
How to Draw an Anime Boy (12 Steps With Proportions)
This step by step tutorial explains how to draw an anime boy’s face. It shows how to structure the head and how to place the facial features using proportions common to anime and manga.
The boy show in this tutorial is intended to look about 8-12 years old. However, when it comes to anime and manga characters can often appear younger than their actual age. For this reason the provided template can also work for drawing someone a little older.
You can see a preview of the main stages of the tutorial in the image above but there are additional examples provided below.
If you are going to be using pencil and paper be sure to make light lines as you will need to erase parts of the drawing in some of the steps.
Above is a line by line video of drawing the boy’s face. Its recommended that you watch it and then read the steps below for further instructions.
If you find these types of guides helpful please be sure to give the video a like! Your likes are VERY important as they help the videos reach more people! Also subscribe to the AnimeOutline channel to be notified when new content is uploaded.
For drawing the face of a high school aged or young adult character see:
How to Draw Anime and Manga Male Head and Face
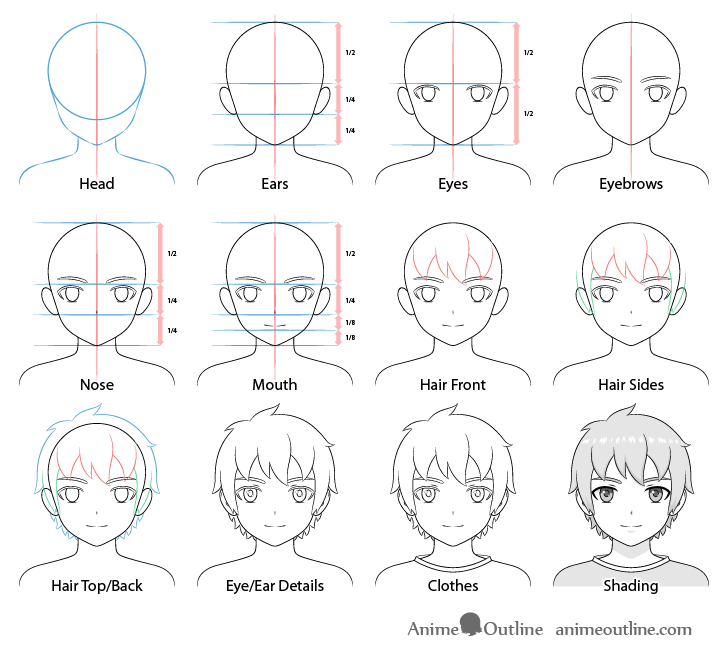
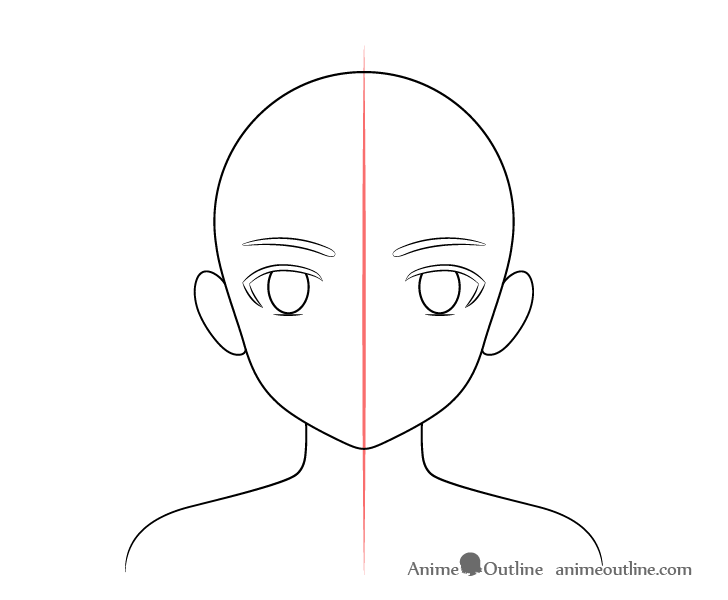
Step 1 – Outline the Boy’s Head, Neck & Shoulders
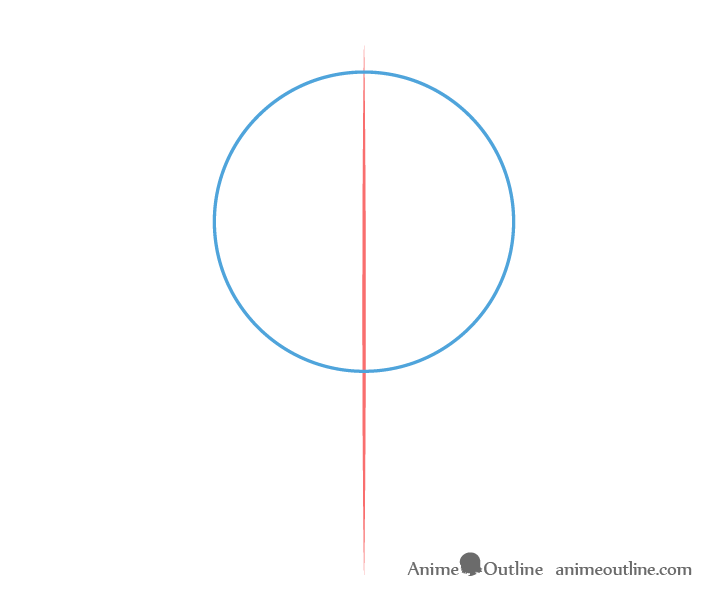
Begin by making a straight vertical line through the middle of your page or drawing area. This will be used as a guide to help insure that things don’t get skewed to one side. The center line can also make it easier to see of both halves of the drawing are relatively even in width.
At the upper part of this line draw a circle to represent the upper part of the head. Be sure to also leave some room above that for the hair.
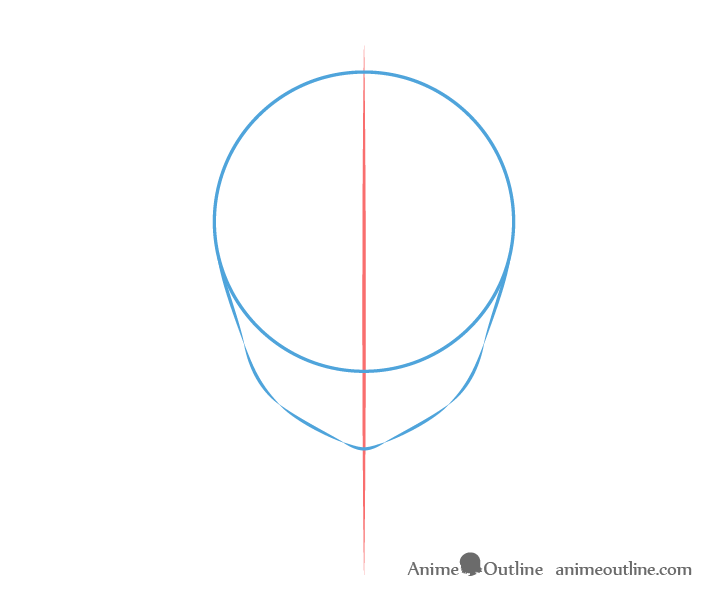
Going down from the circle add the lower part of the face. Since this is a young boy’s head you will want this section to be fairly short for a rounder looking face, longer faces generally make characters look older.
You can see the general shape of this part of the head defined by the broken up line segments. First there are two fairly straight sections that are angled slightly towards the middle of the head. These are then followed by a pair of curves and another pair of fairly straight lines that are angled even more towards the center of the head. These are then joined by another curve.
You can either draw one side of the face at a time or draw the segments in the order listed above (whatever you find easier).
For drawing different kinds of anime heads see:
How to Draw Different Styles of Anime Heads & Faces
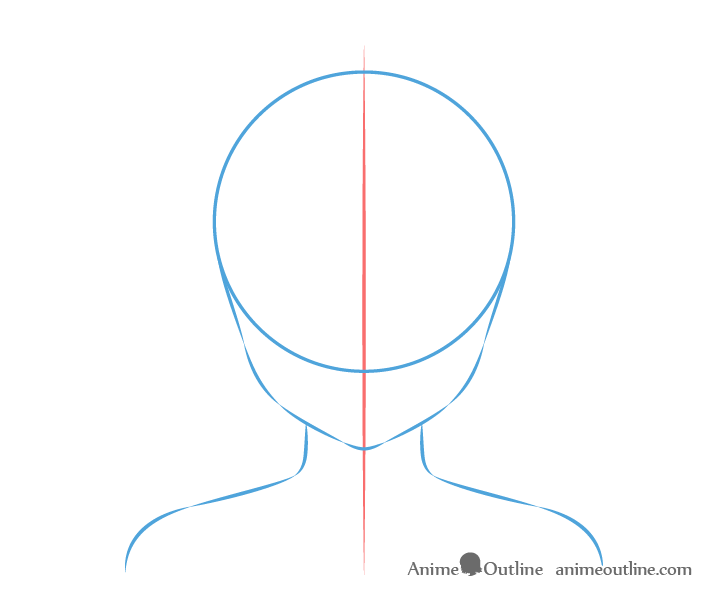
Going down from the bottom of the head add the neck followed by the shoulders. You can once again see their shapes defined by the broken up line segments.
Draw each side of the neck angled curve slightly away form the center of the face with curves near the bottom. The neck should then transition into the shoulder muscles (fairly straight lines) followed by the cures of the shoulders.
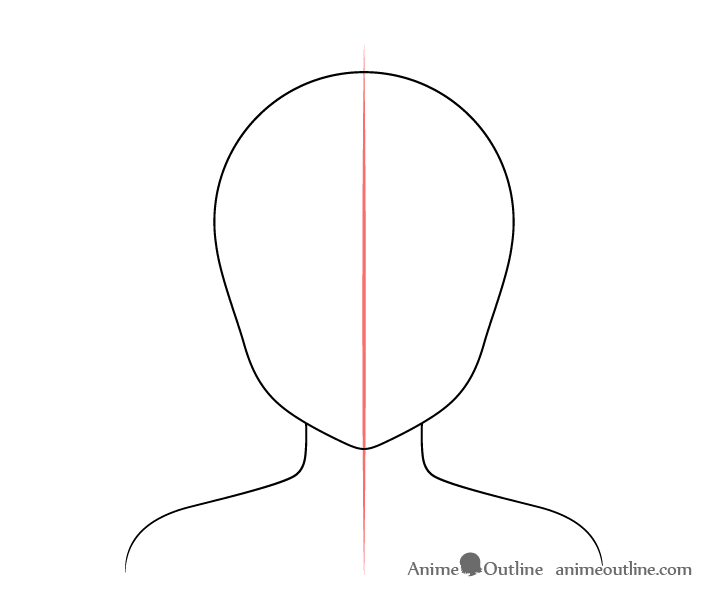
You can erase the lower part of the circle draw at the start once done adding these so that your drawing looks something like the above.
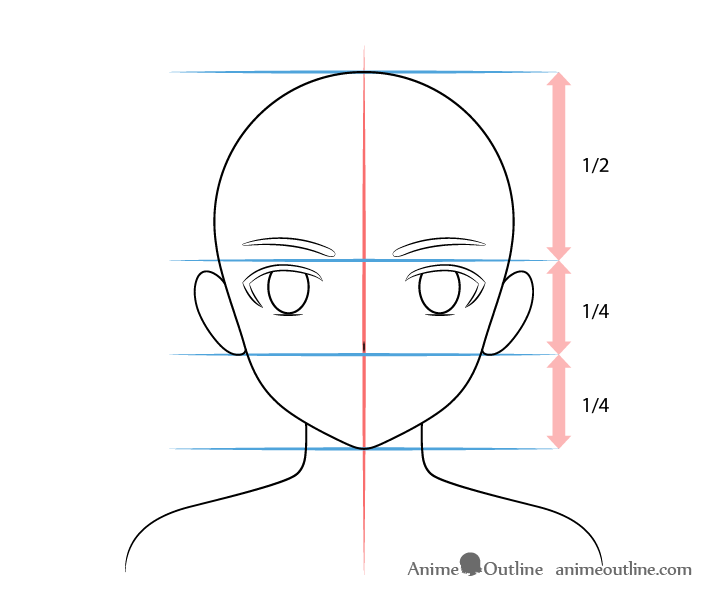
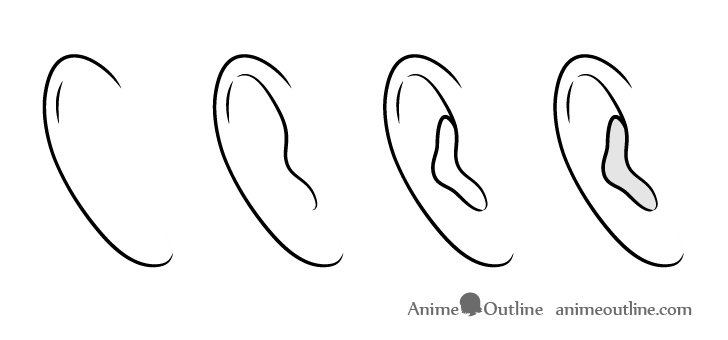
Step 2 – Draw the Ears
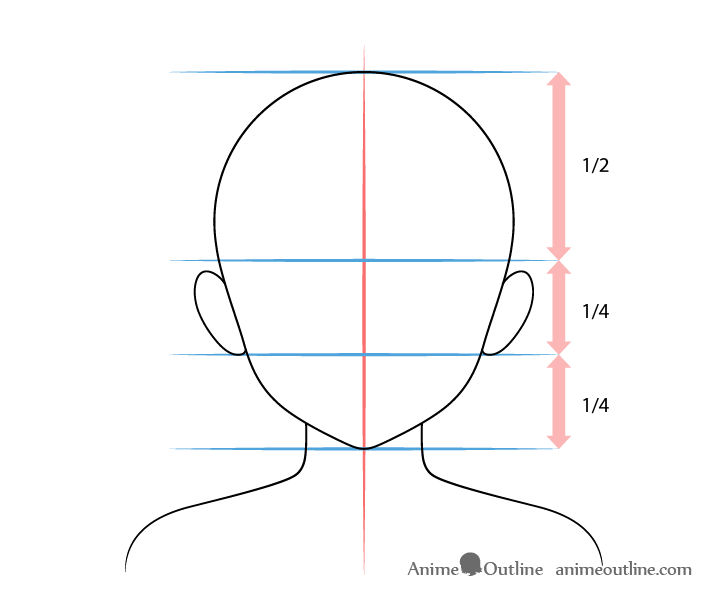
To place the ears on the head you will generally want to do it in a way where their upper ends are below it’s horizontal halfway point. The lower ends can be between the halfway point and the bottom of the chin.
Please note that real ears are usually farther up on the head but since this is an anime boy the proportions can be different.
For more on drawing anime ears see:
How to Draw Anime and Manga Ears
At this stage you will simply want to have an outline of each ear. Leave their inner details for later.
Step 3 – Draw the Eyes
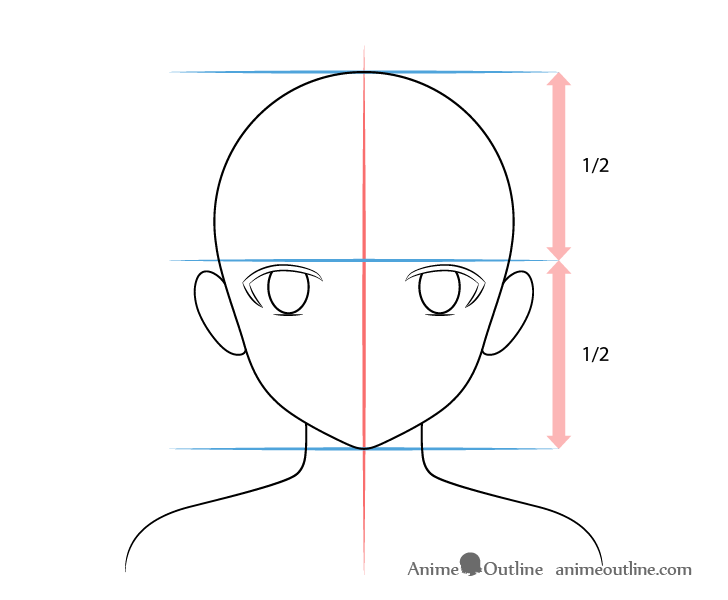
Anime characters (especially kids) generally have their eyes much lower down on the head than real people. To position the boy’s eyes you can once again use the horizontal halfway point of the head and place them just a tiny bit below it.
Since this is a boy draw the eyes bigger in relation to the head than you would for an older male character. This will create a younger appearance.
Similar to the ears, at this stage of the drawing only outline the main shapes of the eyes (eyelashes and irises).
Space the eyes roughly far enough apart so that you can fit a third one in between them (as shown above).
For more on drawing eyes see:
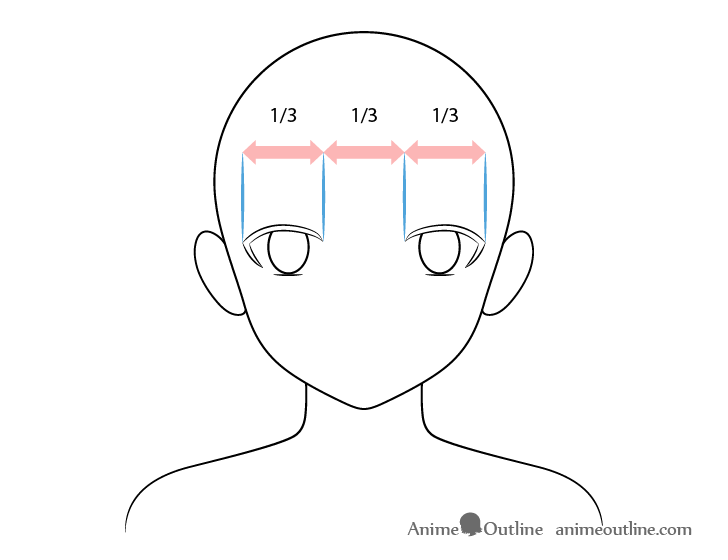
Step 4 – Draw the Eyebrows
A little distance above the eyes draw the eyebrows. In this case they will be fairly thick (slightly more so towards their inner ends).
Step 5 – Draw the Nose
Draw the nose as a tiny vertical dash with its bottom close to the bottom of the ears (halfway between the horizontal middle of the head and the bottom of the chin).
For more on drawing anime noses see:
How to Draw Anime and Manga Noses
Step 6 – Draw the Mouth
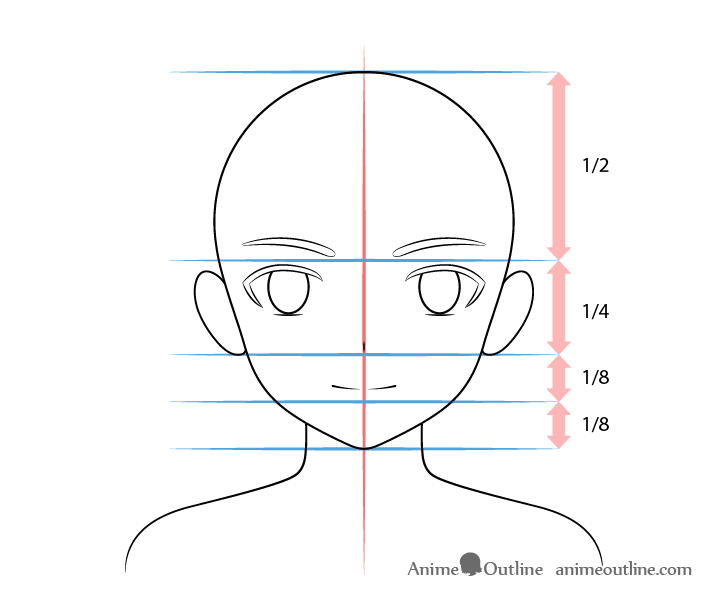
In this case the boy will have a light smile. To show this draw the mouth as a curve and give it a tiny break in the middle.
Position the mouth just a little bit above the halfway point between the bottom of the ears and the bottom of the chin. The halfway point itself is actually the position of the bottom lip which in this case is not drawing (as is common in anime and manga).
Once you add the mouth you can erase the center guide line as well as any other guide lines you chose to draw.
For more on anime mouths see:
Step 7 – Draw the Hair Along the Forehead
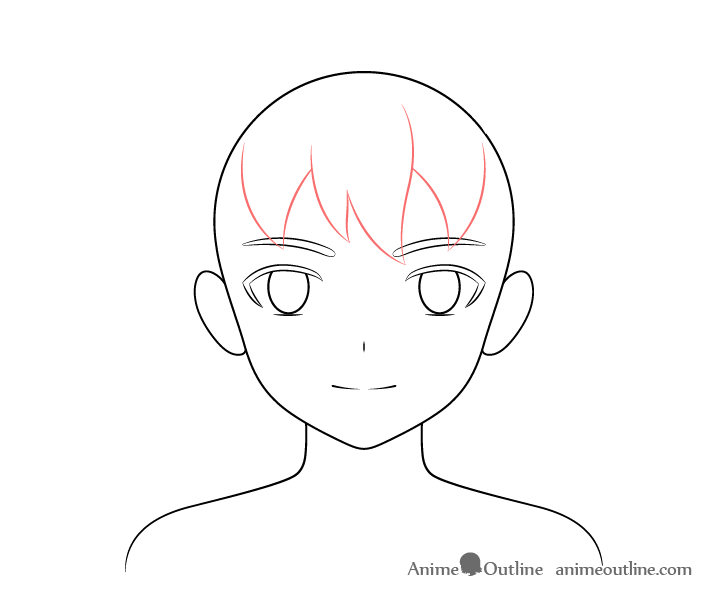
The hairstyle will be slightly messy to help reinforce the character (boys tend to run around and play a lot). To make it simpler to draw the hair it will be split into tree parts. For more on this approach you can see the following tutorial:
How to Draw Anime Male Hair Step by Step
Begin by drawing the hair along the forehead shown in red in the example above. Draw this in fairly large curvy clumps (as is typical of anime and manga hair).
Step 8 – Draw the Hair Along the Sides
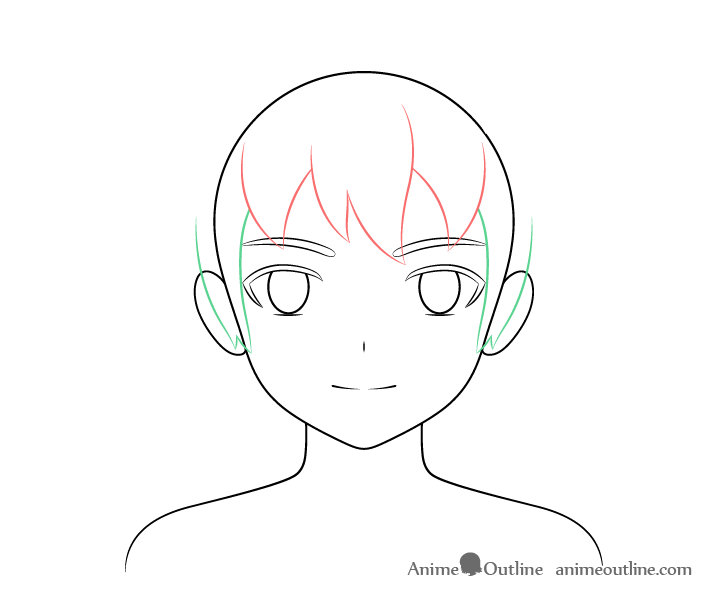
Add the hair on the sides of the face (shown in green). These sections should “hug” the face, curving around it. Draw them right over top of the outline of the ears and head.
Step 9 – Draw the Hair on Top & in the Back
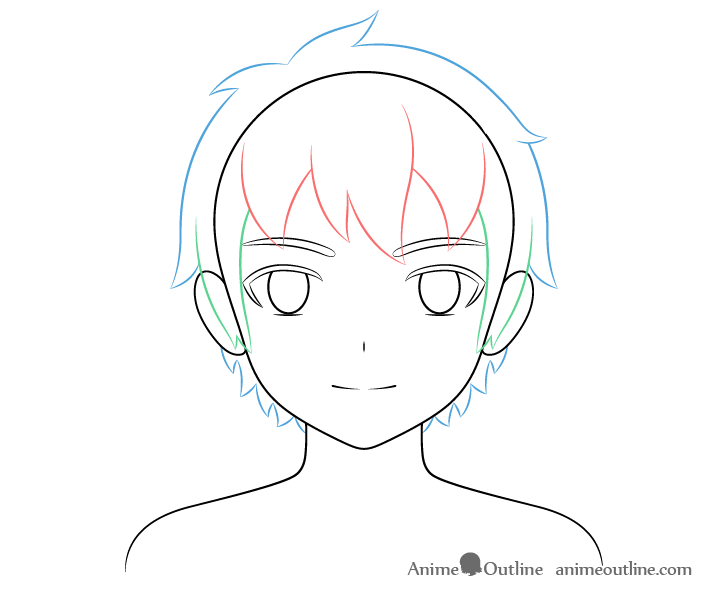
Finally add the hair at the top and bottom/back of the head. Draw the top part curving around the shape of the head some distance away with a few random medium sized clumps tick out of it.
Draw the bottom/background part as a series of smaller clumps curving in random directions.
Once you finish drawing out the different hair sections you can erase the parts of the head covered by them.
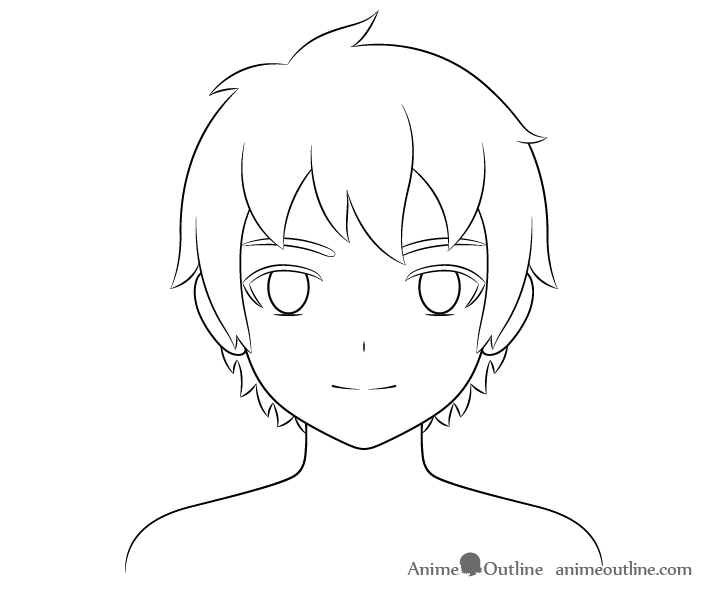
Step 10 – Draw the Eye/Ear Details

Once all of the major parts of the head are outlined you can add the smaller details.

Start with the inner parts of the eyes. Add the pupils, reflections and a hint of the eyelids. Draw these as shown in the example above up to the fourth example. You can refer back to the last two once you get to the shading part of the tutorial.
Most of the details of the ear will be covered by the hair but you can see what they look like in the example above (again, leave the last one for when you do shading).
Step 11 – Draw the Clothes
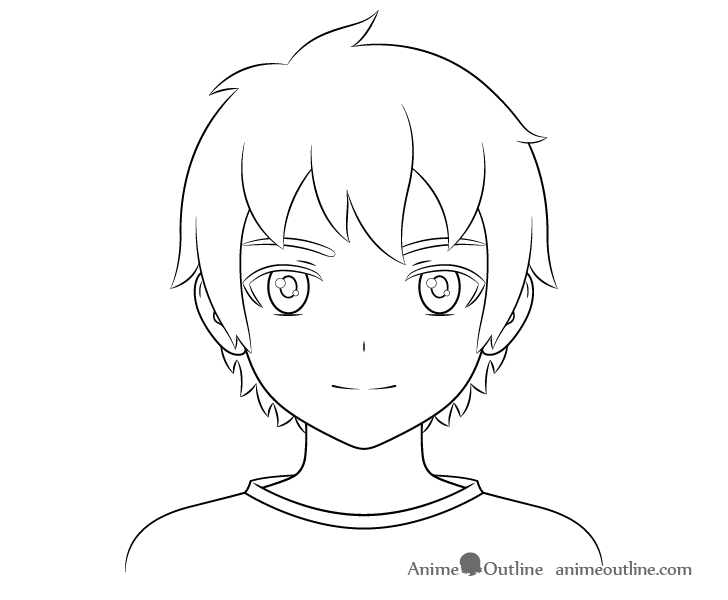
To finish the line drawing first add a little bit clothing. In this case the boy will be wearing a t-shirt. You can show this by outlining it’s neckline as shown above.
Once done with the shirt you can darken the drawing by tracing over it (if you feel the lines are too light).
Step 12 – Add Shading to Finish the Drawing of the Boy
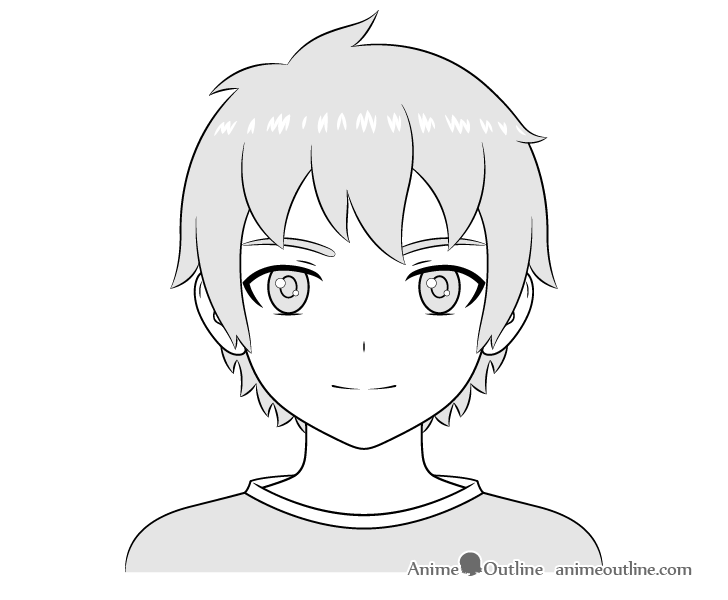
This tutorial will use a technique called “Cel Shading” (standard in anime and cartoons). In short it means that there are no gradients (smooth transitions) but a hard line between the light and dark areas.
For the initial stage of the shading process simply darken the hair, eyes, eyebrows and shirt. Leave a streak of white spots in the hair for the highlights (light reflecting from it). You can either outline these beforehand or simply create them as you shade. If drawing digitally you can add them over top of the shading or you can do so on paper using a white correction pen. Leave the highlights in the eyes white as well along with the collar of the shirt.
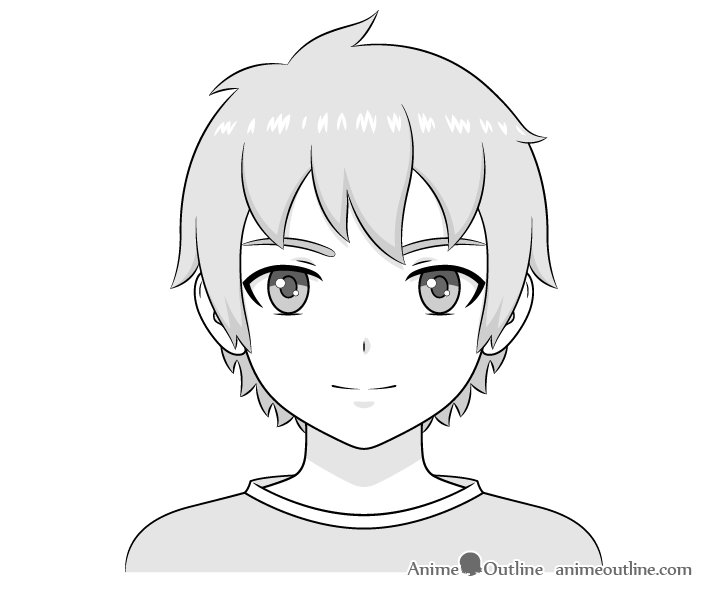
After you have the initial layer of shading further darken the pupils and the upper parts of the irises.
With the above done you can begin adding the actual shadows. For this particular drawing the lighting setup will be as though the boy is either outside during the day or in a well lit room. In both of these cases the light will tend to come from above and the shadows will generally be cast downwards. Place them as follows:
- Along the bottom edges of the hair clump (along the foreheads and sides)
- Below the hair clumps along the forehead
- Around the eyelids (tiny)
- Below the eyelashes
- The inner parts of the ears (barely visible)
- To one side of the nose
- Below the bottom lip (not actually drawn)
- The bottom background section of the head (fully shade this)
- The upper part of the neck (below the head)
With the shadow done you’ve come to the end of this tutorial.
For drawing a boy’s body you can see:
How to Draw an Anime Boy Full Body Step by Step
Conclusion
This tutorial shows how to create a drawing of a young boy as well as how to achieve an anime or manga look. This is achieved by analyzing both the style as well as the proportions of children’s faces and picking characteristics that are common to both.
If you like these types of tutorials with easy to follow examples and detailed explanations you can also try some of the following:
For more on drawing faces of male anime characters see:
For drawing a female anime style faces see:
- How to Draw an Anime Face (Structure & Proportions)
- How to Draw an Anime Girl’s Head and Face
- How to Draw a Cute Anime Girl Step by Step
- 8 Step Anime Woman’s Head & Face Drawing Tutorial
This tutorial was updated with new art. You can find the older artwork below.


