
How to Draw a Thumbs Up (6 Easy Steps)
This tutorial shows how to draw a hand giving a thumbs up. It consists of a total of six steps with illustrated examples for each.

You can see a preview of the included steps in the image above. The tutorial has a slight focus on the anime/manga look but you can also use the same method for drawing a “thumbs up” in a more traditional styles.
As you will need to do some erasing in between the different steps it’s recommended that you start the tutorial in pencil and make light lines. You can darken them later on.
Step 1 – Make an Outline Drawing of the Hand & Thumb
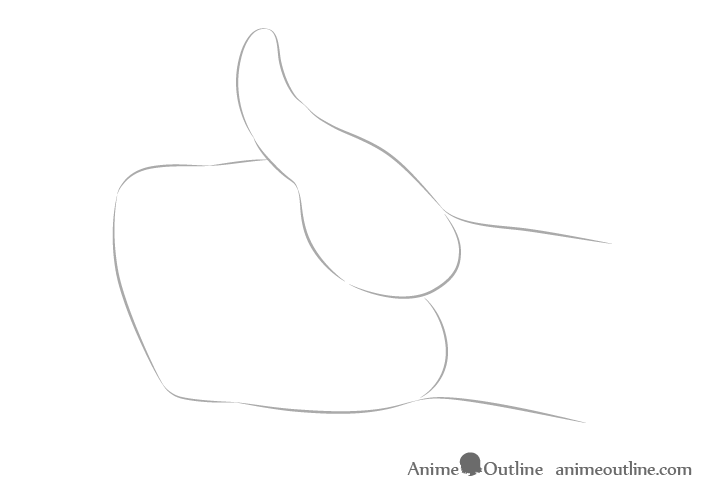
Begin with an overall outline of the the hand. It’s shape should have a forward tilt where the entire thing appears to be leaning towards the index finger.
At this stage you want a drawing that is like a simplified silhouette with a minimal amount of detail. You can add the smaller details after you feel you have the correct overall shapes and proportions of the major parts of the hand.
Step 2 – Draw the Combined Shape of the Fingers
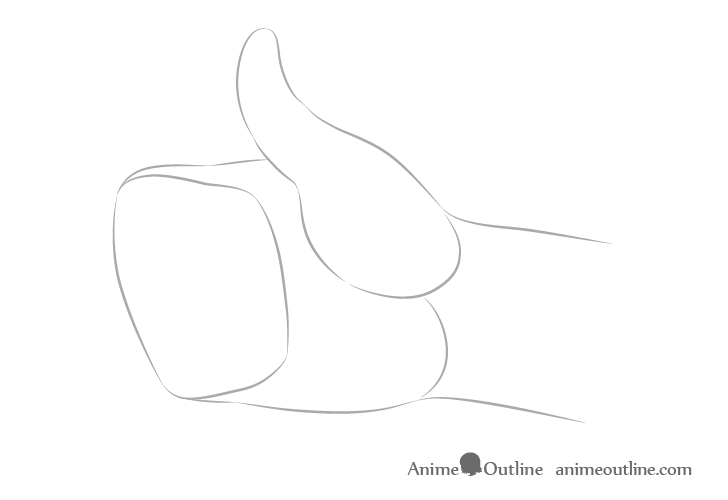
Draw the combined shape of the fingers. This should look a bit like the hand is wearing a tight mitten. Make this outline wider as it moves away from the thumb and narrower towards it as the fingers will be more squeezed together near the palm.
Step 3 – Draw the Individual Fingers
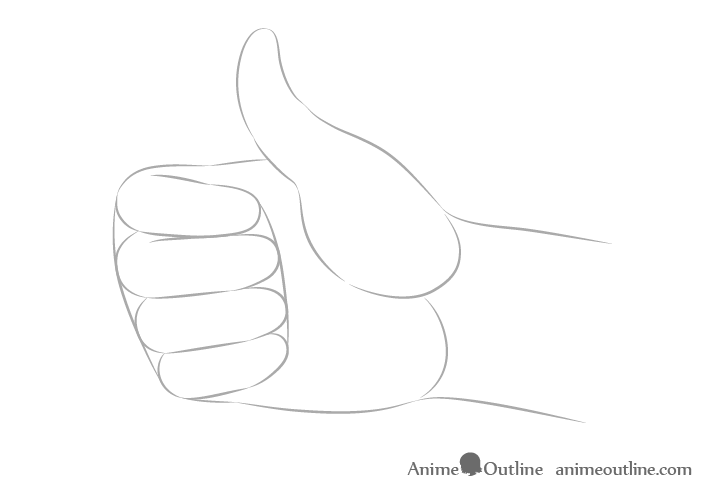
Inside the previous shape you can outline the individual fingers. In this pose they will be somewhat squeezed so you can make them a bit wider than if the hand was open. Make the middle finger the largest and the little finger the smallest. Make index and ringer fingers close in size to one another.
Please note that in your drawing they may not fit as perfectly into the previous shape as in the example and that is absolutely fine. You can erase and make adjustments as needed.
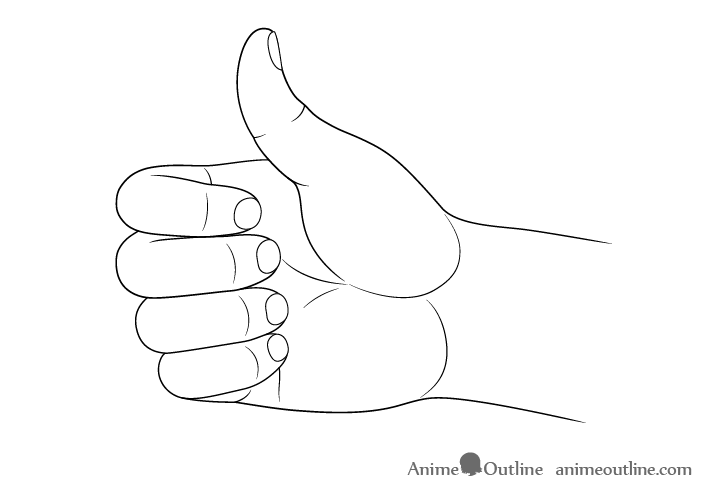
Step 4 – Clean Up the Drawing
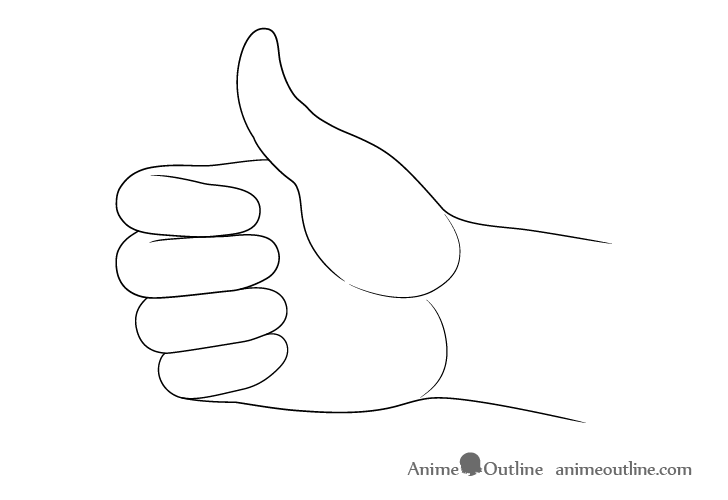
Once you have the individual fingers outlined clean up the drawing so that you have something similar to the above example.
Step 5 – Draw the Small Details
Add the smaller details that are the various wrinkles and folds in the skin. Usually these will be around the areas where the hand bends. Draw some curved lines around the finger/thumb joints to help better emphasize them. As this is an anime/manga style hand you can have fewer of these than you would for a more realistic drawing.
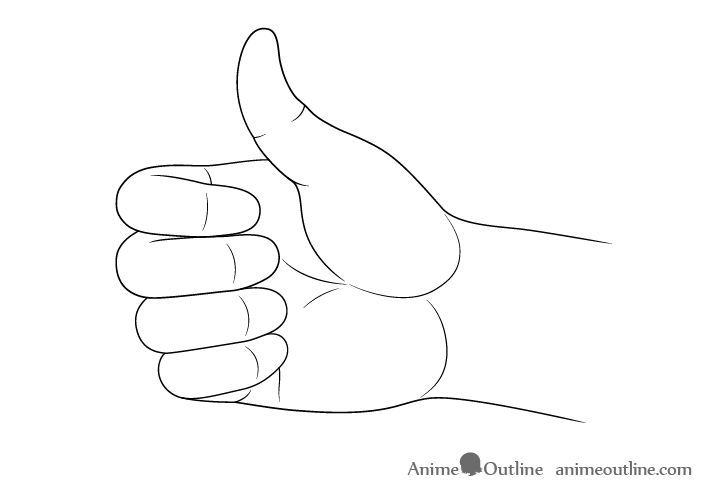
Step 6 – Draw the Fingernails
Anime and manga hands are often drawn without the fingernails, especially when they are shown from far away. However close up drawing such as this one do tend to show them.
When adding the fingernails keep in mind that they are drawn on an angle so make them shorter than you would appear otherwise. As the nail on the index finger is being viewed on slightly less of an angle make it a bit longer in relation to the rest.
Conclusion
A thumbs up is not a particularly difficult hand pose to draw. As for drawing most things you want to start with the larger and most important shapes first and then add the smaller details.
For more on drawing hands see the following tutorials:
- How to Draw Anime & Manga Hands Step by Step
- 6 Ways to Draw Anime Hands Holding Something
- How to Draw Hands Holding Chopsticks Step by Step
")


