How to Draw an Anime School Girl in 6 Steps
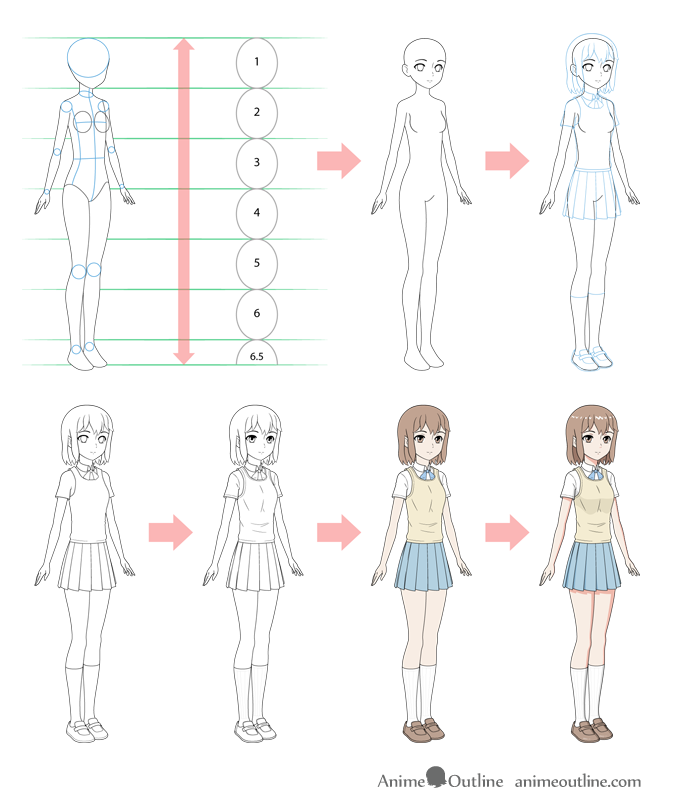
This detailed step by step tutorial explains how to draw a girl in the anime style wearing a school or college uniform in three quarter view. It covers everything going from the basic structure of the body to a colored and shaded detailed drawing.
Step 1 – Structure the Body
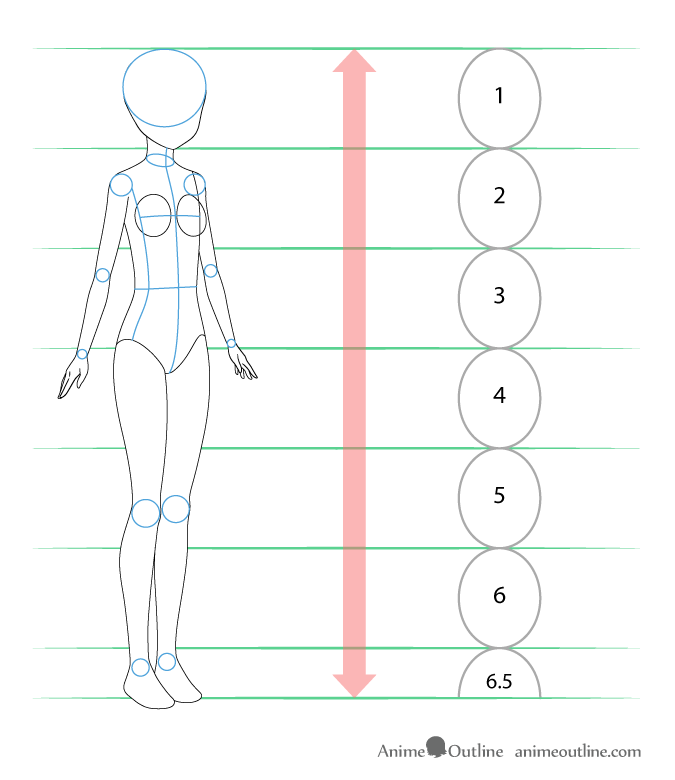
The most important step in drawing the body is to first get the correct proportions.
When drawing anime the proportions can be slightly different than for real bodies but similar principals still apply.
A good way to measure the body is by using the head. A normal body with the head included can be about as tall as 7-8 heads. In anime the heads tend to be drawn bigger than in reality so for this tutorial we will use 6.5 heads.
Start the initial proportions sketch by drawing the head and working your way down to the rest of the body.
A common way to indicate the joints is to draw circles. You don’t necessarily need to do this but it can be helpful.
The distance form the body to the bottom of the legs is about the same as the height of the head and the body combined.
The arms are slightly longer than the body (keep in mind that the arms in this example are being held up slightly).
Also be aware that the far side of the body (especially the arm) will be smaller than the parts closer to the viewer due to perspective.
For more information on perspective you can see:
Perspective Drawing Tutorial for Beginners and How it Relates to Anime
Understanding the Guidelines
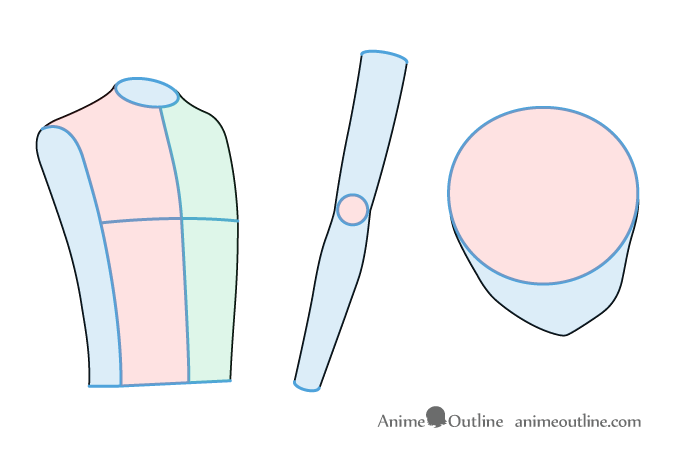
The blue lines in the above example are the guidelines intended to help you draw.
As already mentioned the circles help indicate joints and also act as dividers to help space out the various parts of the body.
The oval draw into the head helps draw the shape of the top of the head. The reason you want to draw the whole oval is that it makes it a lot easier to see if you’ve made a mistake. If you only draw half you may find that it does not look right when you draw the second half.
The lines on the body help define it’s 3d shape. The middle line is used to help with the perspective as in three quarter view the farther away side will be a little narrower then the closer side The other line helps determine where the front of the body ends and the side begins. Basically you want to draw the initial shape of the body as a sort of block with sharp corners.
Step 2 – Draw the Facial Features
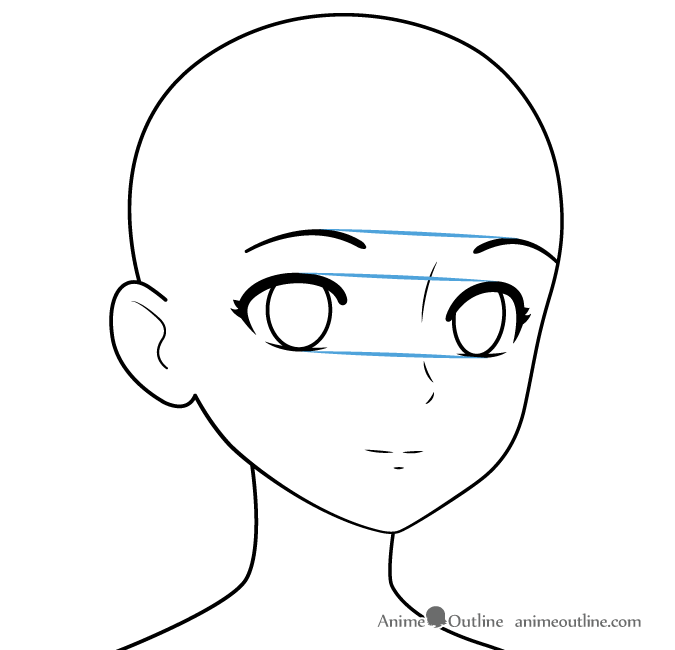
There are already plenty of facial feature drawing tutorials on the site so we will not go into the details of drawing faces in the anime style.
You can see the following tutorials for drawing facial features in the anime style:
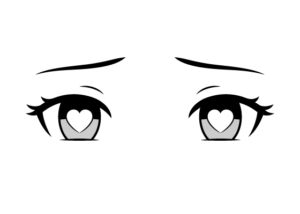
How to Draw Anime Eyes and Eye Expressions
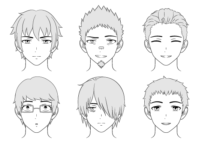
How to Draw Different Styles of Anime Heads & Faces
How to Draw Anime and Manga Noses
How to Draw Anime and Manga Mouth Expressions
Some things you should be aware of is that since the face in this tutorial is drawn in 3/4 view due to perspective the features on the far side of the face will be drawn very slightly smaller and slightly lower down. You can ignore this small size variation unless you are drawing a very large close-up of the face.
As the far side of the face curves away form the viewer the far eyebrow and eye will also appear to be horizontally “squished” compared to the side that is closer to the viewer.
Step 3 – Draw the Hair
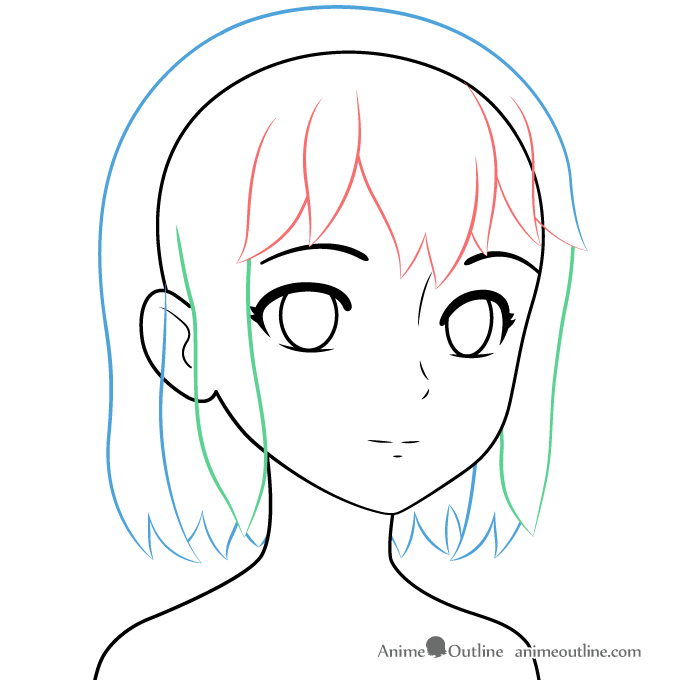
For this particular hairstyle draw the hair following the outline of the top of the head and lightly curving in different directions as it hangs down.
Generally when drawing anime hair you will want to draw it in sort of clumps. Try and vary these in size and direction they point in for a more natural look.
It can also be very helpful to think of hair as split into the front, sides, and back portions especially for this or similar styles.
For more on drawing anime hair you can see:
How to Draw Anime & Manga Male & Female Hair
Step 4 – Draw the Clothes
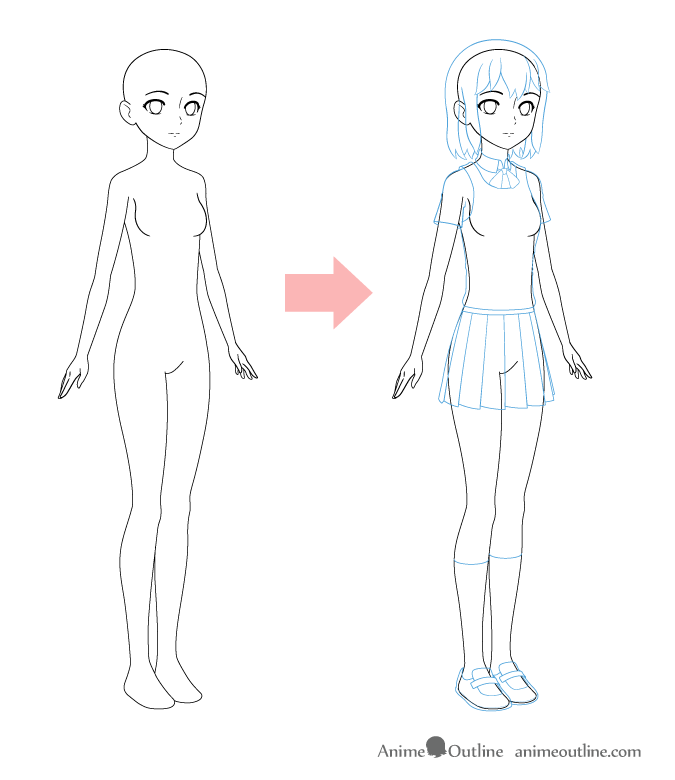
Drawing the clothes is in a way a little similar to drawing the hair. As they will somewhat follow the outline of the body.
Drawing the Shirt, Sweater Vest & Ribbon
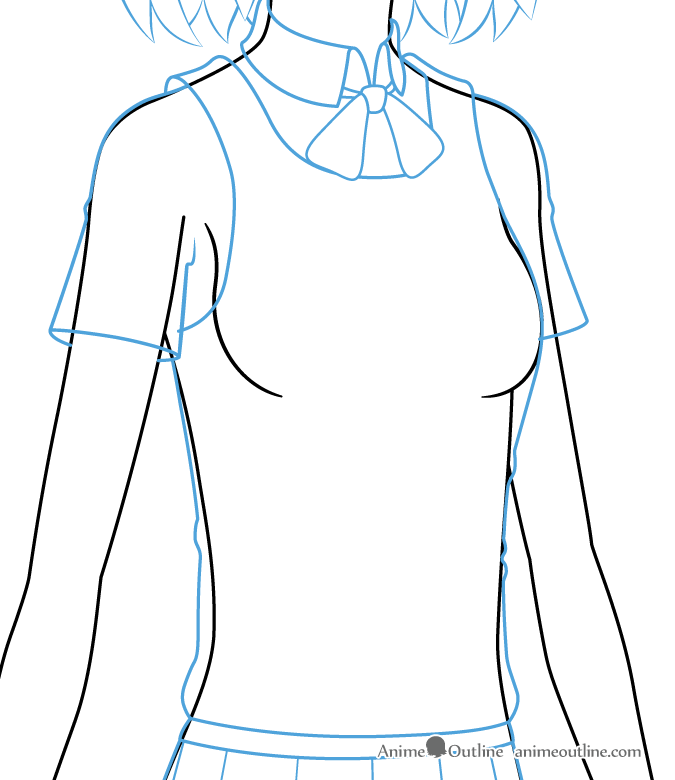
For this particular shirt draw the sleeves fairly loose and draw the collar hugging the neck as it will be held closer to the neck by the ribbon.
Draw the sweater vest hugging the body fairly closely at the top and a little farther towards the bottom where it will sag.
When drawing the ribbon once again be aware that the far side will be smaller due to perspective.
Drawing the Skirt
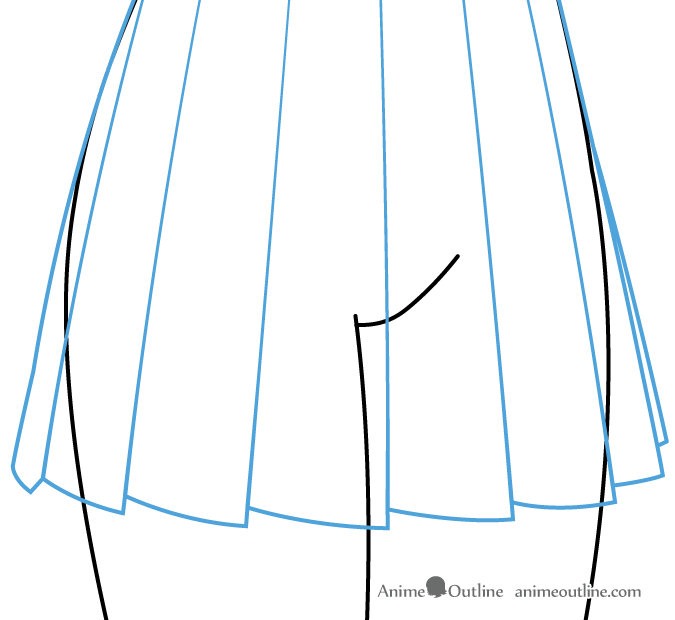
The school uniform skirts in anime often have sharp folds in them that curve around the body. Overall the skirt is sort of a cone like shape with the top cut off.
For more on drawing anime and manga skirts see:
How to Draw Anime Skirts Step by Step
Drawing the Shoes and Socks
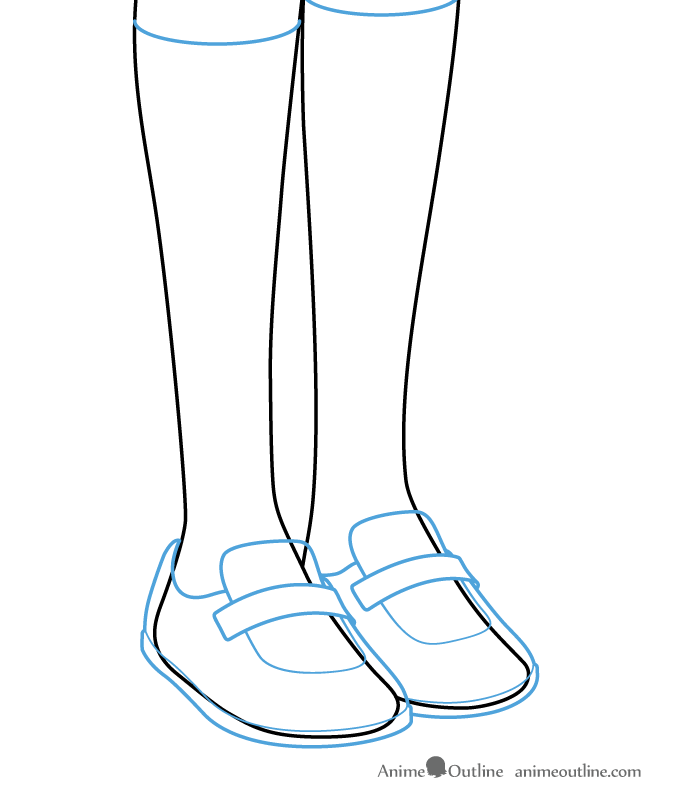
For tight long socks they will basically exactly hug the shape of the legs. Keep in mind that the top part of the socks will be curved as the legs have a cylinder like shape that is below the eye level (again you can see the perspective tutorial mentioned earlier if you need further explanation).
The shoes will roughly trace the form of the feet.
For a tutorial on drawing shoes see:
How to Draw Anime Shoes Step by Step
For more on drawing clothes see:
How to Draw Anime & Manga Clothes
Step 5 – Draw the Smaller Details
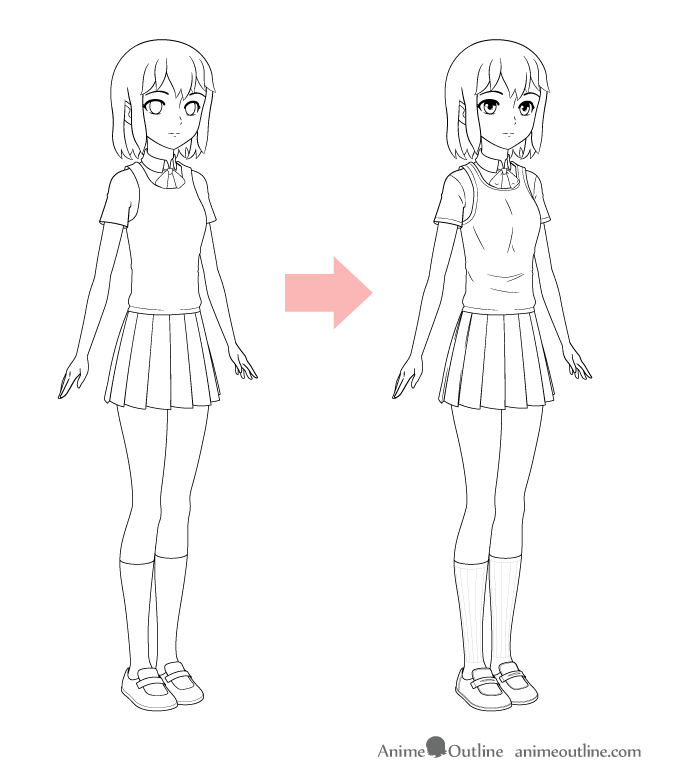
Draw the smaller details of the face and the clothes. When this step is done you should a finished outline drawing of an anime girl wearing a school uniform.
Drawing the Clothes Folds
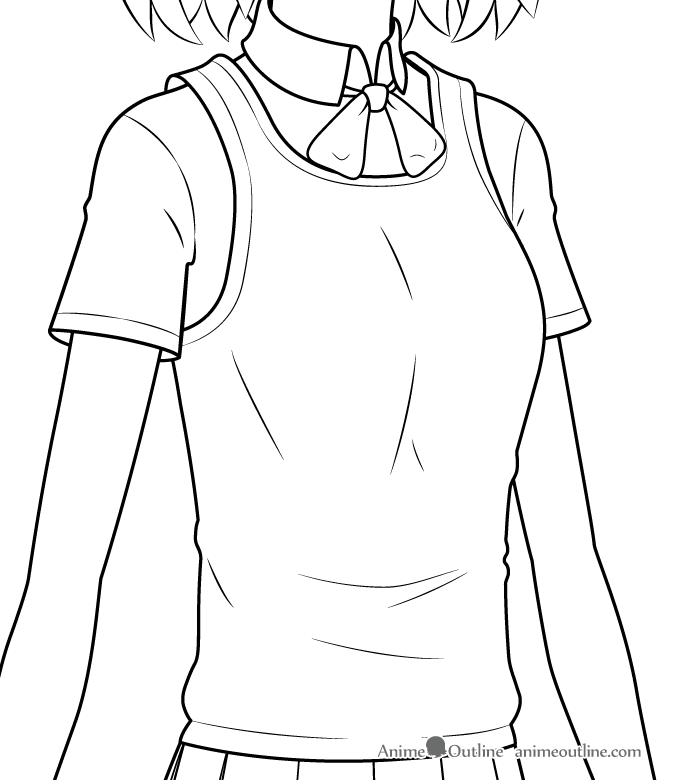
Draw some folds in the clothes. Most of these will be closer to the bottom where the clothes start to sag as well as ares like the armpits where there is some pressure being applied to the fabric.
Draw the Skirt Fold Edges
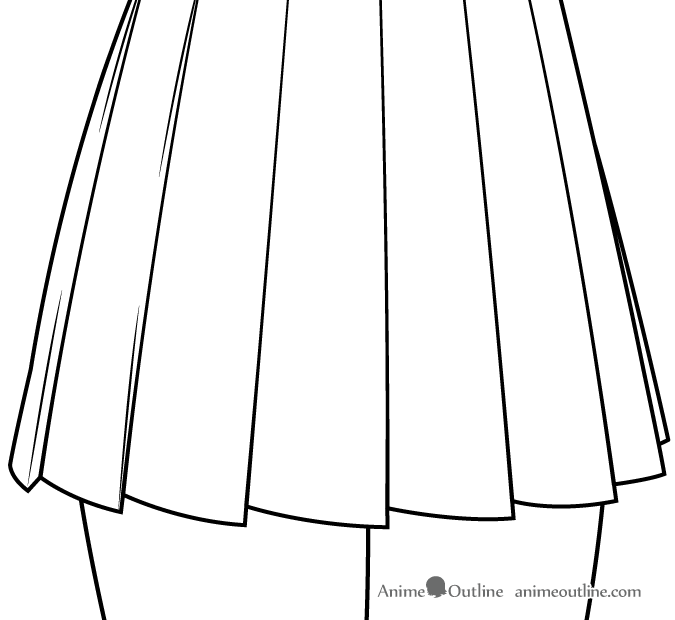
Draw some lines to give a hint of the edges of the skirt. These will only really be visible on the left side of the drawing as eventually the folds will twist towards the right so that the other side of the fold will not be visible.
Draw the Sock & Shoe Details
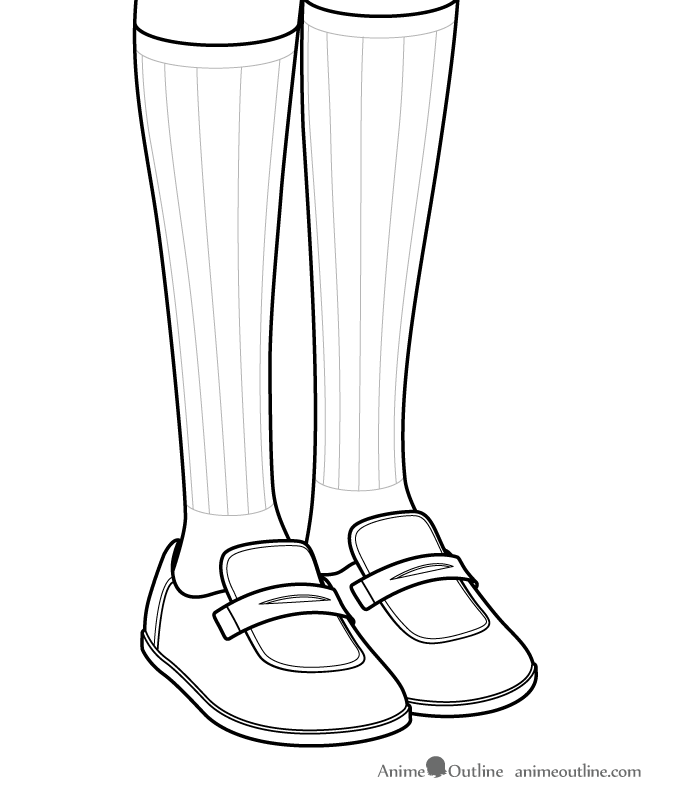
For the socks draw some lines going along the shape of the leg to indicate the patter of the socks. Draw these very lightly. Keep in mind that the legs are round so the distance between these lines should be greater towards the middle area of the leg that faces the viewer and less with each stripe after that as they curve more and more along the leg.
For the shoes you can simply add the smaller details of their design to make them look more interesting.
Step 6 – Color & Shade the Drawing
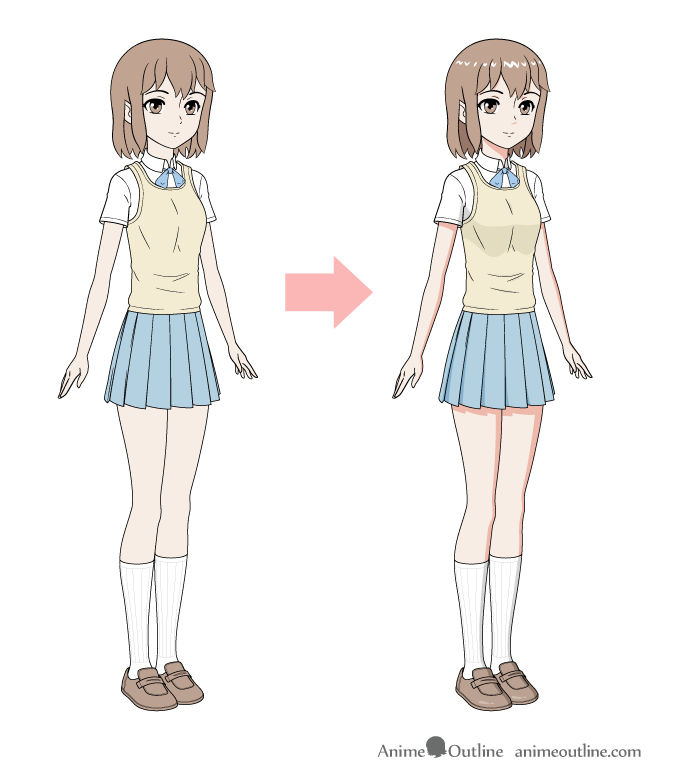
The first step of coloring an anime character is not complicated, simply shade in each area with the appropriate color.
The style of shading used for anime is known as “Cel Shading”. Cel shading means shading a drawing in a way where there are no gradients.
In order to make the shading more believable we will first consider our light source. In this case it will be on the top left of the drawing. This means that the shadows will be on the bottom right.
The major shadows will be on the neck, below the chest and below the skirt as well as on the right side of every part of the body.
Shading & Coloring the Face & Hair
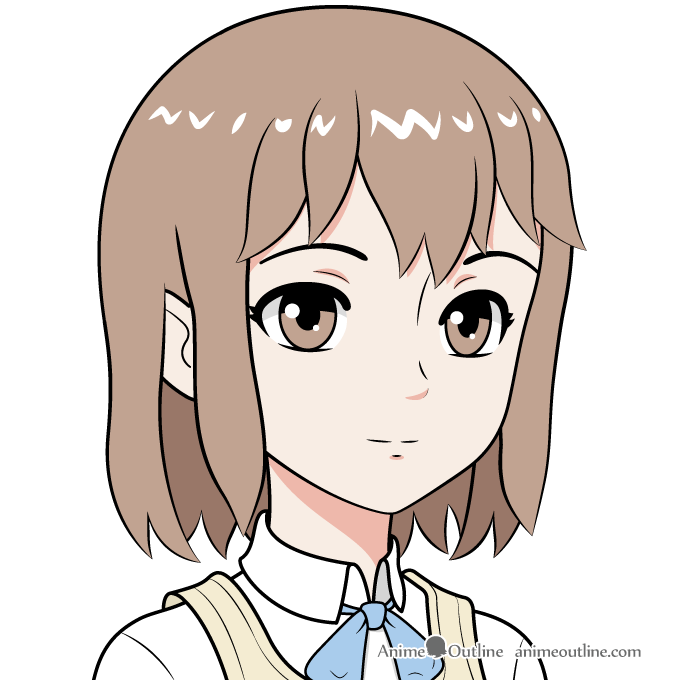
On the face the main shadows will be cast by the hair, nose and bottom lip. There will also be some shadow on the eyelids. The head will cast a large shadow on the neck as well.
For the hair the shaded area will be the inner back part of the hair. You can also add some highlights in the hair to give it a more shiny look.
Shading & Coloring the Torso Area
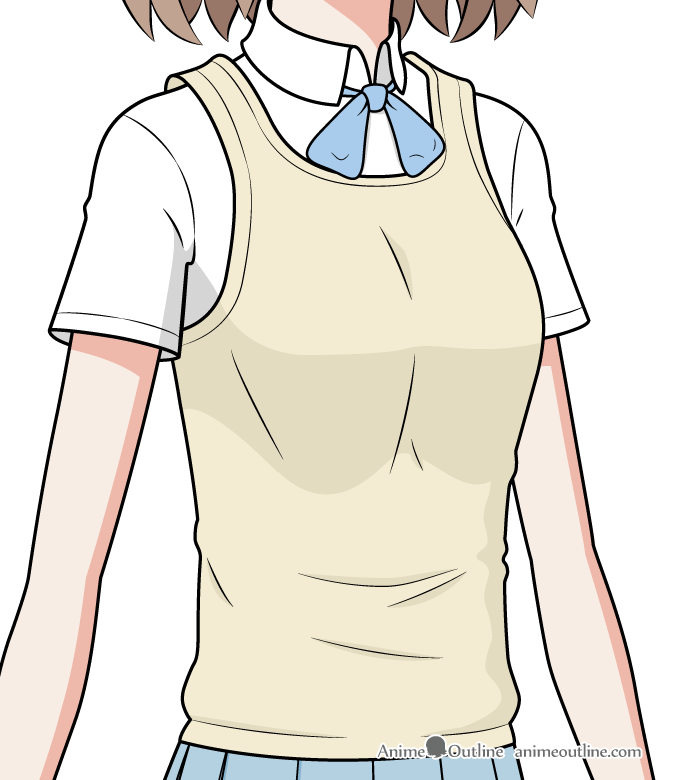
For the torso area as already mentioned the major shadow will be below the chest. There will also be smaller shadow around the folds as well as a shadow on the bottom right of the vest as it is facing away from the light source.
Shading & Coloring the Skirt
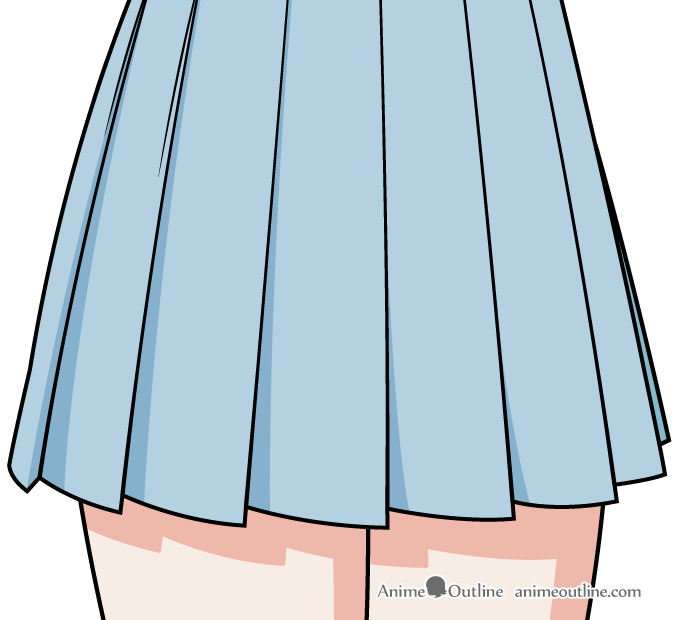
For the skirt the shadows will be inside the fold areas. However once the folds turn more towards the right side of the drawing the shadows will become less visible.
The skirt will also cast a shadow on the legs.
Shading & Coloring the Shoes & Socks
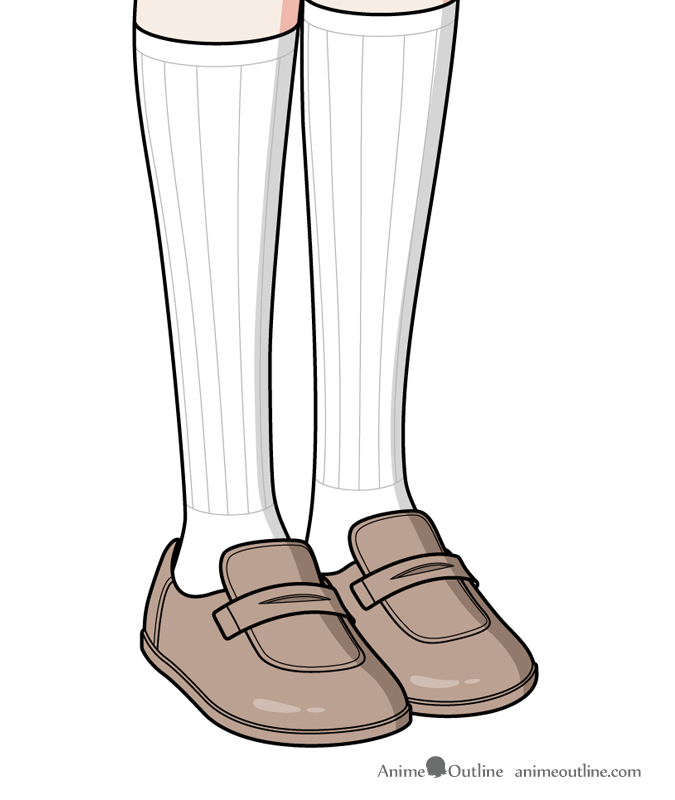
The socks and shoes will really only have shadows along the right side same as the body. You will want to add some reflections in the shoes though to give them a shiny appears. Don’t make the highlights too bright though or the shoes can look like they are made of glass.
Conclusion
There is a lot covered in this tutorial and may be a little bit difficult to take in. If it seems overwhelming don’t be alarmed. You can simply practice drawing different parts of the tutorial separately to make it a little easier.
If you like this tutorial please share it with your friends.
For more similar tutorials see:

