
How to Draw a Gun in 15 Steps (Handgun)
How to draw a handgun in an easy to follow step by step manner is what is shown in this tutorial. The weapon’s various parts are added step by step with illustrated examples.

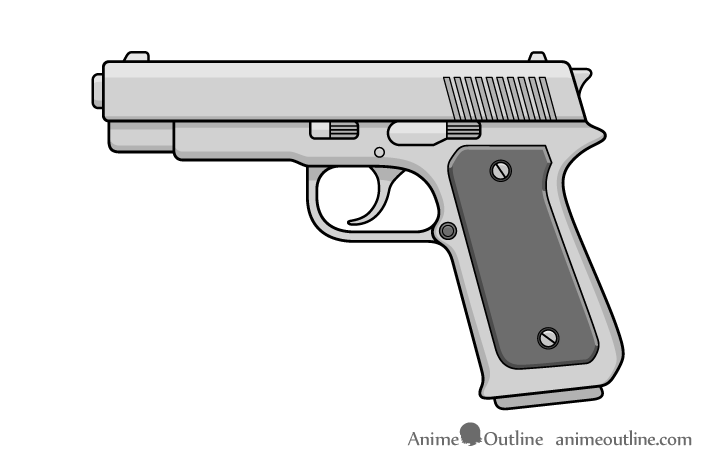
The gun is drawn in a style similar to those that can be found in anime, manga or comic books. It’s parts have black outlines and the shading is done using a technique called “flat shading” (also known as cel shading in 3d graphics). At the same time, the gun still maintains a fairly realistic appearance due to it being given a design, parts and features common to such weapons.
By mixing realistic and stylized elements you can speed up the drawing process and create cool and distinct looking artwork that stands out from more traditional styles.
Although the drawing shown as the example is quite detailed, the guide is broken up in a way where the gun’s various parts are added one or a few at a time to make it easy to follow along. The last two steps are dedicated to shading.
The full breakdown of the drawing stages for the handgun is as follows:
- Slide
- Muzzle
- Frame
- Grip
- Magazine
- Trigger Guard & Trigger
- Front & Read Sights
- Hammer
- Grip Panel
- Magazine Release
- Takedown Lever
- Slide Lock
- Serrations
- Light Areas & Midtones
- Shadows
A simple way to do the tutorial is just by using a regular pencil and paper. As there are no colors that’s all you need. However, if you have a thin black marker you can use that to trace over your lines after you have the entire gun outlined.
As the drawing consists of many straight lines you can also optionally use a ruler to help you.
Above is a video version of this guide that shows a detailed breakdown of drawing the handgun. It’s highly recommended that you watch that and then read the additional instructions and explanations below.
For more similar drawing videos visit the AnimeOutline YouTube channel.
Step 1 – Draw the Slide
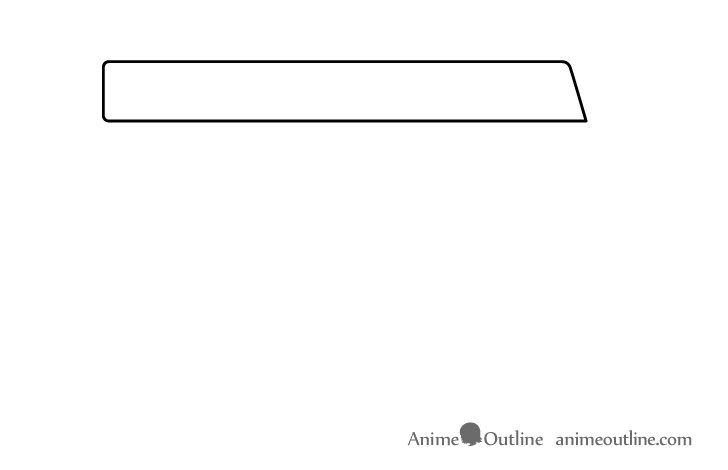
Start the drawing with the the larger parts of the gun and try to generally work top to bottom.
First, draw the slide. Give it a flat front, top and bottom with a sloped back. Also, make it’s front and upper back corners slightly rounded.
Step 2 – Draw the Muzzle
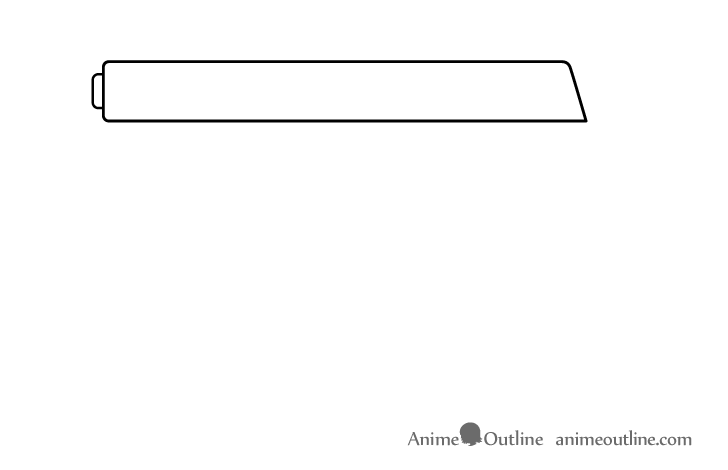
Onto the front of the slide add the muzzle (the part that the bullets come out of when the gun is fired). Make it quite short and significantly thinner than the slide. Similar to the slide, give the front of it’s outline rounded corners.
Step 3 – Draw the Frame
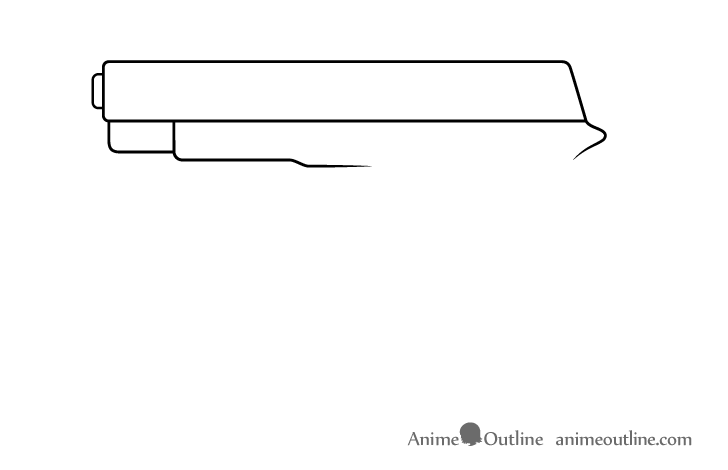
Below the slide, draw the gun’s frame. Start with the smaller bit at the front and follow that up with the area that eventually transitions into the grip. However, don’t draw the grip itself yet, add it in the next step. Instead, draw the “beaver tail” curving out from the bottom of the back of the slide. This should transition into the back of the grip in the next step.
Step 4 – Draw the Grip
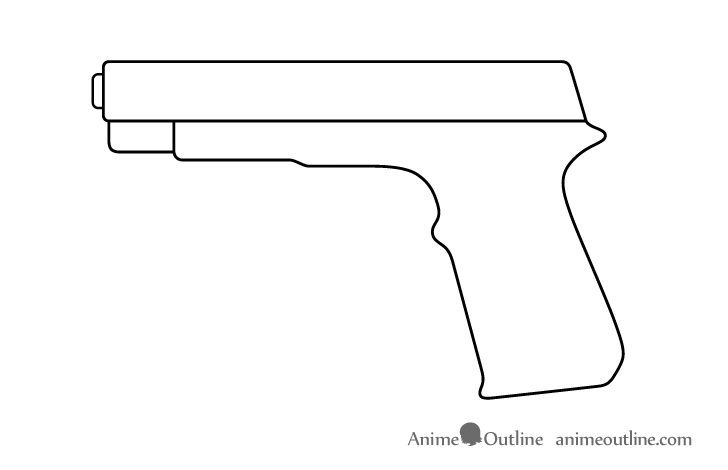
Draw the grip (the gun’s handle) angled backwards running down from the frame. Make it slightly wider as it goes down with a large “bump” near the trigger area (add the trigger itself later) and little “bump” on it’s forward facing side near the very bottom.
Step 5 – Draw the Magazine
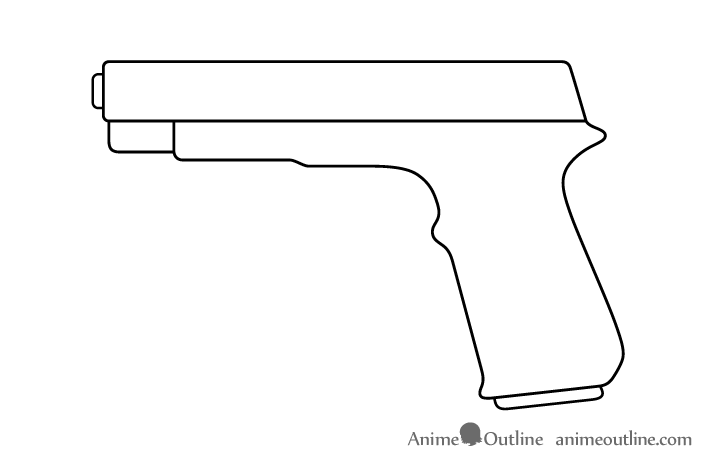
Coming out of the bottom of the grip draw the magazine (the part that holds the gun rounds). Position it so that it’s bottom lines up with that of the grip and give it rounded corners on each side.
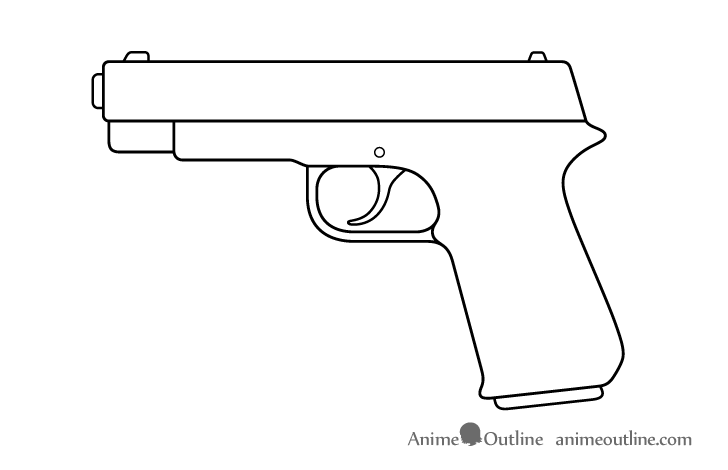
Step 6 – Draw the Trigger Guard & Trigger

In between the bottom of the the frame and the front end of the grip draw the trigger guard and then the trigger itself. Make the trigger guard rounded on it’s bottom forward facing end and also make it curved on it’s inner side around the frame and the “bump” on the grip.
Draw the trigger curving outwards away from the grip as it runs down and make it gradually thinner towards the bottom with a rounded end.
Finally, draw a little round pin above the trigger guard.
Step 7 – Draw the Front & Read Sights
At the top of the slide draw the front and rear sights (used to aim the gun). Make these quite small with the front sight sloped on it’s front end and the rear sight slightly sloped on both ends.
Step 8 – Draw the Hammer
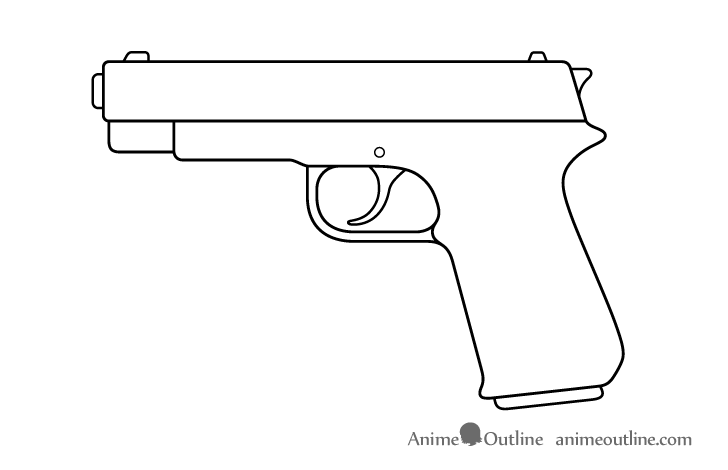
At the back of the slide draw the hammer (hits to ignite the propellant in the rounds to fire the bullets). Give it a flat top with a curve on the end. Draw it’s bottom curving into the back of the slide.
Step 9 – Draw the Grip Panel
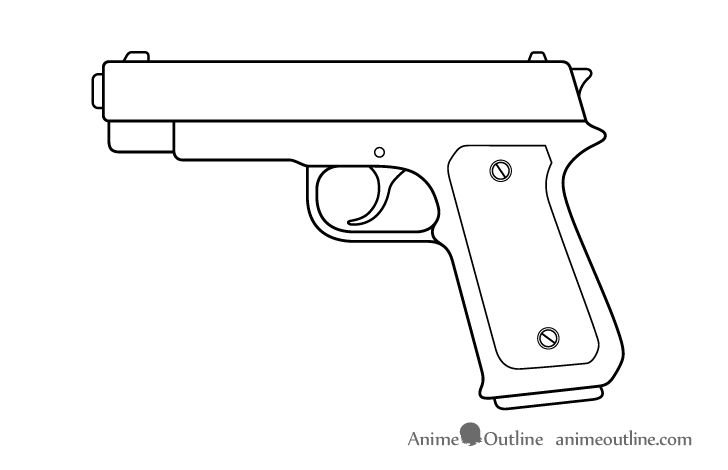
On the side of the grip draw a grip panel with a pair of screws that hold it in place. Make grip panel somewhat similar in shape to the grip itself but smaller.
Step 10 – Draw the Magazine Release

On the larger “bump” along the grip (that the bottom of the trigger guard goes into) draw the magazine release. Give it a circular shape and draw a second smaller circle inside it’s outline to make it look more like a little button.
Step 11 – Draw the Takedown Lever
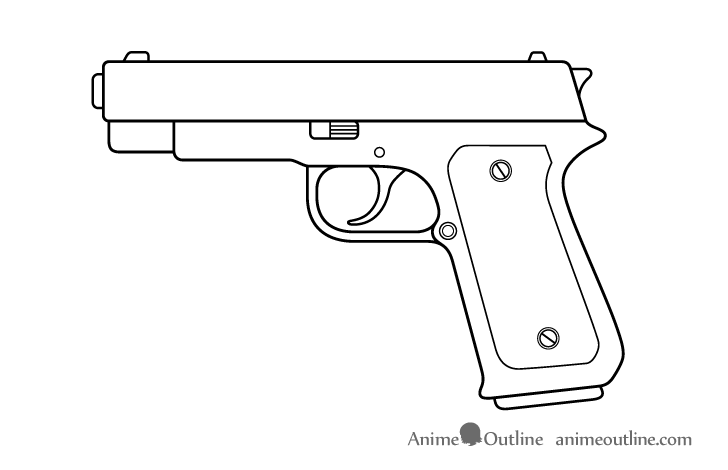
Below the grip (close to the front of the trigger guard) draw the takedown/disassembly leaver. Make it rectangular in shape with rounded corners and draw a series of lines to show serrations along it’s backwards facing area.
Step 12 – Draw the Slide Lock
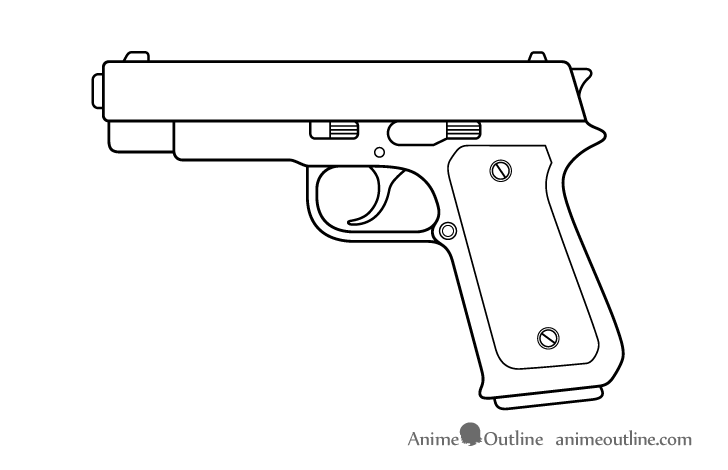
Behind the takedown lever draw the slide lock (used to lock the the slide in place or to release it). Give it a rounded front and a flat top. Sightly past the middle of it’s bottom area give it an upwards slope to create a narrower area at the back. Also, give this part rounded corners and serrations similar to the takedown lever.
Step 13 – Draw the Serrations
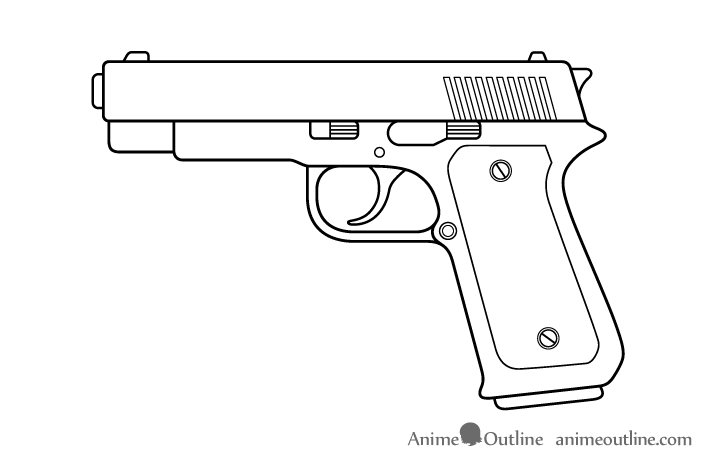
For the last part of the gun draw the serrations along the back of the slide (make the slide easier to grip). You can create these by drawing a series of angled lines. Think of these lines as pairs and leave slightly narrower spaces between each pair when adding them. Join the line pairs at the top to create the indented areas.
For drawing a hand holding a gun see:
6 Ways to Draw Anime Hands Holding Something
Step 14 – Shade the Light & Midtone Areas
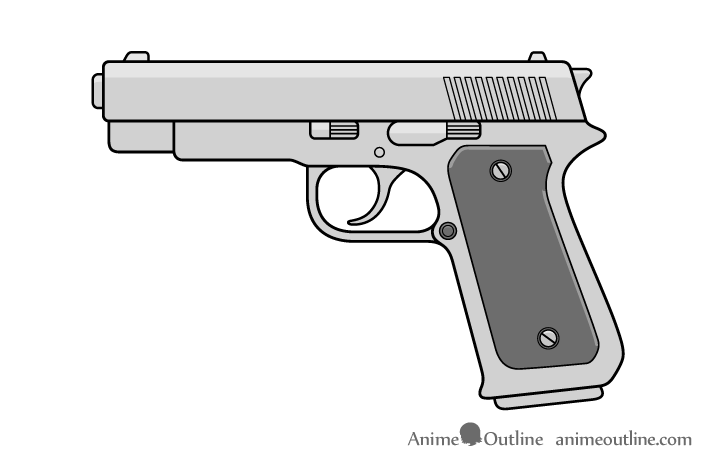
Generally, shadows depend on the position of the light source or sources around the object. In this case the shading is done in a very generic way as though most of the light is coming from about (slightly closer to the front of the gun) but with some coming from it’s viewer facing side as well. This means most of the lighter areas will be on top and the darker areas will be on the bottom and towards the background. However, as this is a somewhat stylized drawing the goal is to create shading that just looks believable, it does not need to be very accurate.
As already mentioned, in this case the shading is done using what is called “flat shading”. This means that there are no gradients but just hard transitions in between the darker and lighter variants of the greys only hard edges. In total there are three variations of grey used for the gun (light medium and dark). Keep in mind that the plate along the grip is naturally darker so all of the greys along it are darker as well, however, it’s still the same three variations.
First, apply the the light and medium greys. Begin by fully shading the entire gun with the light grey. Next, add a layer of the medium grey but leave the following areas a light grey:
- Both sights (no medium grey)
- The top of the slide, muzzle and hammer
- The upper halfs of the takedown lever and slide lock (make the serrated areas a medium grey)
- The upwards facing edges of the grip panel
- The upper edges of the magazine release (both circles), pin and plate screws (these are optional depending on the size of your drawing as they are very thin and can be hard to see)
Alternatively, you can outline the light areas and shade around them with the medium grey and then only shade the lighter parts with the light grey without having to make the entire gun a light grey first. However, applying an entire layer of light shading will tend to make it more consistent throughout.
If you are drawing digitally it can be easier to shade the entire gun the medium grey and add the light grey areas over top similar to how the shadows are done in the next step.
Step 15 – Add the Shadows to Finish the Gun Drawing
For the last step of the tutorial add the shadows (the darkest areas) as follows:
- The entire area of each indent of the serrations along the slide
- The lower part of the muzzle and slide, the upper part of the frame and the serrated areas of the takedown lever and slide lock
- Along the lower part of the frame running all the way down to the bottom of the grip
- On the upper part of the trigger guard and the upper part of the trigger
- Along the back of the grip
- The entire are of the magazine
- Along the bottom facing edges of the grip plate
- Around the screws on the grip panel
Conclusion – A Stylized Gun Drawing Can Look Cool & be Easy to Make
This guide shows how to draw a gun in a style similar to those you can find in anime, manga or comic books. It features a mix of some more realistic elements such as the gun’s overall shape and parts with some more stylized ones such as fairly thick black outlines and flat shading. By working in such a way you can both give your art a more distinct look, speed up the drawing process and yet still keep the object easily recognizable (as is the case with the gun in the example).
If you liked this tutorial also be sure to try the following:
- How to Draw a Samurai Sword Video Tutorial
- How to Draw Kunai Video Tutorial
- How to Draw an Anime Face (Structure & Proportions)

")


