
How to Draw Sushi Step by Step
This tutorial shows how to draw six different kinds of sushi with step by step examples for each type. These include maki, uramaki, nigiri, ebi nigiri, tamago nigiri and ikura nigiri.
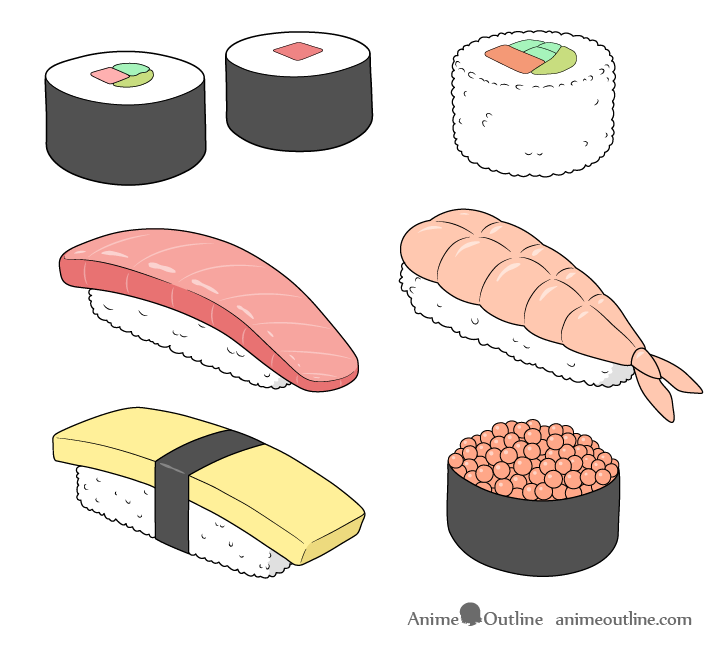
In anime and manga you particularly tend to see this type of food when characters go out for drinks with their friends. As such these usually tend to be older (college age and up).
If you want to draw food that younger characters are likely to have you can check the link at the end of the tutorial.
Above is a video that show how to draw the six sushi examples features in this guide line by line. It also provides some updated art.
If using pencil and paper you will want to keep the parts of the drawings shown in blue particularly light. The reason for this is that you will need to erase some or all of these lines as you progress.
If you liked these kinds of guides please leave a like and subscribe to the AnimeOutline channel. Your likes and subscriptions are very helpful and really appreciated!
1 – How to Draw Maki Sushi Step by Step
These first two example are of a fairly common type of sushi. Maki consists of rice wrapped in seaweeds with various kinds of filling in the middle.
As shown in the example this can be one or several ingredients.
Step 1 – Draw the Outer Shape of the Sushi Roll
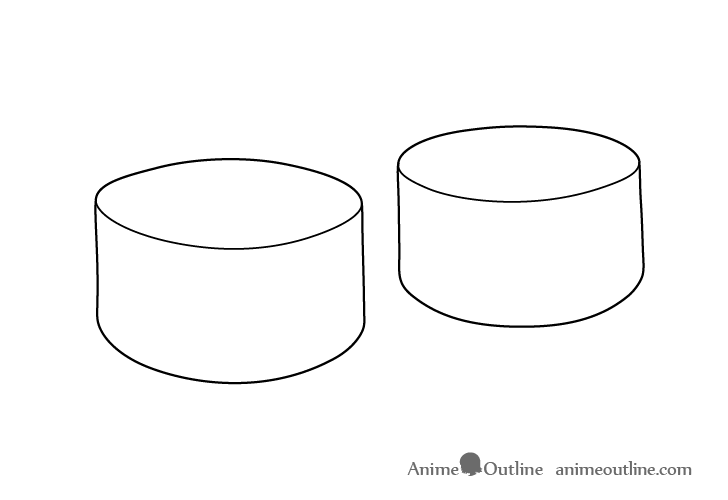
To draw a maki roll begin with it’s outer shape that should look like a short cylinder. It does not need to be perfect but one thing you should make sure of is that the bottom part of each roll is at least slightly rounder than the top. If you draw it flatter the roll will look odd.
For an explanation of this see the example with the cup in the tutorial below:
Perspective Drawing Tutorial for Beginners and How it Relates to Anime
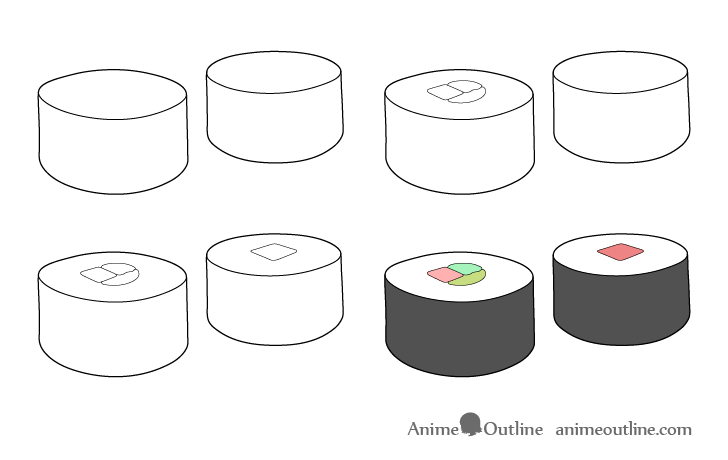
Step 2 – Draw the Filling

Inside the roll draw in the filling.
The first example is of a few combined ingredients. These can be slightly different in shape depending on what they are.
Usually there will be some sort of fish mixed with vegetables (or just vegetables).
Keep in mind that the roll is being viewed on an angle so try and draw the ingredients sort of “flattened” so that they match the angle of the top of the roll.
Step 3 – Add the Other Filling Type
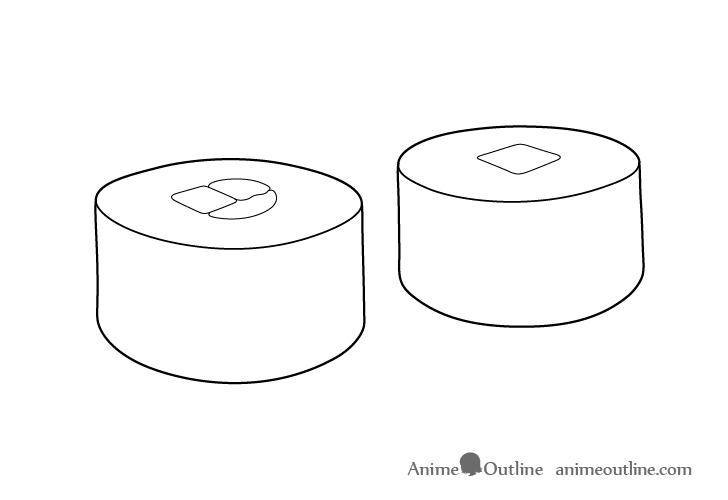
You can also draw the simpler version of the maki with just one ingredients as shown above, again a slice of fish or a vegetable.
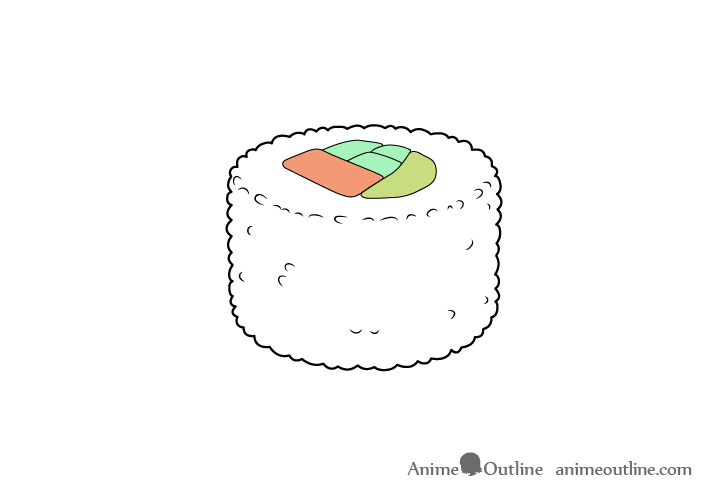
Step 4 – Color the Maki Drawing
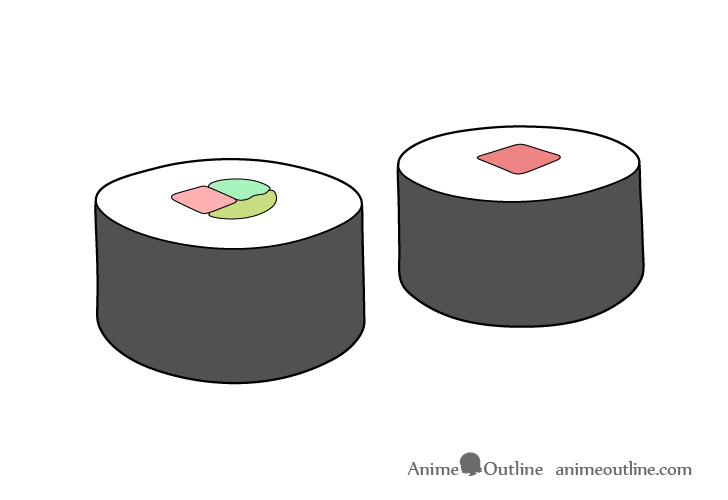
Coloring this example is fairly straight forward. Make the seaweeds a dark grey, leave the rice white and color the other ingredients according to what you want them to be.
For example fish can be an orange/pink and vegetables can be different types of green.
2 – How to Draw Uramaki Sushi Step by Step
The uramaki is similar to the maik but with the rice on the outside of the seaweed. As the seaweed is pretty thing and fairly hard to see in such a roll you can generally avoid showing it all together.
This type of sushi is generally considered more “western” and is not really common anime and manga.
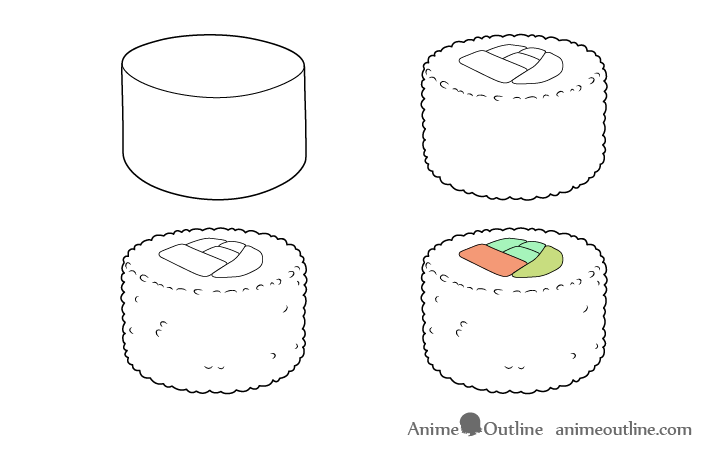
Step 1 – Draw the Base Shape of the Roll
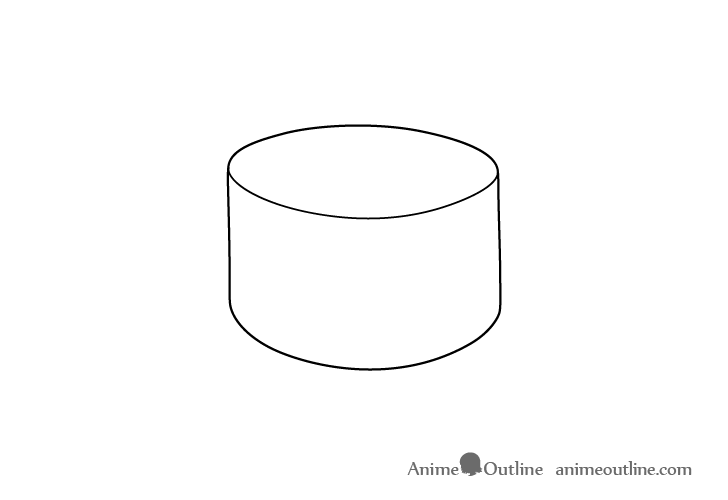
Just as the previous example begin by drawing the outer shape of the roll. If drawing using pencil and paper be sure to do this with very light lines. Unlike in the previous example you will need to erase this entire shape.
Step 2 – Add the Rice Details & Filling

Using the cylinder as a guide draw the outline of the sushi roll with a series of little bumps of random shapes and sizes to create an appearance of rice grains stuck together.
To show the upper forward facing edge of the roll you can create a row of small curves to again make it look like rice grains. Once done, you can erase the guide lines (the cylinder from the first step).
The filling in this example has has more peaces and is overall larger in relation to the roll than the previous one. Otherwise you can draw it pretty much the same way (minding the angle the roll is being viewed at).
Step 3 – Add More Rice Grains
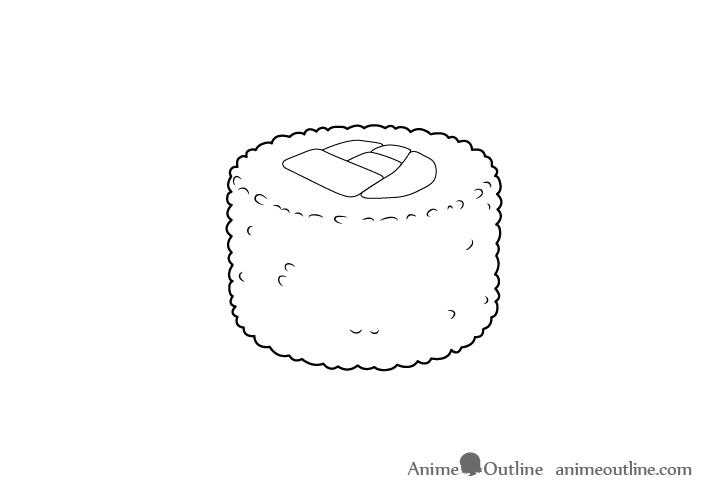
To finish the line drawing you can add a few hints of individual rice grains sticking out here and there along the curvature roll’s curvature. Don’t add any on the top as the rice there will be smoother due to being sliced.
Step 4 – Color the Uramaki Drawing
Finally, you can add some color to the ingredients depending on what you want them to be.
3 – How to Draw Nigiri Sushi Step by Step
This type of sushi is basically a peace of fish on a small bed of rice. It usually loosely rectangular in shape with the fish slice being longer than the rice it’s sitting on.
Step 1 – Draw the Outlines of the Fish & Rice

Begin by drawing the fish slice and then add the rice underneath it. Similar to the uramaki you should first draw the overall shape of the rice without the grains. Again, if using a pencil do this with very light lines.
Step 2 – Add the Details of the Rice

Draw in the bumps of the rice grains along the rice outline from the previous step and erase it once done.
Step 3 – Add More Rice Grains
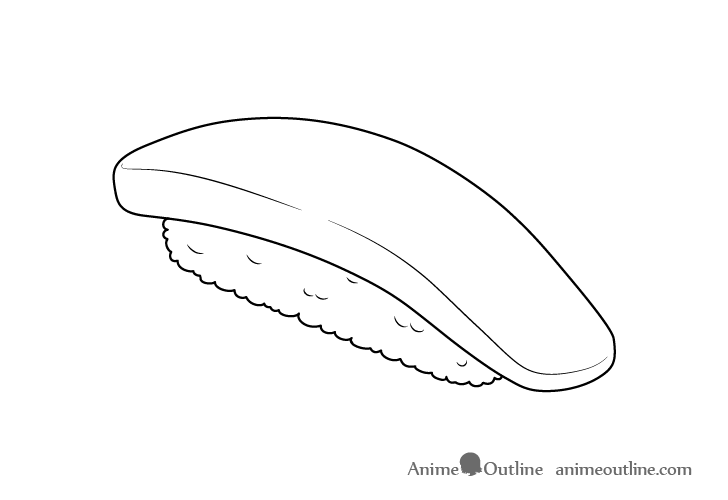
Add in some hint’s of individual grains inside the rice’s main outline as well.
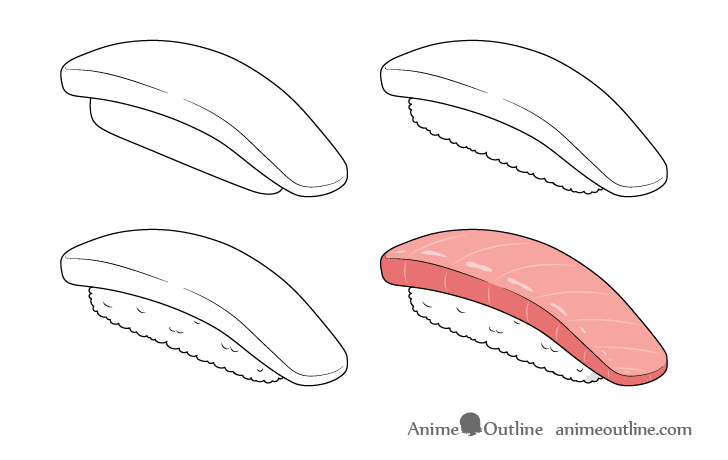
Step 4 – Color the Nigiri Drawing
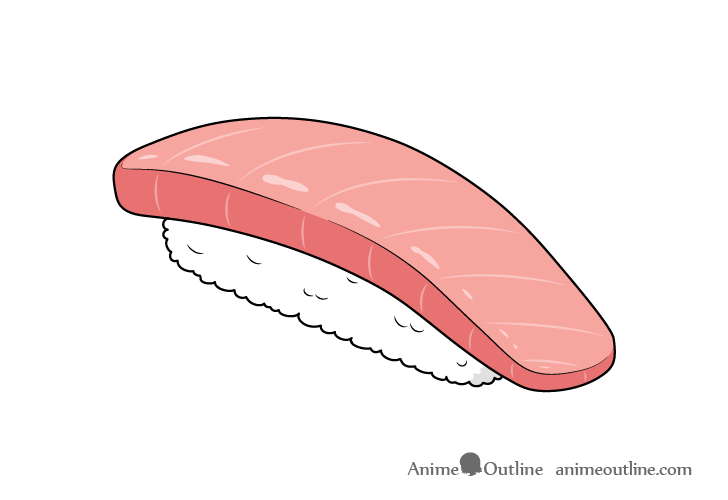
The coloring for this particular type of sushi can be a little tricky. First, to make the fish slice to look more like fish give it some lighter streaks through it’s surface that fish meat tends to have. To show that the fish is moist and also add some small highlight/reflctions as shown in the example. If drawing digitally you can add these in over top of the color. If drawing on paper you can lightly outline the reflections using a regular pencil or a red/orange one (close to the color of the fish) and then color around the outlines.
To make the meat look a little more three dimensional you can also color the side slightly darken than the top. Usually light tends to hit the surface areas of objects more making them lighter.
You can also darken the part of the rice where the fish is hanging off of it as that will cast a bit of a shadow (bottom right).
4 – How to Draw Ebi Nigiri Sushi Step by Step
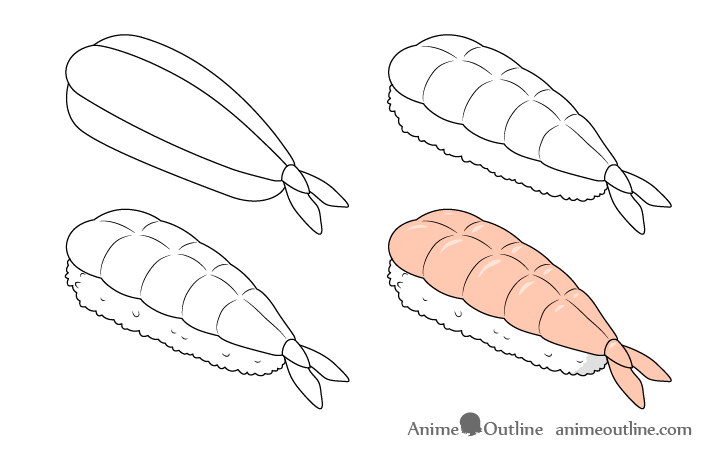
Again similar to the previous example this one has a shrimp tail on top instead of the fish slice. The shrimp tail is sliced through the middle so that it’s sort of split in two (butterflied).
Step 1 – Draw the Outlines of the Shrimp & Rice
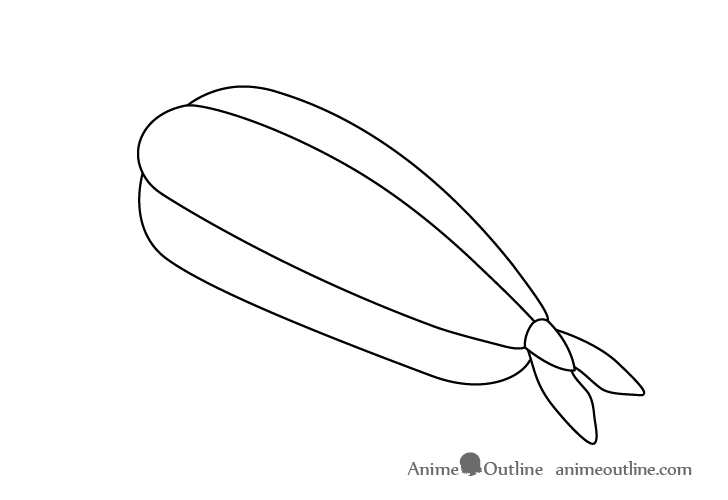
First, draw the upper part of the sushi which in this case will be the simplified shape of the shrimp. Add the outline of the rice underneath it.
Again if drawing in pencil keep your lines light.
Step 2 – Add the Details

Draw the bumps/curves along the shrimp followed by the outline of the rice grains as shown in the example. Erase the outlines from the previous step (where needed) once done.
Step 3 – Add More Rice Grains
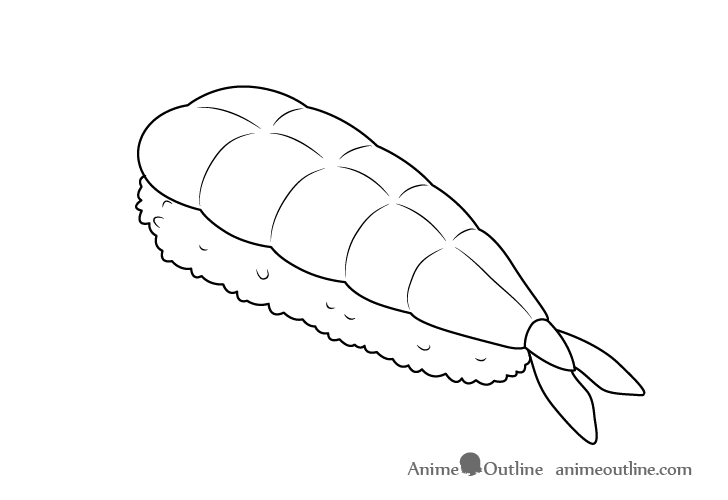
Add a few hint’s of rice grains inside the rice bed to finish the line drawing.
Step 4 – Color the Ebi Nigiri Drawing
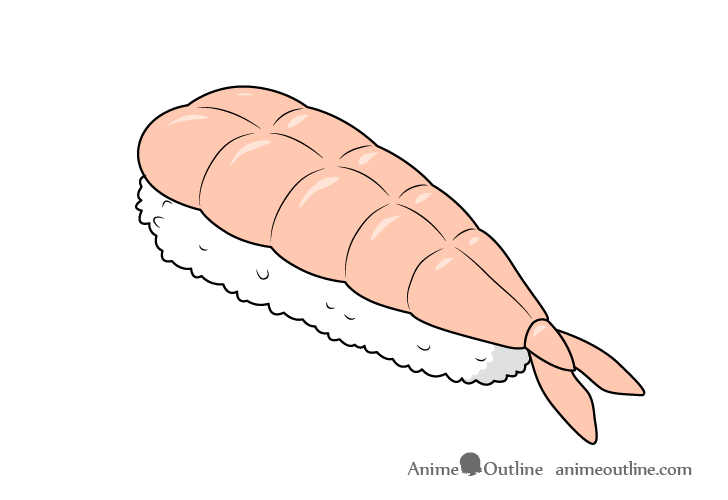
To color the shrimp you can make it an orange/pink leaving a few small highlight for each of the little bumps.
You can also add a small shadow along the rice near the tail.
5 – How to Draw Tamago Sushi Step by Step
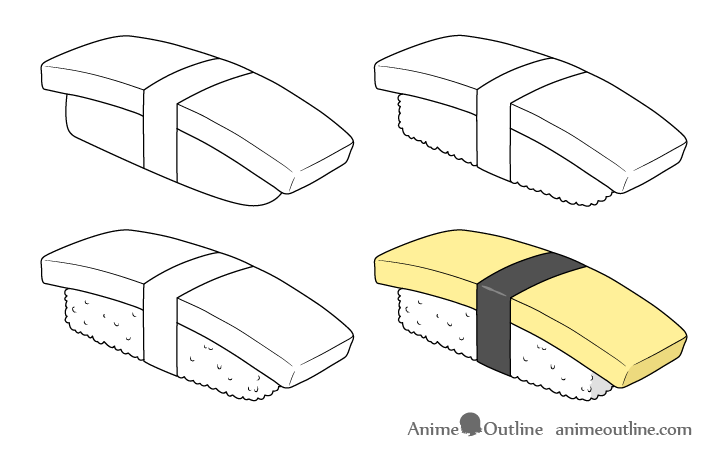
Tamago sushi is usually a slice of an egg/omelette sitting on a bed of rice (similar to the fish/shrimp in the previous examples). The egg is tied to the rice using a small strip of seaweed.
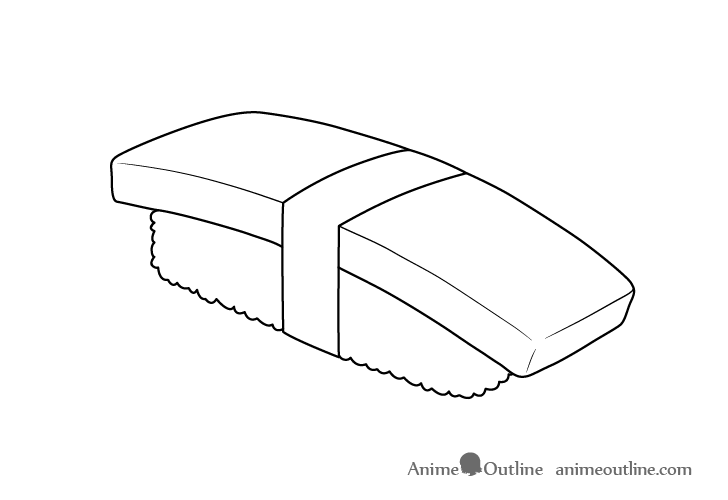
Step 1 – Draw the Outlines of the Egg & Rice

First, draw in the egg followed by the outline of the rice. Next, erase a bit of the egg’s outline around the middle and draw in the seaweed that ties it to the rice.
Step 2 – Add the Details of the Rice
Draw rice grains along the outline added in the previous step and erase it once done.
Step 3 – Add More Rice Grains
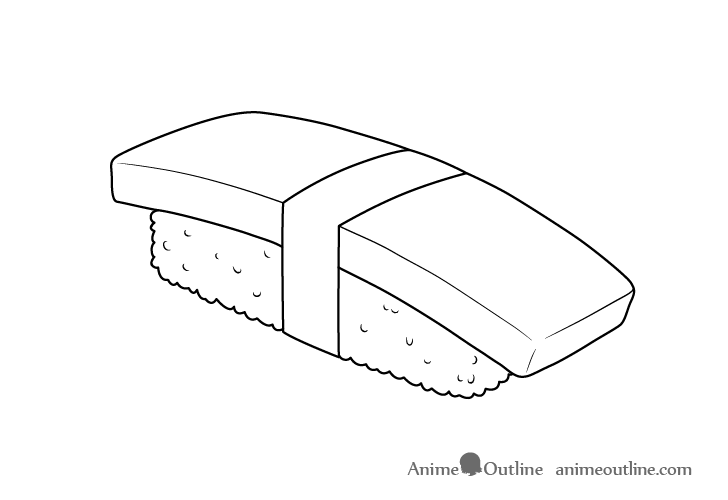
Inside the rice’s main shape add a few hints of individual grapes.
Step 4 – Color the Tamago Nigiri Drawing
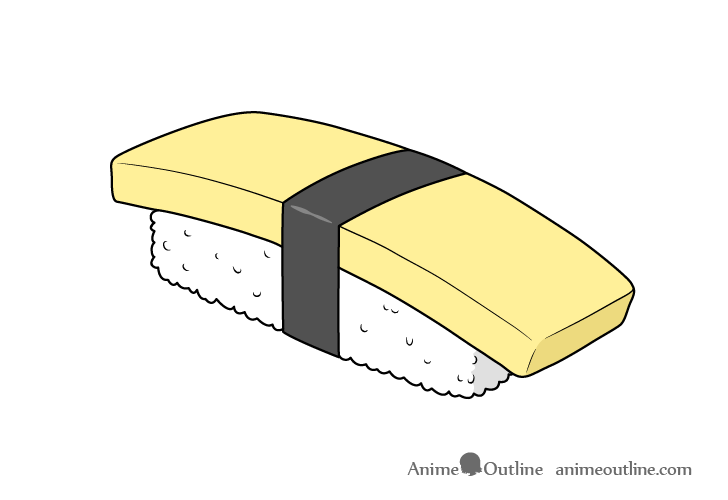
Color the egg a light yellow, the seaweed a dark grey (with a tiny lighter reflection along the it’s corner) and add a small shadow along the rice where the egg hangs down from it.
6 – How to Draw Ikura Nigiri Sushi Step by Step
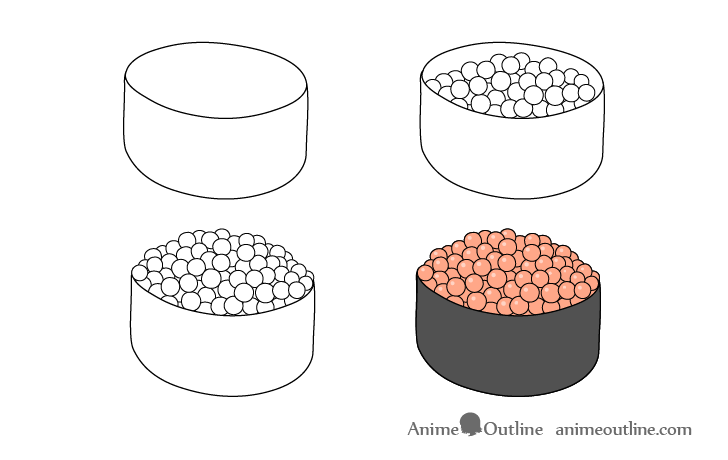
The ikura nigiri is somewhat similar to maki sushi (wrapped with seaweed on the outside) but with red fish roe on top.
Step 1 – Draw the Base of the Roll
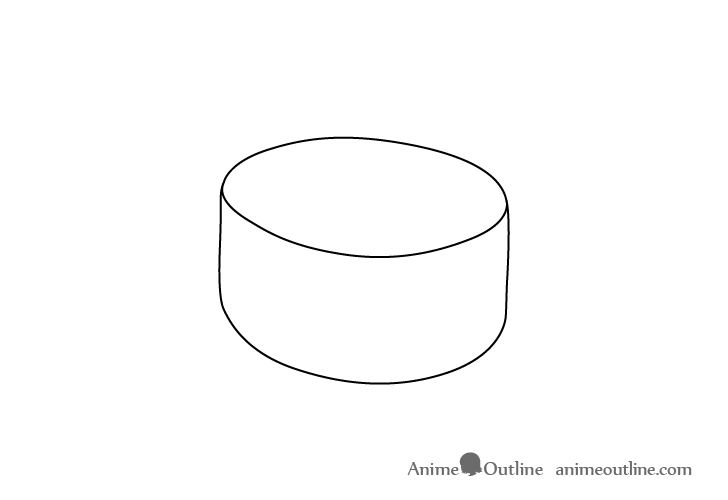
Just like when drawing to the maki/uramaki first draw the outline of the main shape of the roll. But make the “cylinder” a little squished so that it looks more like an oval.
Step 2 – Begin Adding the Fish Roe
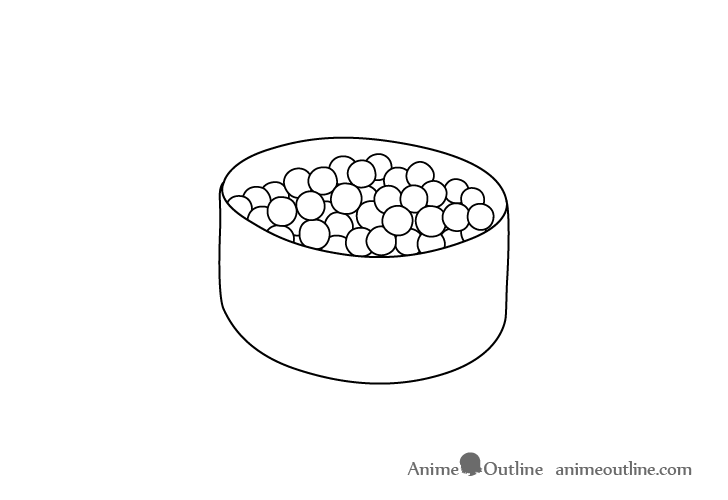
This part may be a bit tedious but you will have to draw each fish egg one at a time. Generally, you want to draw the ones in front first and then add the other ones sticking out in between/behind them.
Step 3 – Finish the Line Drawing

Keep on “stacking” the roe until you have a nice little “heap” as in the example.
Step 4 – Color the Ikura Nigiri
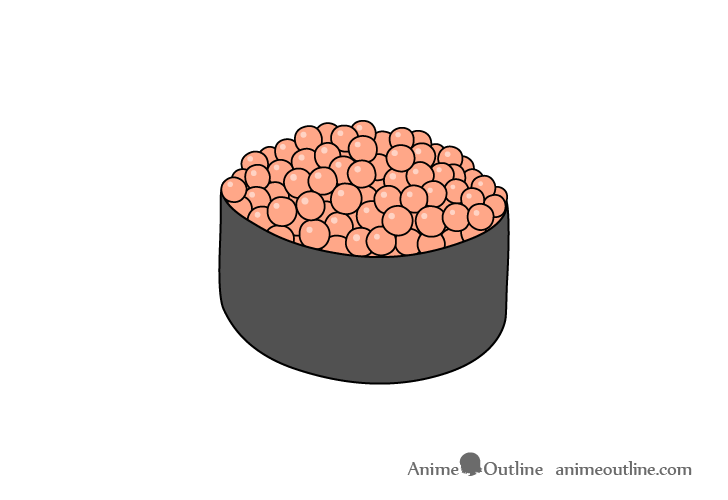
To color the ikura nigiri you can make the seaweed a dark grey as in the other examples. Make the roe orange but leave a small highlights inside of the eggs that are mostly visible. Again, this is a bit time consuming but will make the roe look shiny and more three dimensional.
Conclusion
Because it’s somewhat unusual sushi is a fairly interesting food to draw. Due to it’s generally simple shapes drawing it is also not particularly difficult especially in the simplified anime/manga style. There are of course a lot more sushi types then are shown in this tutorial but you can draw many of them in pretty much a similar way. Start with the outlines of the main shapes and then add the smaller details such as the filling, rice grains, etc… You can give a hint of the texture by adding in highlights for things that are wet/shiny and leaving them out for those that aren’t.
For more food related drawing tutorials (done in the anime and manga style) also see:
- How to Draw Anime Style Food & Lunch Box
- How to Draw a Rice Bowl Step by Step
- How to Draw a Slice of Cake Step by Step
- How to Draw Hands Holding Chopsticks Step by Step
- How to Draw a Candy Apple Step by Step
- How to Draw Takoyaki Step by Step
- How to Draw Dumplings (Anime & Manga Style)
")


