
How to Draw a Kunai (Weapon) Step by Step
This tutorial shows how to draw a kunai, a dagger like object that can be used as a weapon. It consists a total of seven steps that cover line drawing, coloring and shading.
In anime and manga a kunai are often shown as ninja weapons. However, even though kunai resemble daggers they were originally used as gardening tools.
In this case the kunai will be be drawing in a vertical position but you can of course rotate your drawing however you like. There is also an example at the end of the tutorial of one drawn on an angle.
Unless you are drawing digitally it’s recommended that you start the tutorial in pencil and make light, easy to erase lines. You can darken them before coloring.
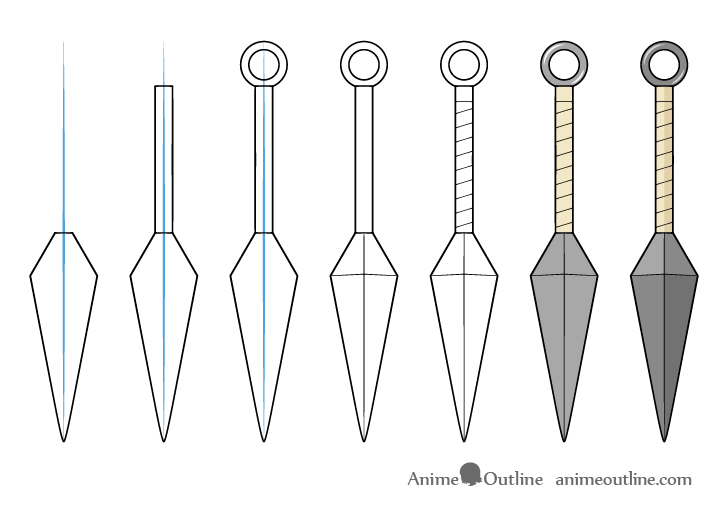
Step 1 – Outline the Blade of the Kunai
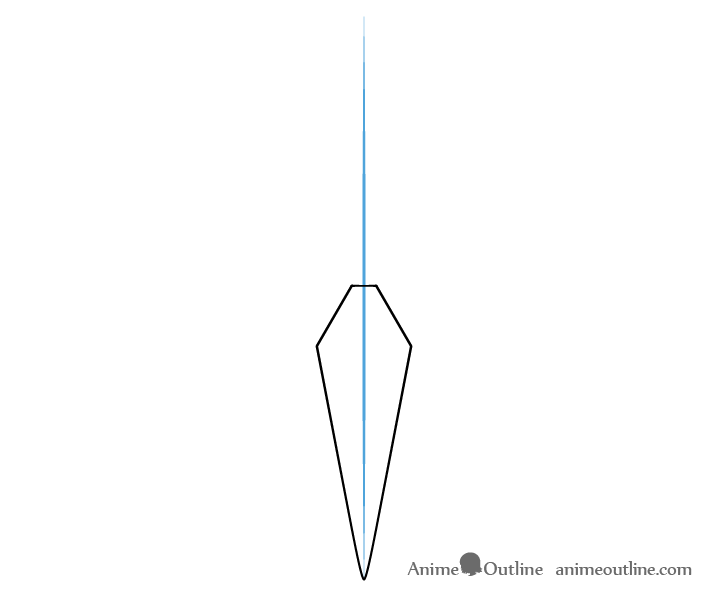
Begin the drawing by making a straight vertical line. This purpose of this is to help you insure that the drawing is not crooked and to make it easier to see if the kunai is symmetrical.
Towards the bottom of this line draw the blade. You can make it’s shape as shown in the example.
If you want to draw the kunai on an angle then of course you can draw the line on an angle as well.
Step 2 – Outline the Handle
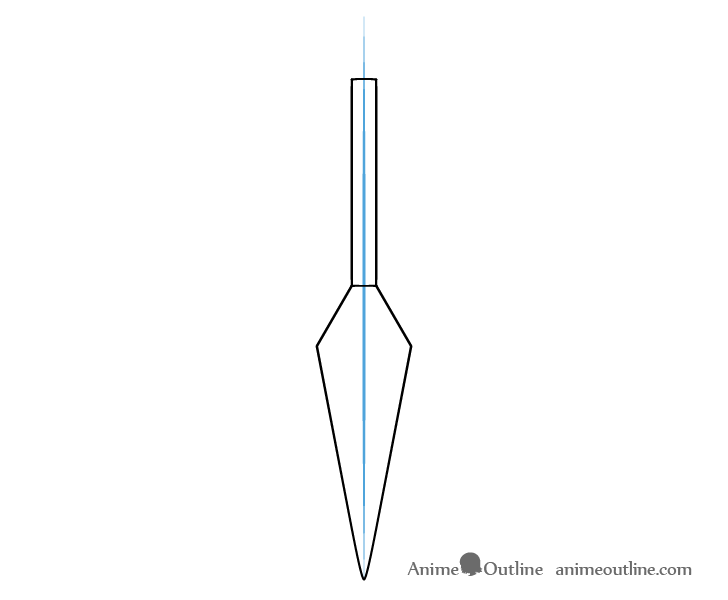
Going up from the blade add the handle. While in it’s cylindrical in shape from this view it will appear similar to a long rectangle. You can define it’s bottom and sides with straight lines but draw the top (back of the handle) curved slightly upwards.
The handle should be fairly thin in relation to the blade, much more so than you would generally see on a knife or dagger.
Step 3 – Draw the Ring
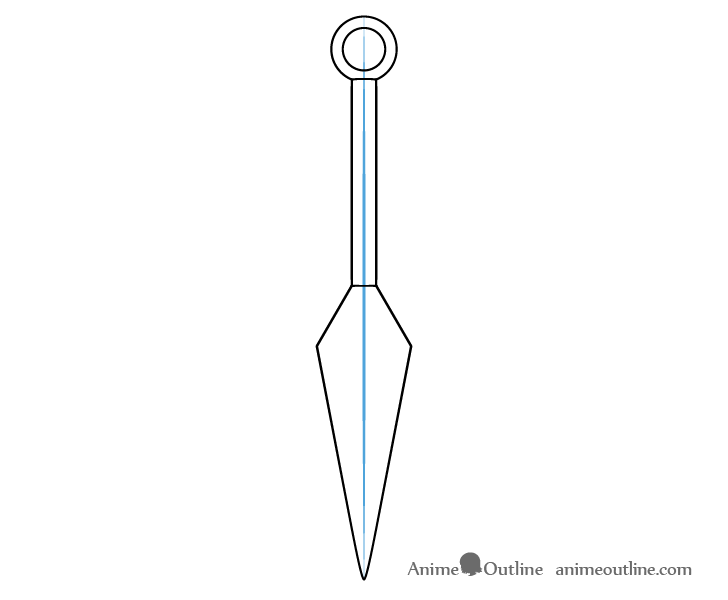
At the end of the handle add a ring. First draw it’s outer shape that connects to each side and then the smaller inner circle.
Once done with this step you should have a basic outline of the main part’s of the kunai.
Step 4 – Show the Blade Edges
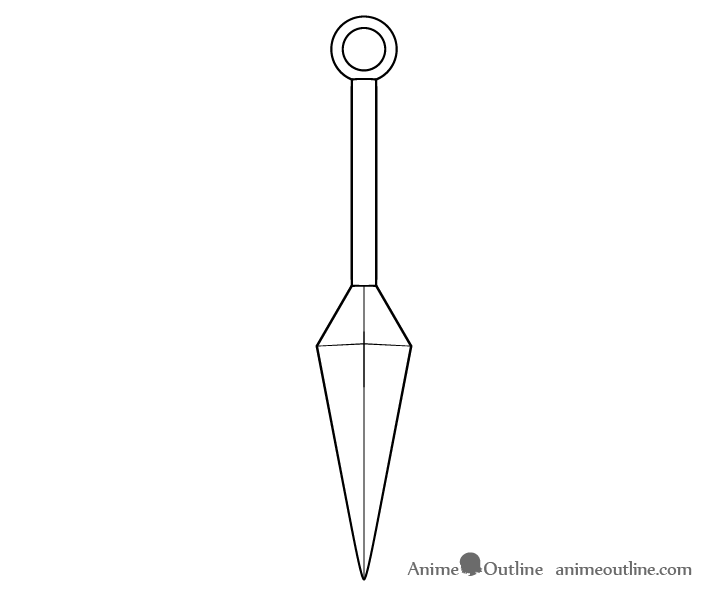
At this point you can erase the center line added in step one along the ring and handle. Leave it along the blade and draw another pair of straight lines running from it’s upper end towards the corners. This will help show the sharp edges of the blade.
Step 5 – Draw the Handle Wrap & Finish the Line Drawing
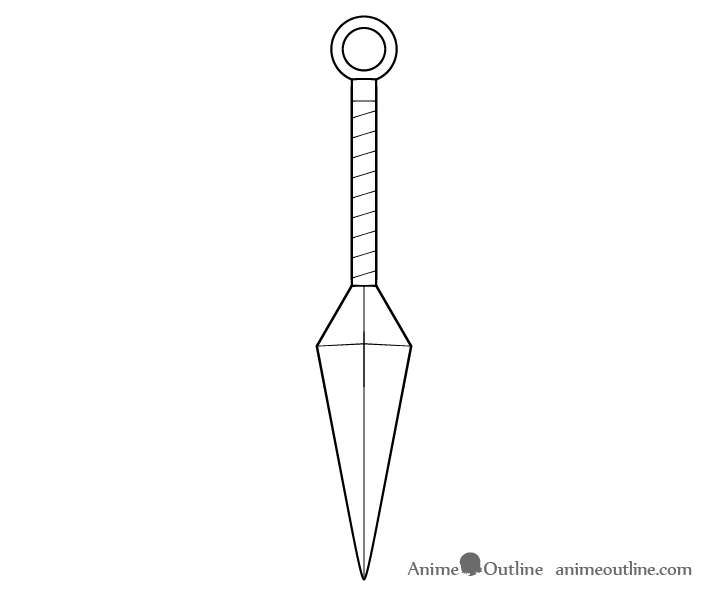
Running along the handle add some wrapping. Draw this as series of angled lines with a straight one at the end of the handle.
Step 6 – Apply Color
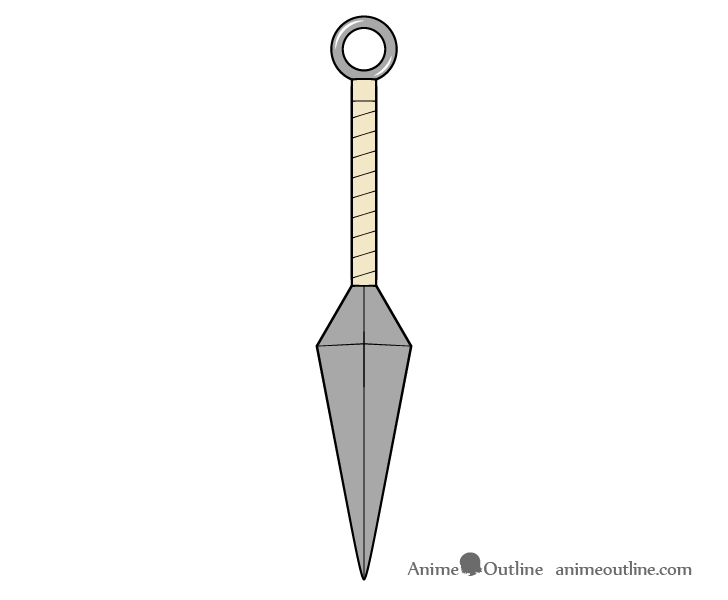
In anime and manga the metallic part of the kunai can be shown with different shades of grey, depending on the artist’s preference. They can also be black.
In this case the blade will be a solid grey. You can color the ring using the same shade of grey as well but leave a couple of curved white reflections as shown in the example. Finally make the handle a light yellow with a bit of brown and/or grey in it.
Step 7 – Add Shading
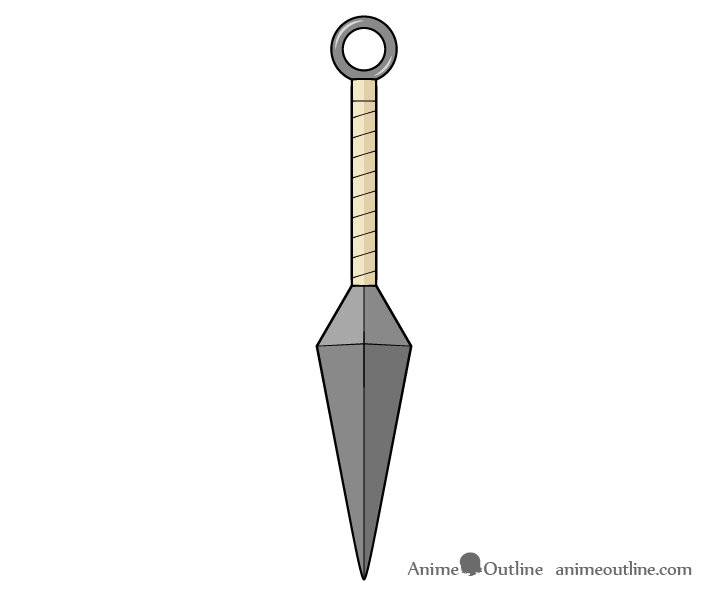
You will notice that in the previous example the kunai looks a little plain and flat. To fix this we will give it some very basic shading.
In this case the shading will be applied as though the light is coming from the upper left. This means that the upper left part of the blade will be the lightest (don’t add any more shading to it).
The bottom left and upper right portions will be slightly darker, you can go over these with a darker grey. The bottom right part will be the darkest (as it’s facing away from the light). Make this part an even darker grey. You can also shade the right half of the handle.
Depending on how shiny you wan the metal of the kunai to appear you can slightly shade in the reflections as well. Darker (less bright) reflections will make the metal look more dull. This may be something you want if drawing one for a ninja as they would probably not want really shiny objects that attract attention when sneaking around in the dark.
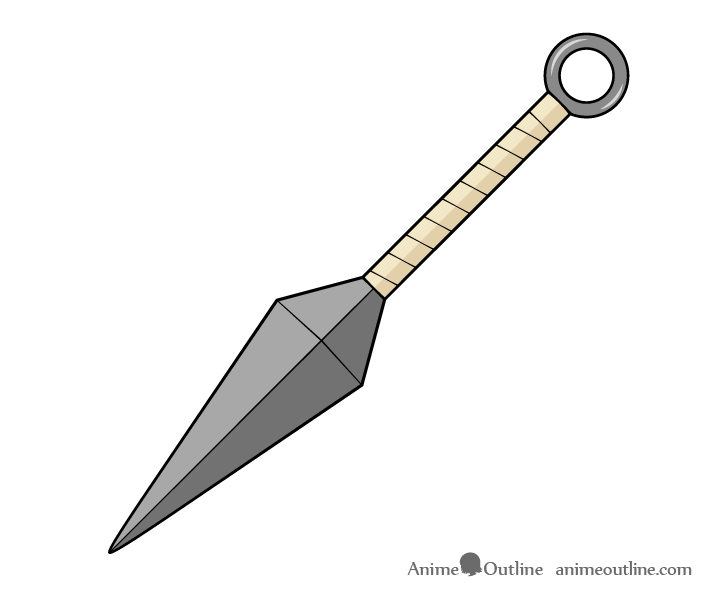
Above is an example of the same kunai drawn on an angle. It’s once again shaded as though the light source is in the upper left. However, since the position of the object has changed the shading is also slightly different. In this example the left side of the kunai’s blade will be lighter (the base grey) and the right side darker.
Conclusion
This is a fairly simple tutorial but it can still be very helpful if you are looking to draw a kunai. As other tutorial’s here on AnimeOutline it focuses on the anime style but with a good approach to drawing in general. It shows how something as simple as just drawing a straight line to act as a guide can be very helpful in avoiding common mistakes. It also illustrates how you can make your drawing look significantly nicer with some very basic shading..
For more tutorials on drawing weapons and other objects commonly seen in anime also check the following:
- How to Draw a Shuriken (Ninja Star) Step by Step
- How to Draw a Katana Step by Step
- How to Draw a Military Knife in 6 Steps
- How to Draw a Gun in 15 Steps (Handgun)
- How to Draw Fantasy Weapons (10 Different Types)
For drawing hands holding various types of objects see:
6 Ways to Draw Anime Hands Holding Something
")


