
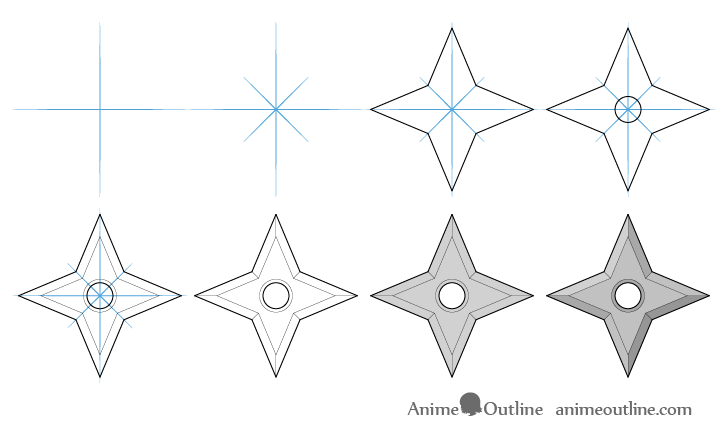
How to Draw a Shuriken (Ninja Star) Step by Step
This tutorial shows how to draw a shuriken or ninja star as they are often called in eight steps in the anime/manga style.
Shurikens can sometimes be seen in martial arts and historical anime and manga. While their designs tend to vary, usually as their other name implies they tend to be shaped like some sort of a star.
The one shown in this tutorial is a four point/diamond star shuriken (from the side view).
Unless drawing digitally star the tutorial in pencil as you will eventually need to erase the guide lines used in the earlier steps. Also please note that the lines in the examples have been made darker just so that they are easier to see. Keep your lines light so that they don’t leave marks when erased. You can darken them towards the end of the tutorial (before coloring).
Step 1 – Draw the First Set of Guide Lines For the Shuriken

To help make sure that the ninja star has a nice shape and doesn’t look like it’s bent or warped draw some guide lines to help you create it’s shape.
Start by making a horizontal and a vertical line. Where these intersect will be the middle of the shuriken/ninja star. Be sure that these lines are straight.
Step 2 – Draw the Second Set of Guide Lines
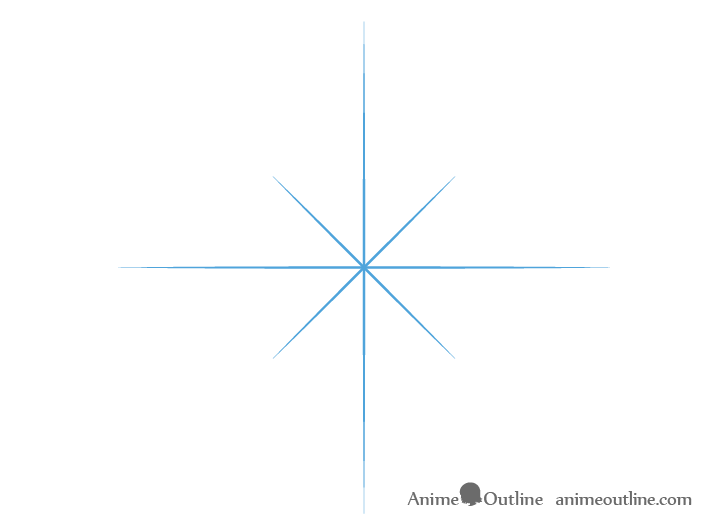
Through the middle of the previous lines draw another (shorter) pair that should create an “X” like shape. Try and make sure that the sections between these lines (that kind look like slices) are all of the same size.
Step 3 – Draw an Outline of the Shuriken
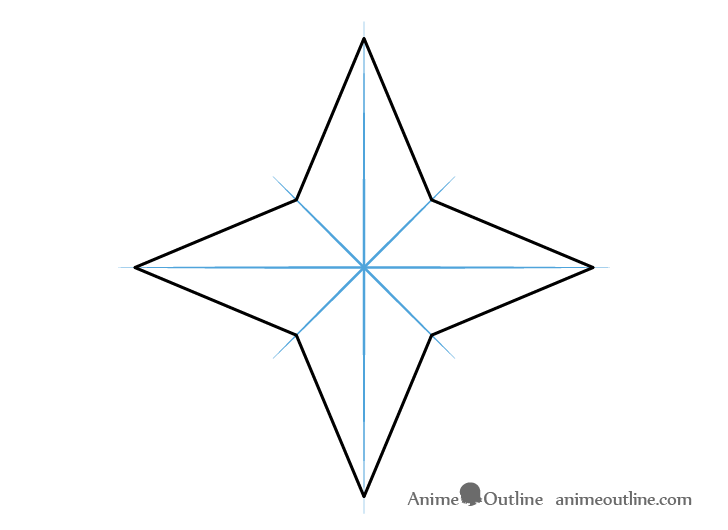
Based on the guide lines draw a four pointed star. You can see how the guides can be very helpful in this based on the example.
Step 4 – Draw the Hole

For this simple step draw a small round hole through the middle of the shuriken.
Step 5 – Draw the Edges
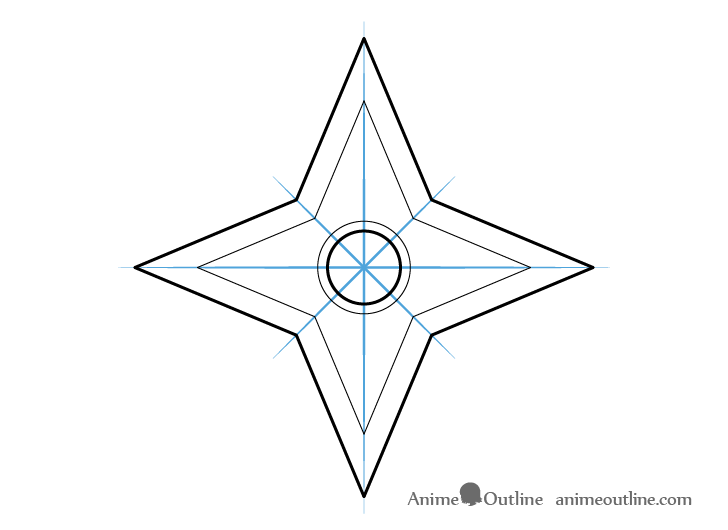
Outline the shuriken’s edges by drawing another similar shape inside the main outline. You can also draw a second larger circle centered around the hole.
Step 6 – Clean Up & Finish the Line Drawing
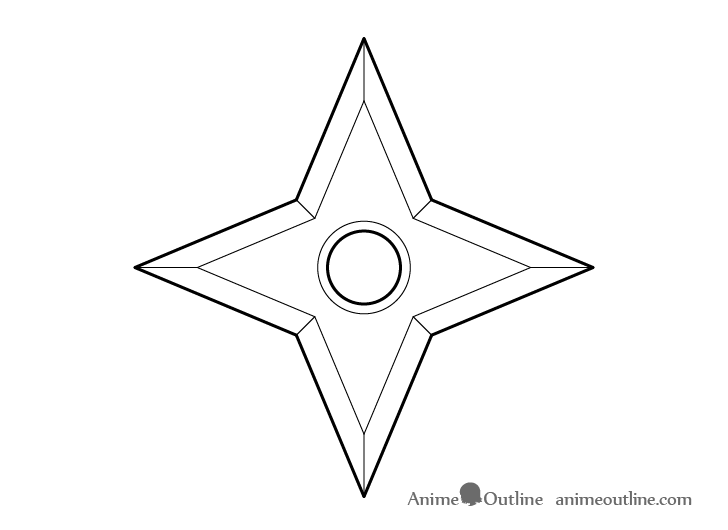
Once you have all of the parts outlined clean up your drawing and erase the guides. Once done you can also darken your lines. You can also optionally make the lines that define it’s main shape slightly thicker than those that define the details.
Step 7 – Add Color
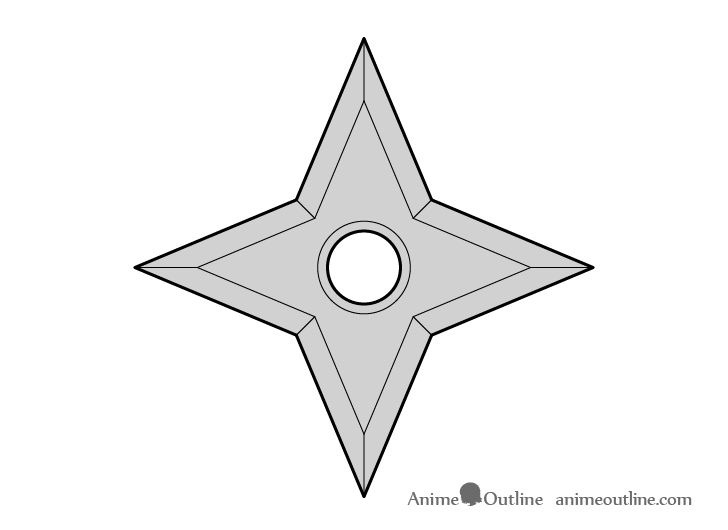
To show that the shuriken is metallic simply make it a light grey. You can just do this using a regular pencil.
Step 8 – Add Shading
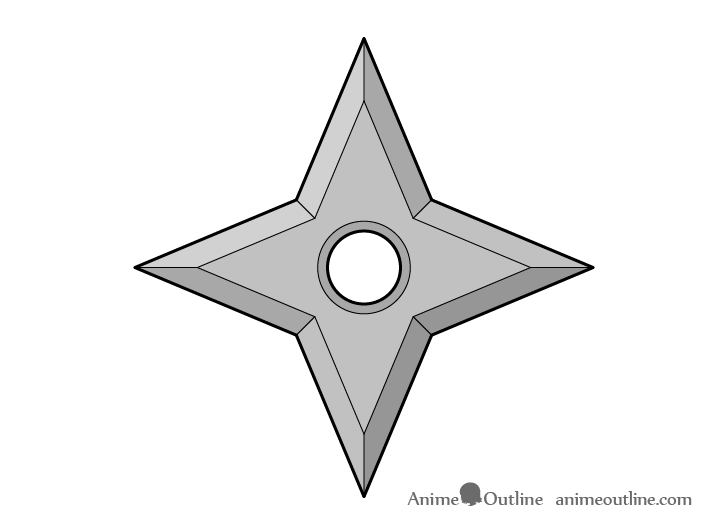
You many notice that in the previous example the drawing looks a little flat. To fix this you can give it some very basic shading that will make the object appear more three dimensional.
In the example the light will be coming from the upper left. In this lighting setup the shadows will be distributed something like the below example.

Keep the in mind that in this case the shading is simplified (as it often is in anime and manga). The goal is to just have it close enough that it looks believable.
At the same time you want to keep it somewhat subtle. If you make one sections too dark compared to the other the drawing will start to look more like a mosaic then one whole object.
Conclusion
Shuriken’s in anime and manga can be drawn in a variety of different ways. However, as already mentioned usually they will look like some sort of a star. Hence their other name, the ninja star.
Drawing these is not particularly difficult especially if you use an approach like the one demonstrated in this tutorial.
For more similar drawing guides also see:
- How to Draw a Katana Step by Step
- How to Draw a Kunai (Weapon) Step by Step
- How to Draw a Military Knife in 6 Steps
- 6 Ways to Draw Anime Hands Holding Something
- How to Draw Explosions, Smoke & Fire Step by Step


")


