
How to Draw a Rose Step by Step
This tutorial shows how to draw a rose in eleven steps. It’s focus is on the anime and manga style but most of the tips and drawing examples can also be applied to traditional art.
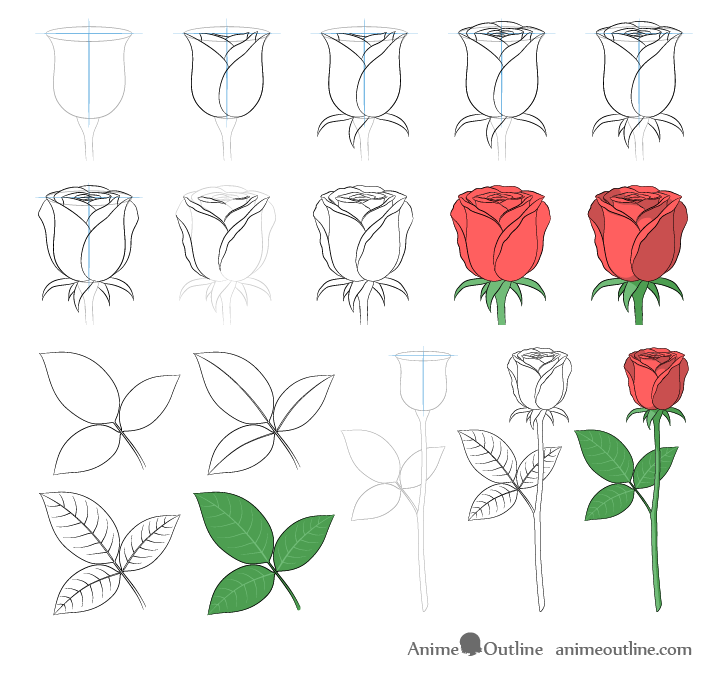
Roses are a fairly common flower in anime and manga. They can be a used for background scenery, as a part of a character’s outfit and in various romantic scenes. However, due to their complexity such as the irregular shapes of the petals these flowers can also be very difficult to draw. To make the process easier this tutorial demonstrates an approach that starts with a simple shape which you then build upon to create the more complex rose.
Please note that unless you are working digitally you should use a pencil and make light lines until the final stages of your drawing.
Step 1 – Make a Construction Drawing of the Rose Flower
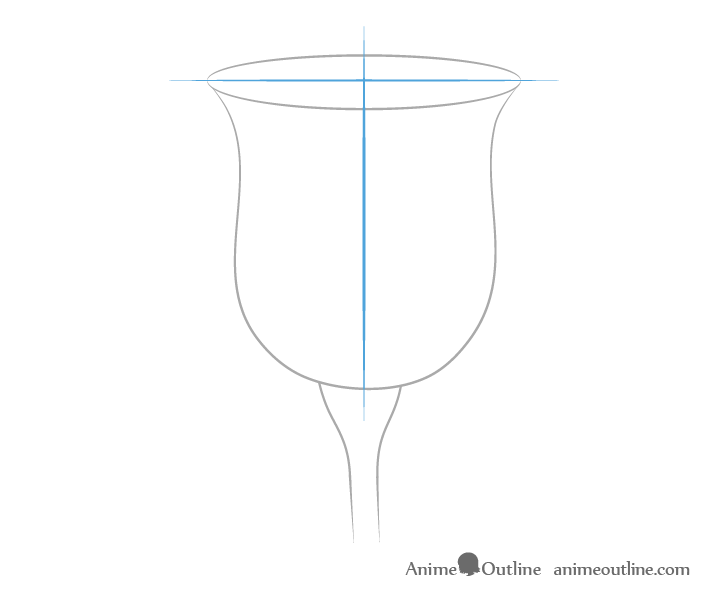
If you look at the overall shape of a rose flower that is not fully open it tends to be similar to a wine glass. You will want to make a light line sketch of this shape but before you do that draw a pair of guide lines. First make a vertical line through the middle of your drawing area to help insure that both halves of the “glass” are even. Next draw a horizontal line to help you place the oval shaped rim.
Give the “glass” a rounded bottom. It’s shape should then get narrower towards the top and finally curve outwards away from the center line. Next add the oval of the rim at the very top to create the “opening” of the glass.
Generally the “height” of this oval will be determined by the “eye level”. If for example you wanted to draw a rose directly at the level of the viewers eye the top would be a straight line and if you would look at the rose from very high up the oval would be close to a circle in shape.
In this case we will be drawing the rose just slightly below the eye level.
If you would like an explanation of “eye level” as well as perspective drawing (which it is related to) see:
Perspective Drawing Tutorial for Beginners and How it Relates to Anime
Step 2 – Draw the Stem & Leaves
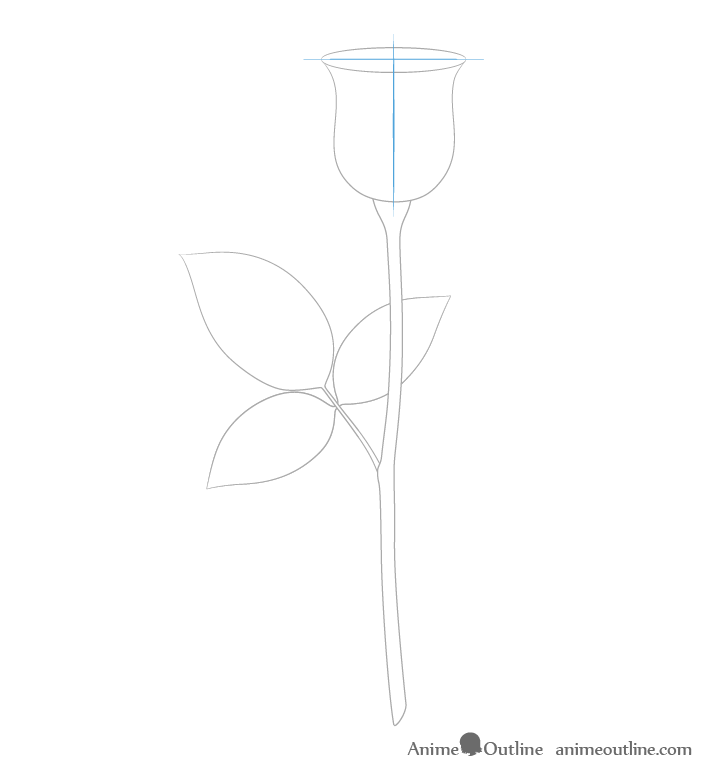
After you make the construction drawing of the flower add the stem and leaves. As these are fairly simple shapes you can pretty much make their outlines the way they will appear in the final drawing.
Generally the stems of roses tend to bend towards the parts where leaves grow out of them. In this case there is only one set of leaves so there is only one bend. The stem will also appear to get much thicker near the flower, this part is called the receptacle. Be sure to also add that in your drawing.
After you finish the stem add the leaves in a group of three (the way rose leaves tend to grow). You can draw each leaf with just two curved lines.
Also please note that if you want to only draw the flower section of the rose you can leave out most of the stem as well as the leaves.
Step 3 – Add the Front Petals & Sepals
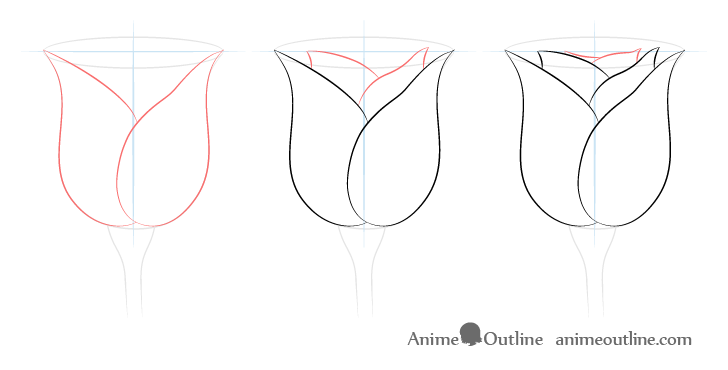
The example shows dark lines for the petals to make it easier for you to distinguish them from the construction lines. You should however continue to make light lines if using pencil and paper.
Start drawing the rose petals by first adding their “front sides” (facing towards the viewer). Draw these going from the larger petals at the bottom towards the smaller at the top.
It may also be helpful to keep in mind that the petals are basically stacked inside one another and tend to alternate like a braid.
At this stage leave out any of the smaller bends and curves that the rose flowers usually have. These will be added in later steps.
For drawing a hair brad see the following tutorial:
How to Draw Anime & Manga Style Hair Braids
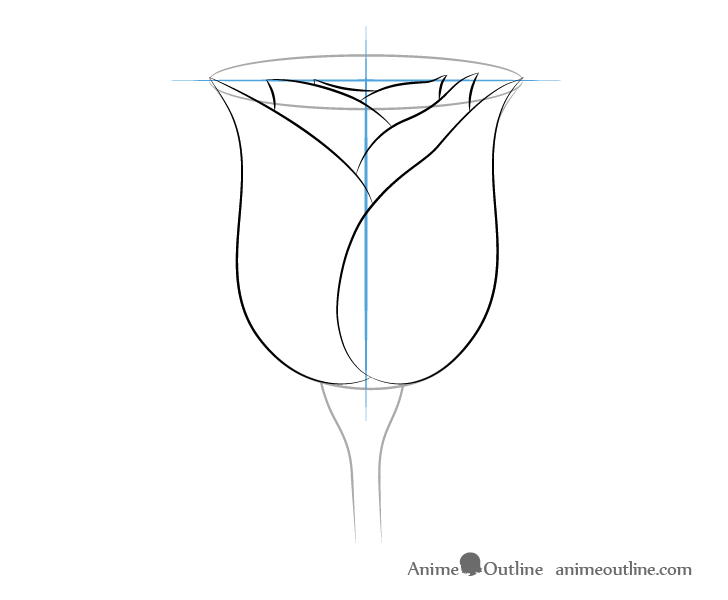
You can see a large example of the front petals drawing above.
Draw the “front” set of sepals (small leaves at the bottom of the flower) with pointy ends curving slightly downwards. You can draw two of them pointing towards the sides and one pointing more towards the viewer.
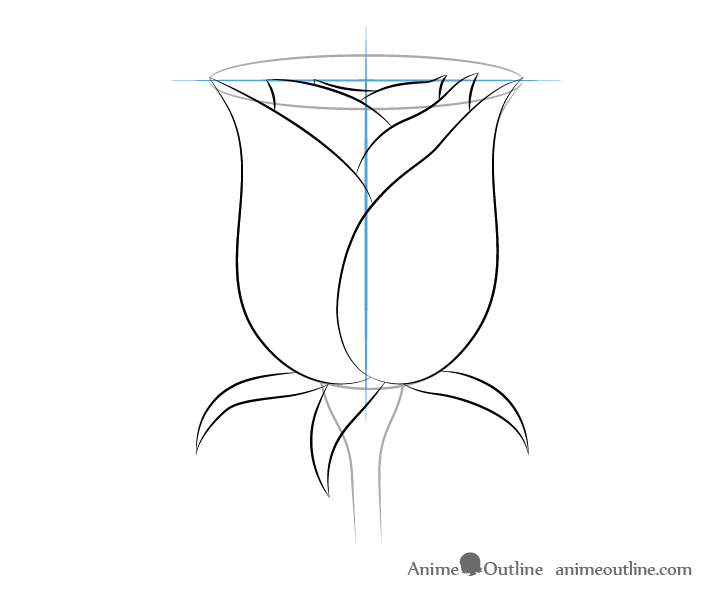
Step 3 – Draw the Back Petals & Sepals
Now add the next set of petals. Draw these starting with the smaller ones in the center and working outwards. Try and make the overall shapes of the petals in a way where they appear to wrap around the “wine glass”. Use the curve of the oval to help you.
You can see a large example of the drawing with all of the petals above.
Draw two more sepals at in the background with each one in between the front and side sepals.
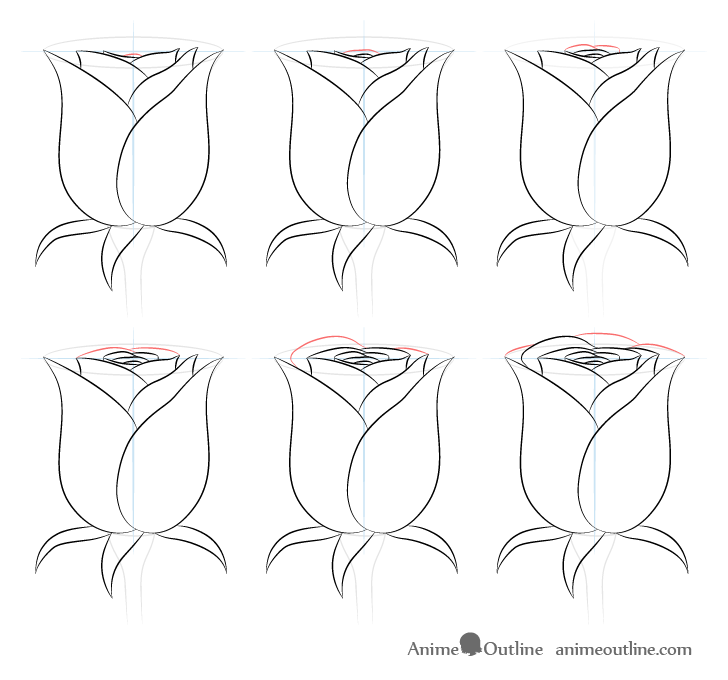
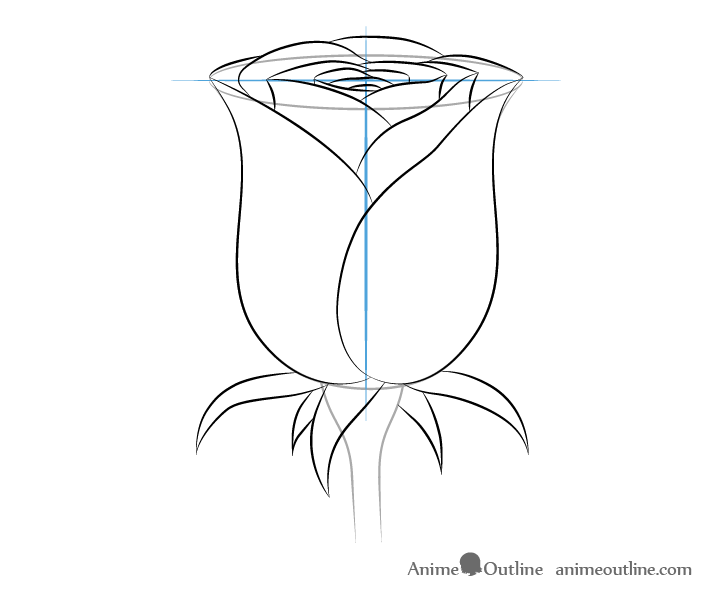
Step 5 – Draw Outer Petals

Add another pair of petals to the sides of the rose. These will help make the rose look more natural instead of strictly sticking to the construction lines. Draw these sort of following the outer shape of the “wine glass” but leaning away form it as they transition towards the top.
Step 6 – Add the “Frills”

A very characteristic feature of rose petals is that tend to have small “wavy” bends around their edges. Sort of like frills that can be found on the edges of some old fashioned clothes.
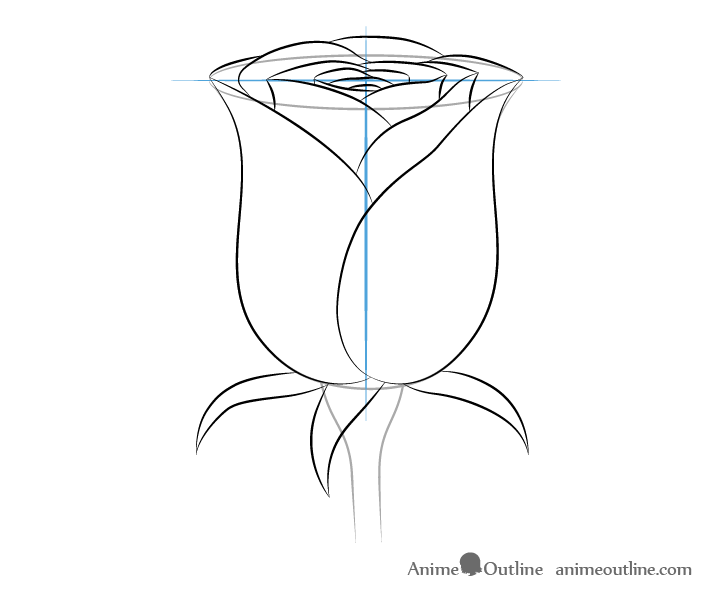
Step 7 – Finish the Flower Line Drawing
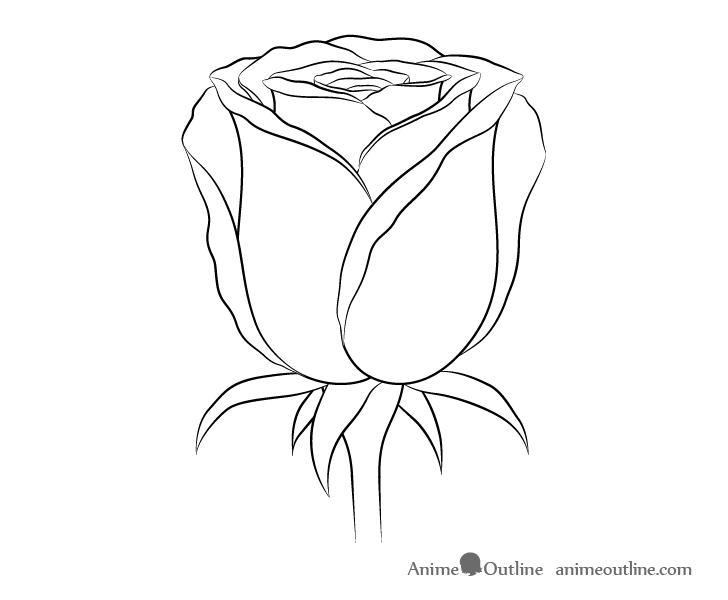
To make the rose look more natural add some smaller bends and curves to the edges of the petals.
If you only want to draw the flower then at this point you can go over your drawing with darker lines. If drawing on paper you can use a black pen or a marker but be careful not to make a mistake. If you are worried simply darken the lines with pencil.
If you want to draw the rest of the rose then darken the outlines after you finish the whole drawing.
Step 8 – Draw the Details of the Leaves
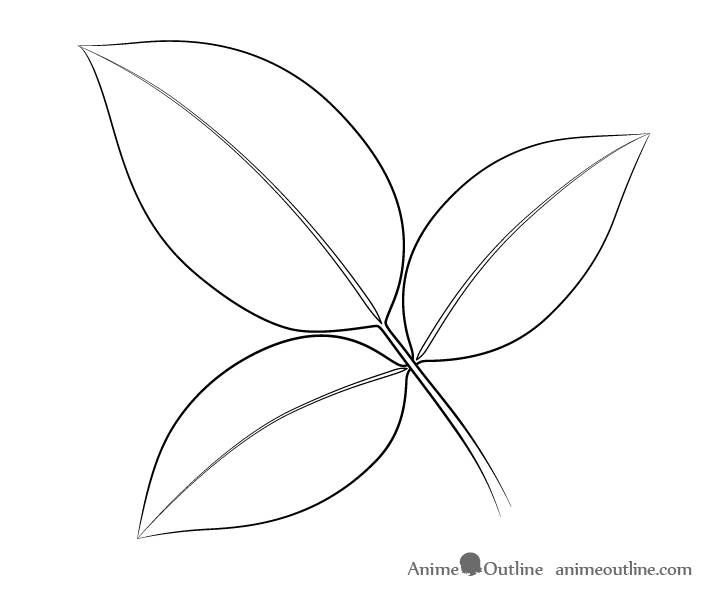
Please note that if you are going to be coloring the rose then you will want to draw these in color right away or make a very light sketch that will basically become invisible when you color the drawing. You can see the colored leaves in the last step of the tutorial.
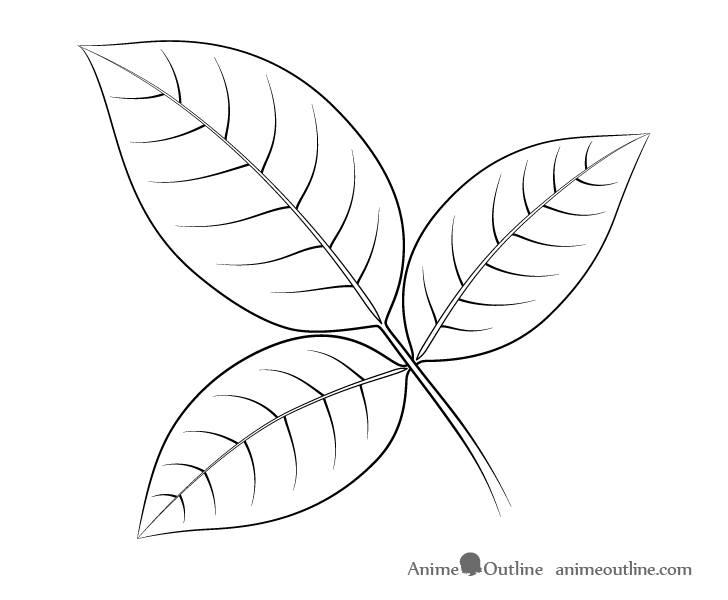
Same as the petioles draw the veins in color right away if you want to color the rose or make them very light.
Step 9 – Finish the Full Rose Line Drawing

As already mentioned go over your drawing with darker lines to finish the line drawing stage of the tutorial. Again please note that if you are going to be coloring the rose then do not make dark outlines for the inner details of the leaves.
Step 10 – Apply Color
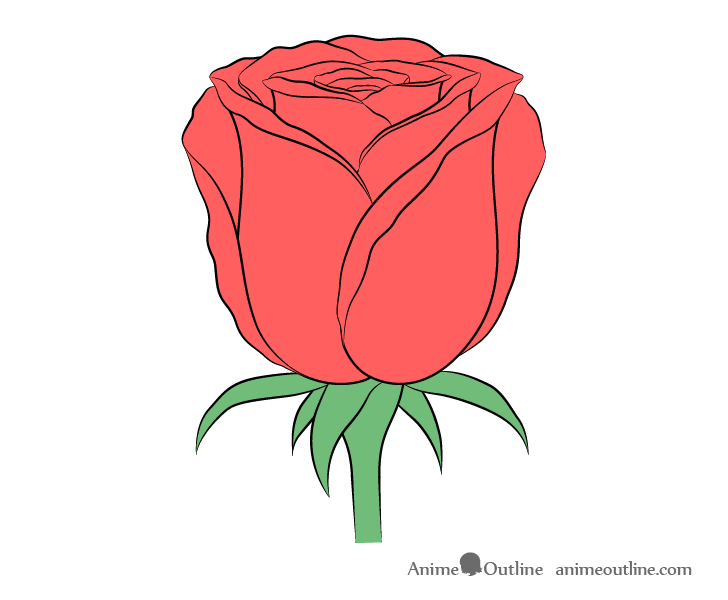
For this step fill the rose flower with red and the stem with green.

Make the part of the petiole and veins inside the leaves the same green as the stem. Color the rest of the leaves with a darker green.

You can see a close up color drawing of the leaves above for reference.
Step 11 – Apply Shading
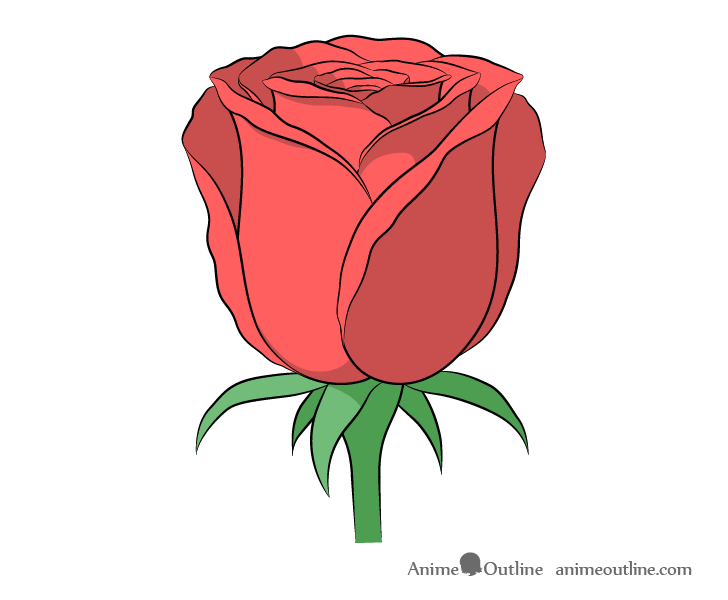
If you want to shade the rose in the anime style you can use what is known as “Cel” shading. You may already be familiar with it if you’ve seen some of the other tutorials here on AnimeOutline.
To shade the rose in such a way simply apply a darker red for the shaded areas. Apply the shading with no gradients, just a hard line between the light and dark areas.
Shading the Flower
The areas where the shading is applied will be based on the type of lighting the rose is in. In this case we will shade it as though the light is coming from the upper left area of the drawing.
This means that the shadows will generally be along the bottom and right sides of the flower as well as on the left on the inner side of the petals.
Shading the Sepals
Shade the back sepals and the one sepal on the right the darker green used for the leaves. Partially shade the middle/front sepal with a shadow being cast on it by the petals.

Shading the Stem
The top of the stem will have a large shadow cast on it by the flower/sepals followed by a shadow on its right side (as that faces away from the light).
Shading the Leaves
You can keep the leaves the way they are from the previous step as they somewhat face away from the light and should be the darker green.
Conclusion

Roses can be a very difficult flower to draw even in the simplified anime/manga style. Starting with a construction drawing and then building the rose around it in several steps can really help bring some order to what otherwise may seem like a confusing mass of petals.
For more anime and manga related tutorials see:


")


