How to Draw an Anime Little Girl (Entire Body)
This tutorial show how to draw a little girl in the anime or manga style. It goes over the proportions of the entire body as well as the face.
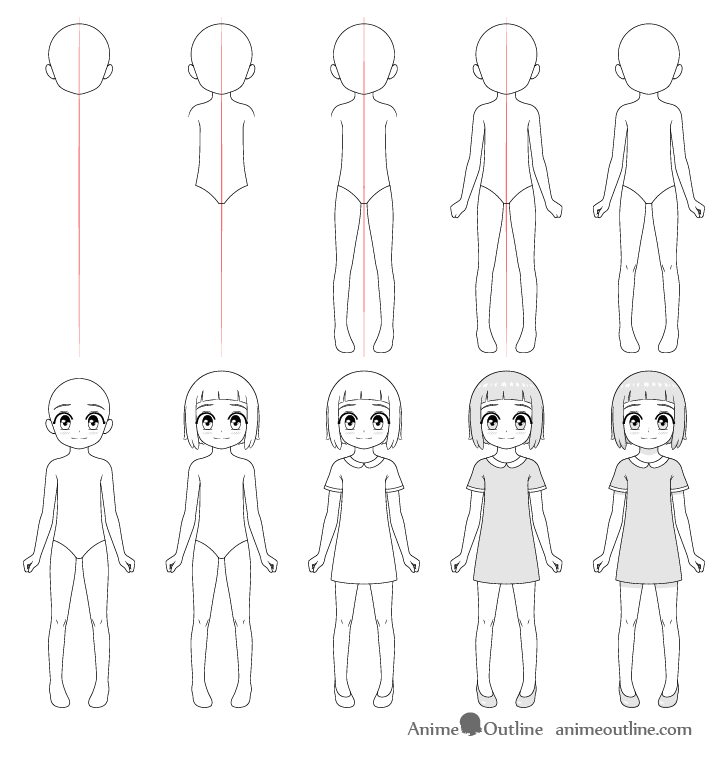
In anime and manga many characters already look younger than their actual age. For this reason it can be a little confusing as to how you should go about drawing really young kids in that style. To help this tutorial shows how to proportion the body, structure the head and position the facial features to create a young looking character. In this case it will be a little girl.
You can see a preview of the main stages of the tutorial in the image above. There are also additional examples included in some of the steps.
As you will need to erase parts of the drawing in some of the steps, it’s recommended that you use a pencil and start with very light lines. You can darken them later on (before shading).
Above is a video that shows the entire drawing process line by line. You can watch it and then read the more detailed instructions below.
If you find these kinds of videos helpful please be sure to give it a like! Your likes REALLY help! Also subscribe to the AnimeOutline channel to be notified when new content is uploaded.
Step 1 – Draw the Little Girl’s Head
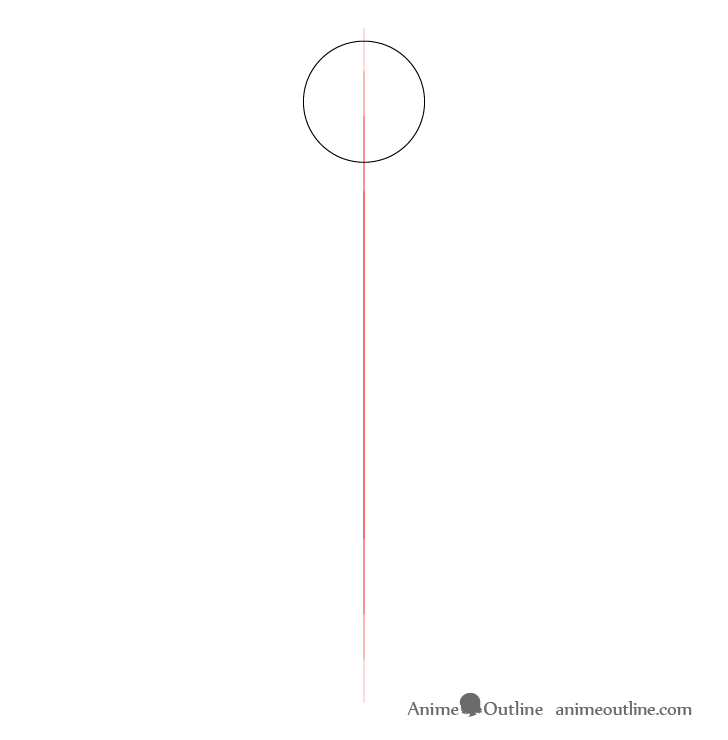
Start by making a long vertical line through the middle of your drawing area. This should be as tall as (or slightly taller) than the entire body. At the top of this line draw a circle for the top of the head. Be sure to leave a little bit of room above it for the hair.
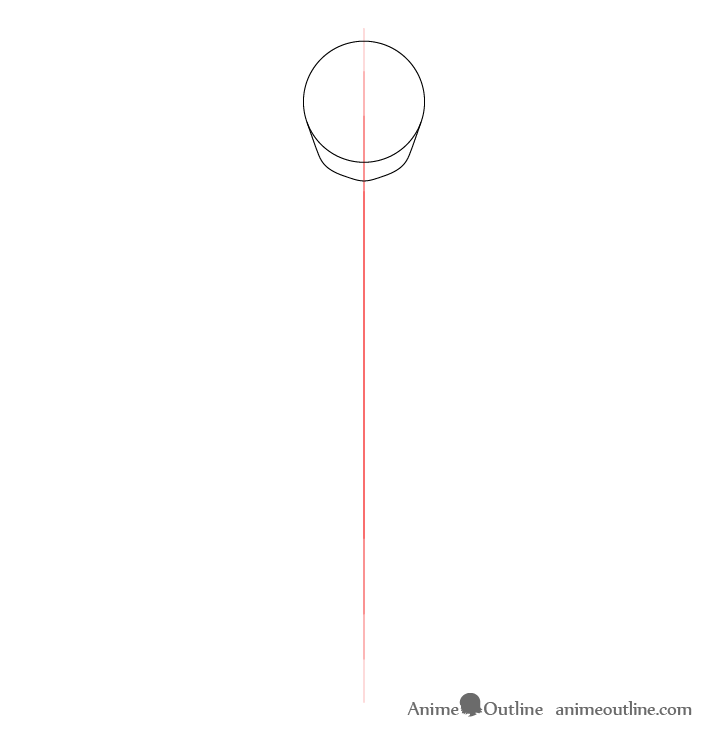
Going down from the circle add the lower part of the head. To show that this is a child make this section fairly short (taller faces will make a character look older).
Define this part of the face starting with two straight lines (coming down from each side of the circle) angled towards the middle of the head, followed by a pair of curves and another pair of fairly straight lines that are angled even more towards the middle of the head. Finally join the two sides at the bottom with the curve of the chin. Once done, erase the lower part of the circle.
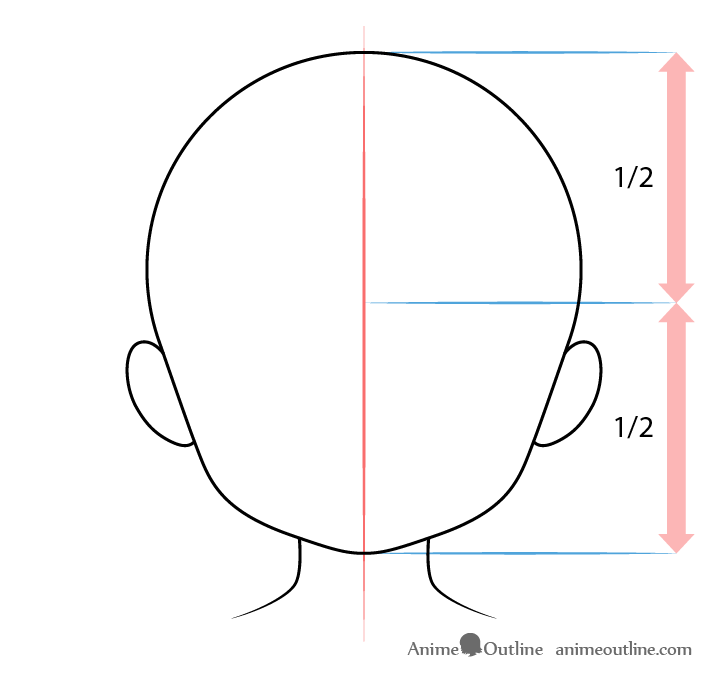
You can see the placement of the ears in the illustrations above (well below the horizontal halfway point of the head). However, adding them is option as they will be covered by the hair later on (unless you wish to draw a different hairstyle).
For more on on drawing anime ears and different ways of placing them on the head see:
How to Draw Anime & Manga Ears (3 Different Ways)
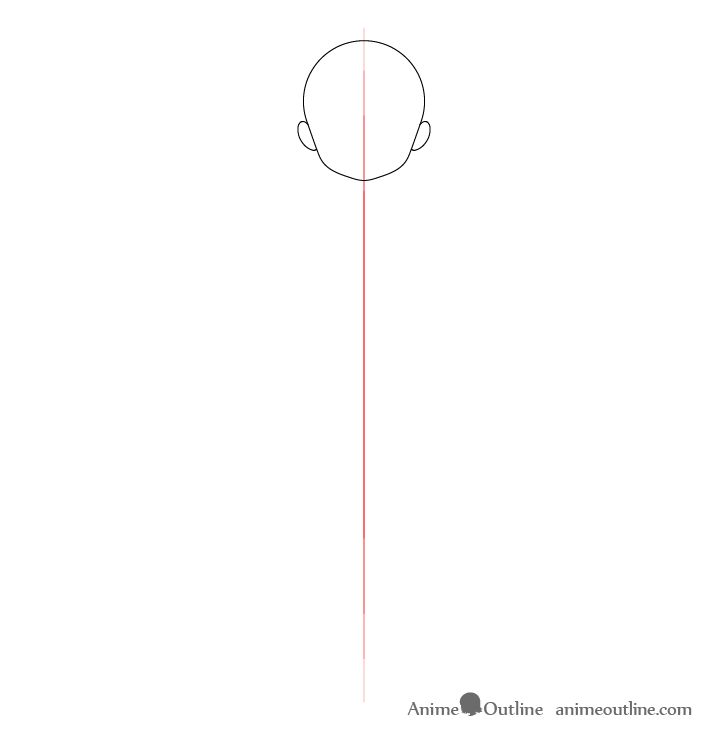
If you do add the ears your drawing should look something like the above once you are finished with the first step.
Step 2 – Draw the Body
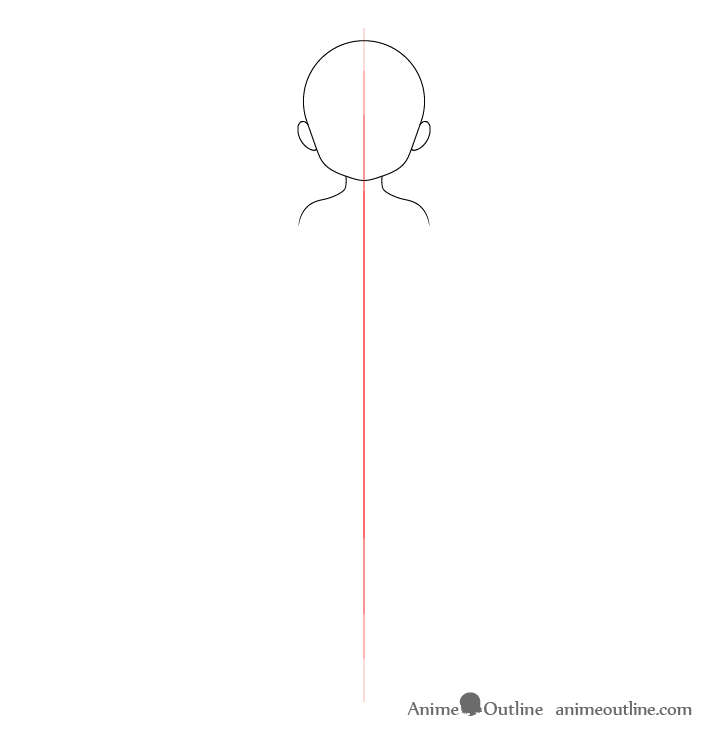
Going down from the bottom of the head add the neck followed by the shoulder muscles and the curves of each shoulder. As this is an anime character and a little girl you will want to make the shoulders very narrow in relation to the head.
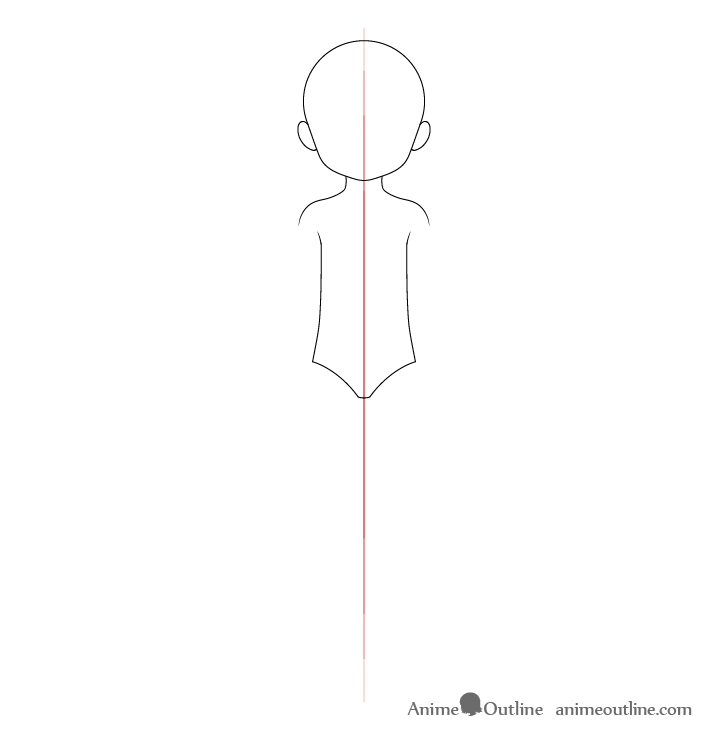
Draw the body as shown in the example. Make it’s overall shape a bit wider as it goes down. However, you should read the explanation below before you start.
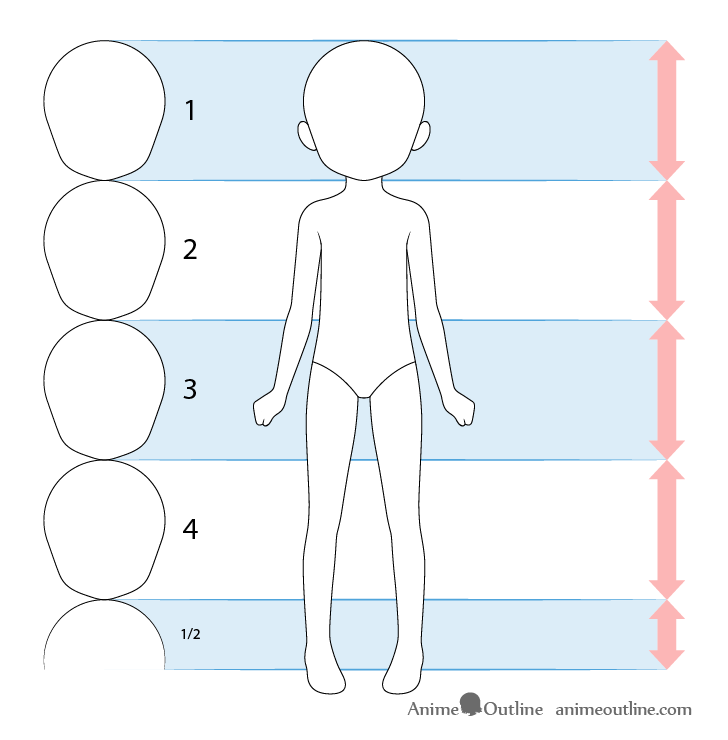
A good way to measure the height of the body is by using the head. It’s also important to note that the proportions of kids are different than those of adults.
In this case the little girl will be about 4 1/2 head’s tall.
For drawing an older female character see:
How to Draw Anime Girl Full Body Step by Step
Another important thing to be aware of is that the height is measured roughly from the heels. The tips of the feet seem to go down farther than they actually do due to “eye level” and measuring the height starting from them would be incorrect.
For more on “eye level” you can read the following tutorial:
Perspective Drawing Tutorial for Beginners and How it Relates to Anime
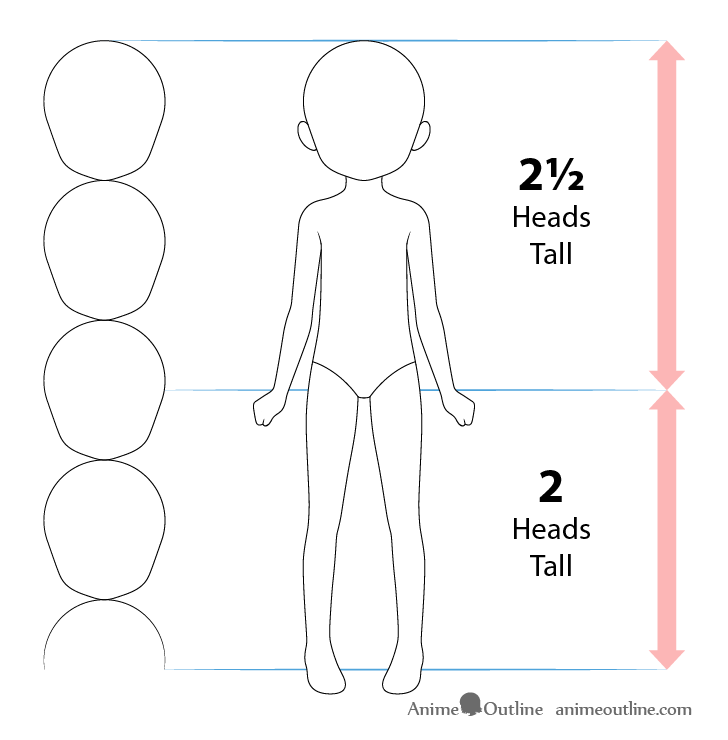
In this case the upper body including the head itself will be about 2 and 1/2 head’s tall (1 and 1/2 without it). Keeping this in mind you can start drawing.
Step 3 – Draw the Legs & Feet
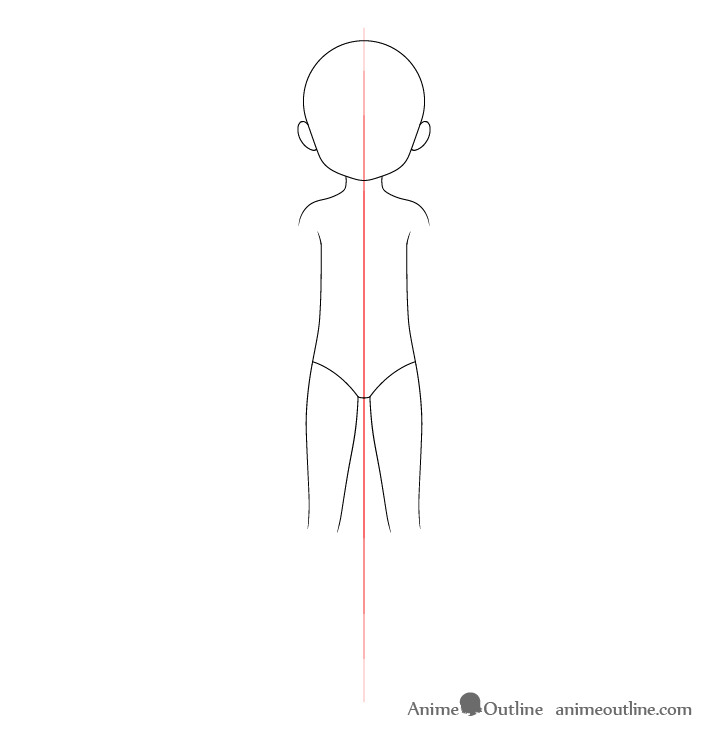
First draw the upper part of the legs as shown in the example. Make their overall shapes wider at the top and narrower as they go down.

In this case the part of the legs going down from the bottom of the body to the bottom of the knees is about the same length as from the bottom of the knees to the heels.
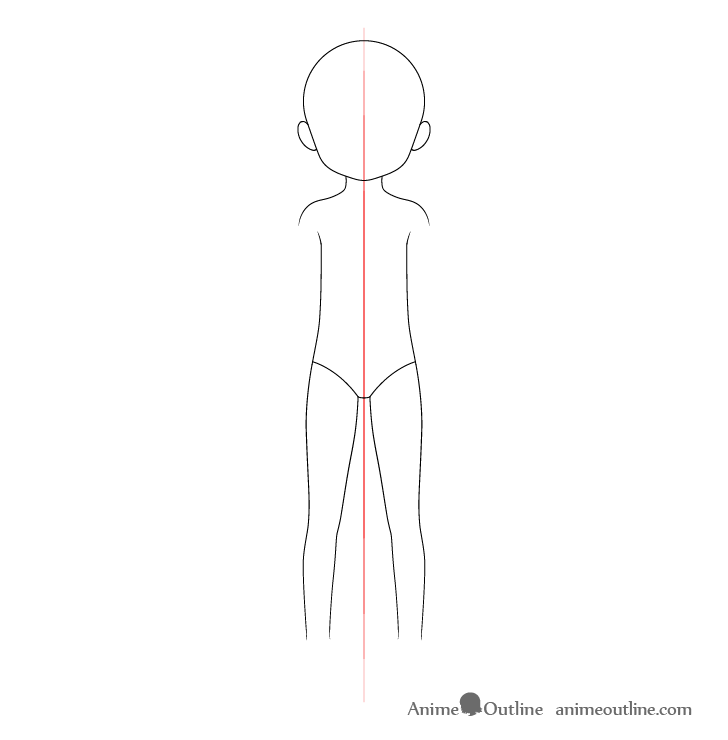
Draw the lower part of the legs wider as they go down and then narrower. The parts where they get wider should be significantly shorter in length than the parts where they get narrower.
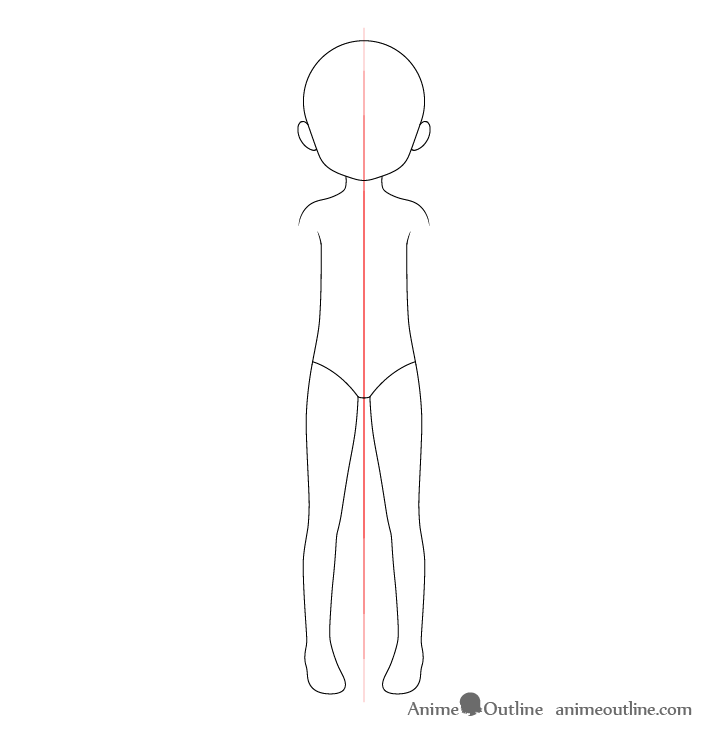
In this example the girl will be wearing shoes so the individual toes don’t need to be drawn.
Outline the overall shapes of the feet pointing inwards. This is fairly characteristic of anime characters and it can also help give the little girl a cuter look.
Step 4 – Draw the Arms & Hands
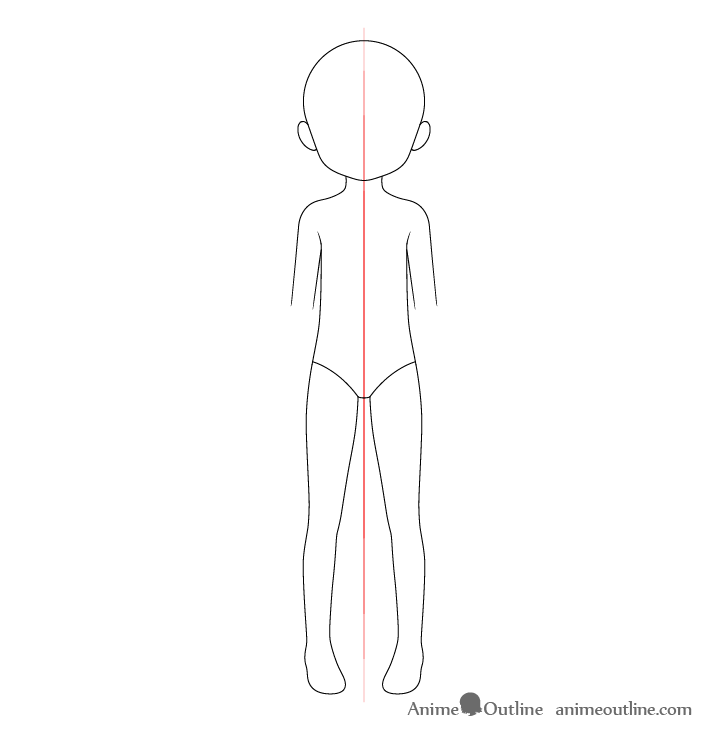
Going down from the shoulders add the upper part of the arms. You can make these pretty much even in width throughout their length.
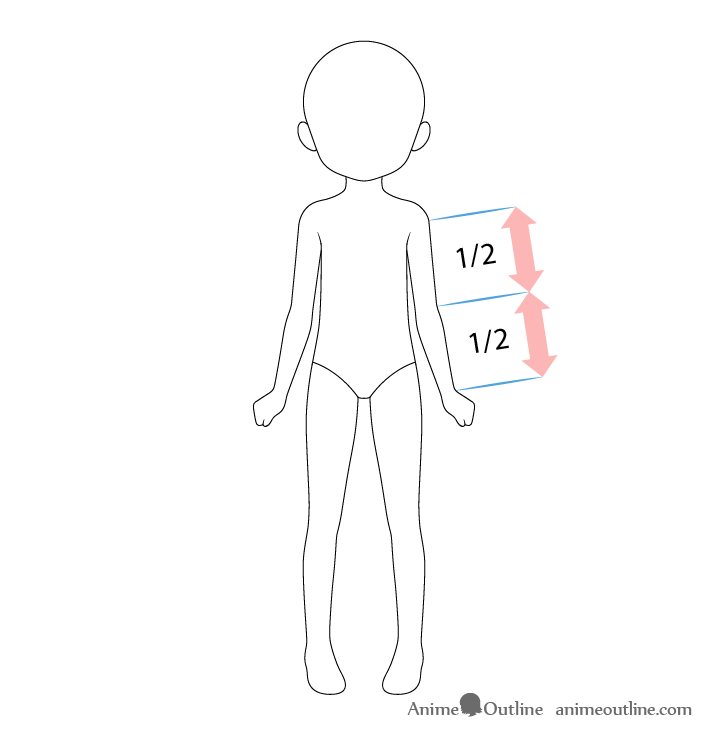
Proportion the arms so that their upper parts (starting from roughly the end of the curve of the shoulder) are about the same length as the lower parts (from the bend to the wrist). The overall length of each arm (down to the wrist) should be about the same as the length of the upper body.
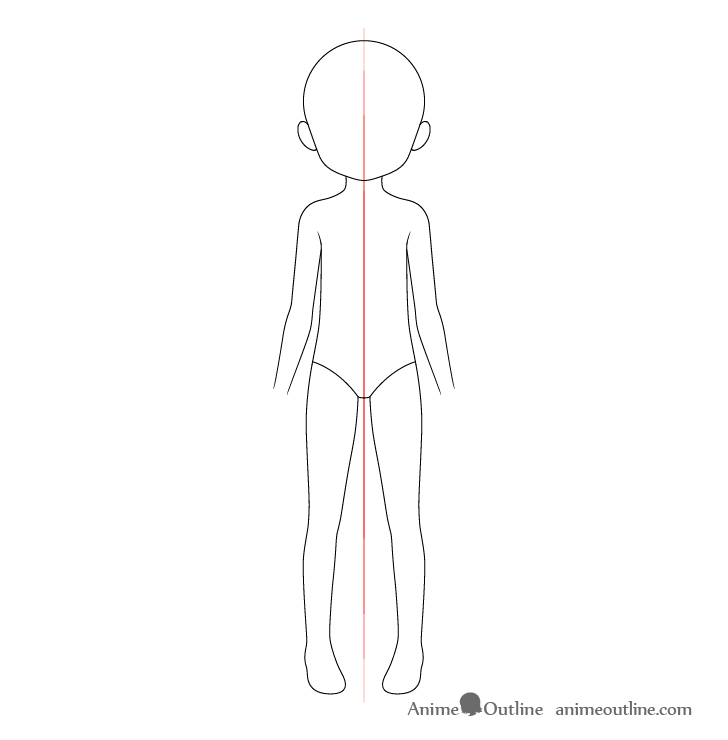
Draw the lower part of the arms similar to the lower part of the legs (first wider and then again narrower).
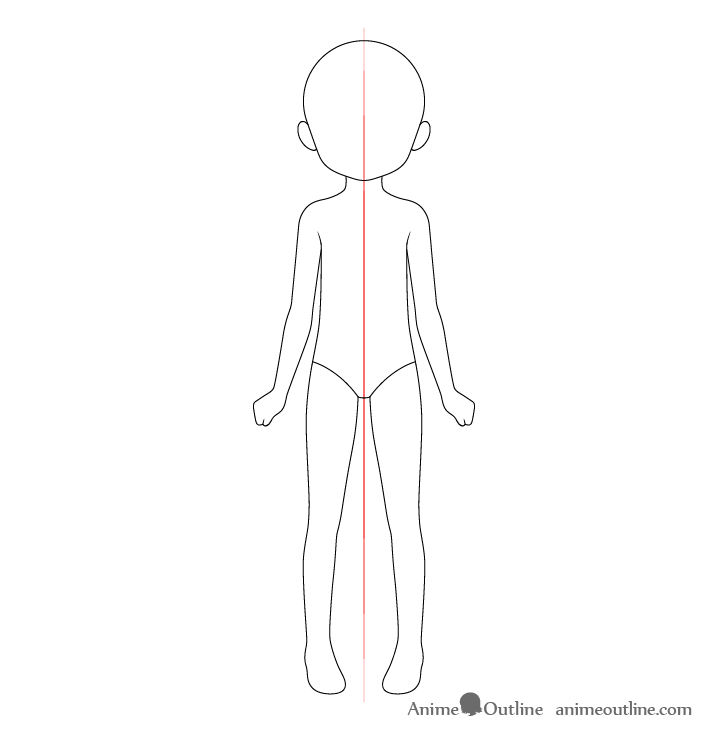
Draw the hands in fists that are raised slightly upwards. This will give the girl a more feminine pose. At this stage is the goal is to get their overall shapes, leave the details of the fingers for the next step.
Step 5 – Draw the Details of the Body
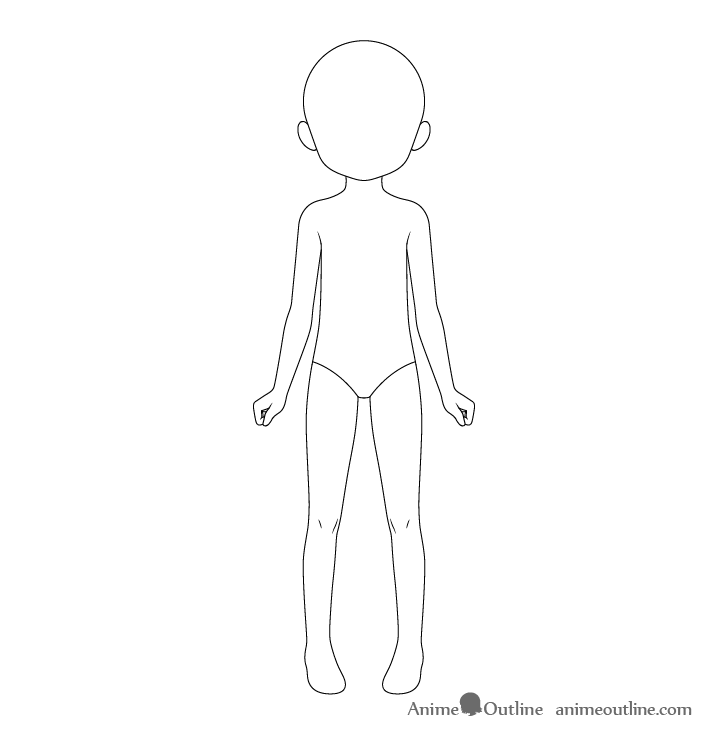
Add the smaller details of the body. In this case they will be the fingers (a already mentioned) and the knees.
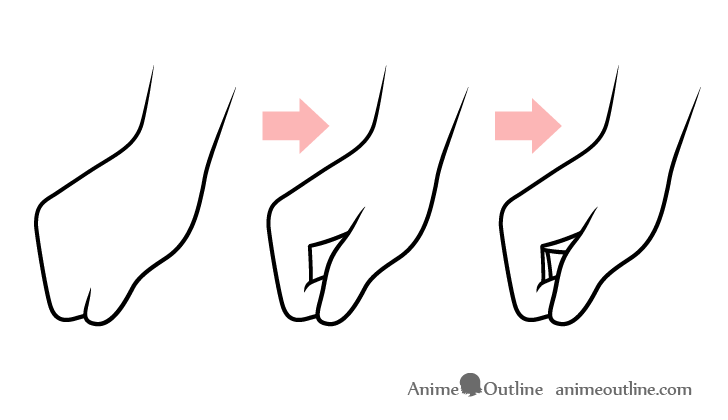
You can see a step by step breakdown of drawing the details of the hands above. First outline the thumb and index finger and then show just a bit of the other fingers and palm.
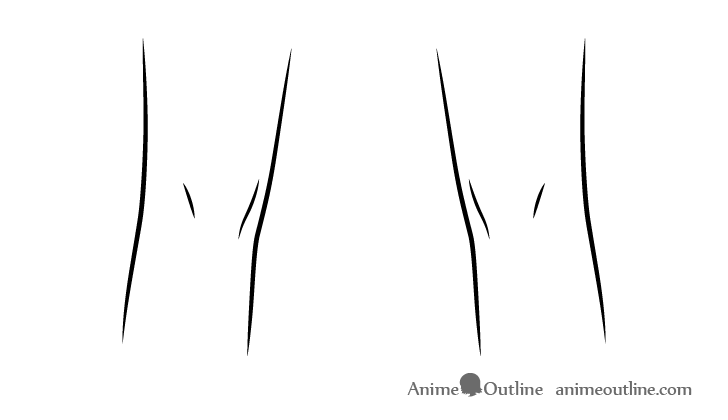
Give a hint of the knee bones with just a pair of lines for each leg as in the example.
Step 6 – Draw the Face
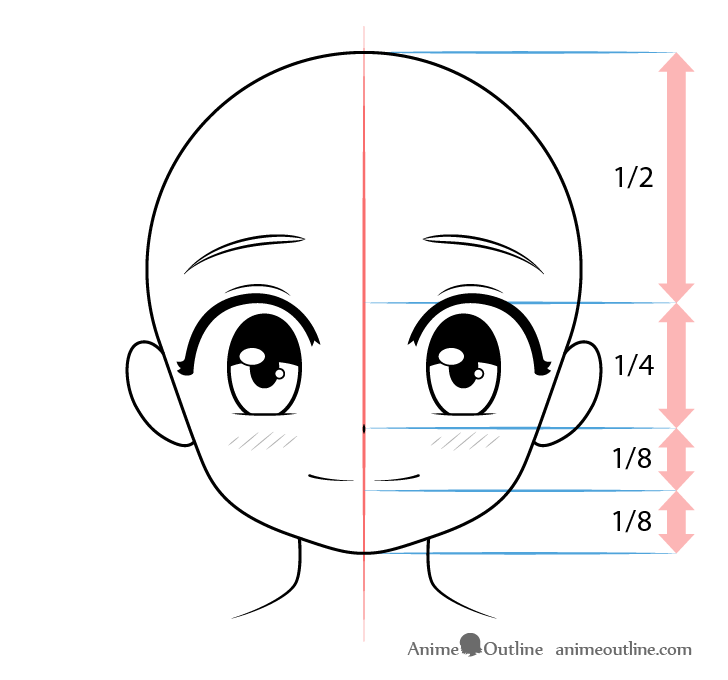
The facial features are very important in creating a young looking character. To show that this is a little girl draw the eyes very tall and wide open (kids generally have eyes bigger in relation their heads than adults). You can also draw the eyebrows with their inner ends slightly raised and the mouth smiling. This will give the little girl a bit of a surprised and happy look characteristic of a child (kids are generally easily exited).
Position the facial features as follows:
- Eyes – below the vertical halfway point of the head
- Eyelids – very slightly above the eyes
- Eyebrows – a little bit above the eyes
- Nose halfway between the upper part of the eyes and the bottom of the chin
- Mouth slightly above the halfway point between the nose and the chin
Draw a pair of highlights inside the eyes. Make one larger and one smaller for each eye. This is the light reflecting from the smooth/wet surface of the eyes. The larger reflection will generally be from the main light source and the smaller from a secondary one.
You can also add a little bit of blush below each of the eyes as a series of angled strokes. This will make the little girl look cuter and a little shy.
For more on drawing anime style blush see:
How to Draw Anime & Manga Blush in Different Ways
Once you have all of the facial features outlined you can darken the pupils, upper parts of the irises and the eyelashes (leave the highlights white).
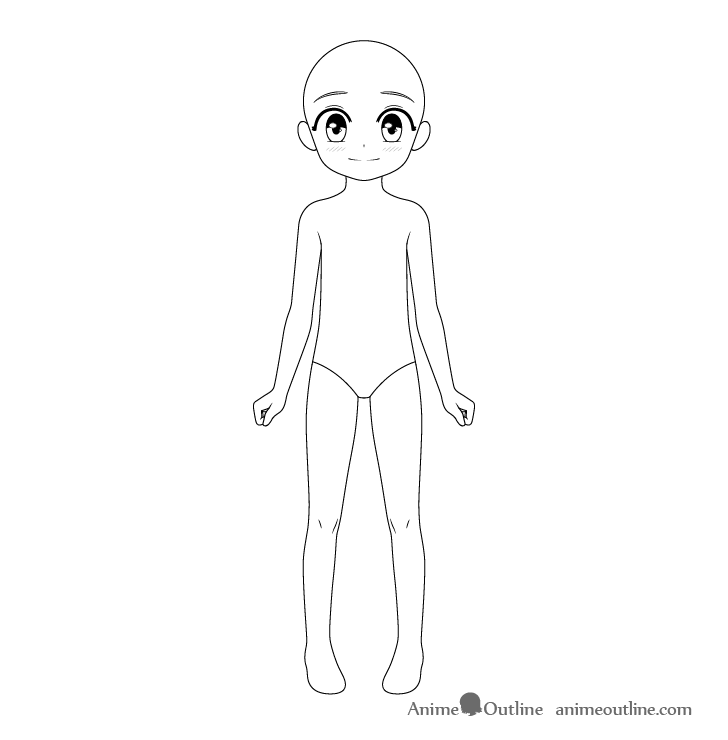
You can see the face with the full body in the example above.
Step 7 – Draw the Hair
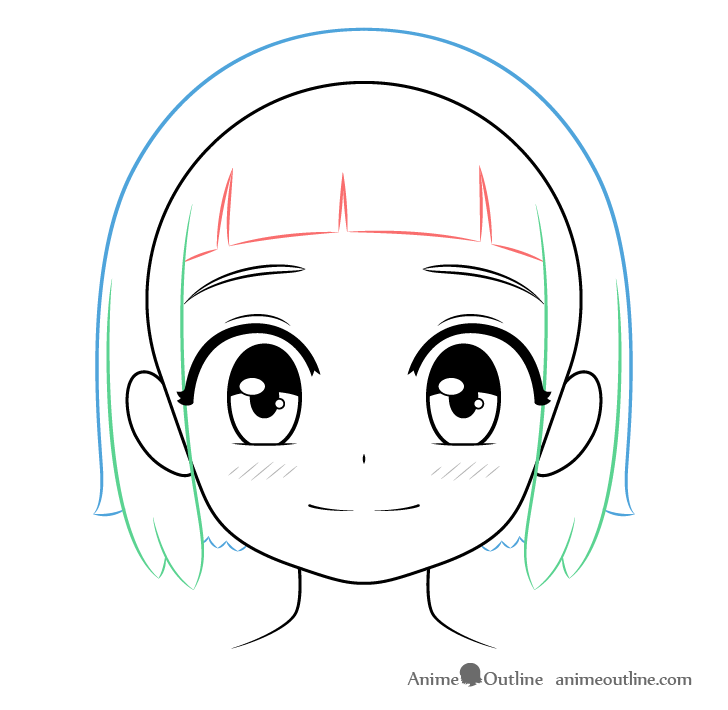
In this case the girl will have a fairly short hairstyle.
When drawing the hair it can be though of as three separate sections:
- Front (red) – the hair along the forehead,
- Sides (green) – the hair along the sides of the face
- Top/back (blue) – the hair along the top and back of the head.
First draw the front section, next the sides and finally the back/top.
For more on this approach see:
How to Draw Anime and Manga Hair – Female
For the forehead hair (red) you can first draw a solid line and then add some splits into it erasing little bits of it in between them. This will create a “trimmed” looking hair effect. Draw the hair along the sides (green) slightly curving around the face with splits on the end.
Draw the hair along the top (blue) somewhat following the shape of the head and give it a pair of little clumps on the sides as it goes down. You can then add a series of little clumps between the face and the side section for the lower background hair (again blue).
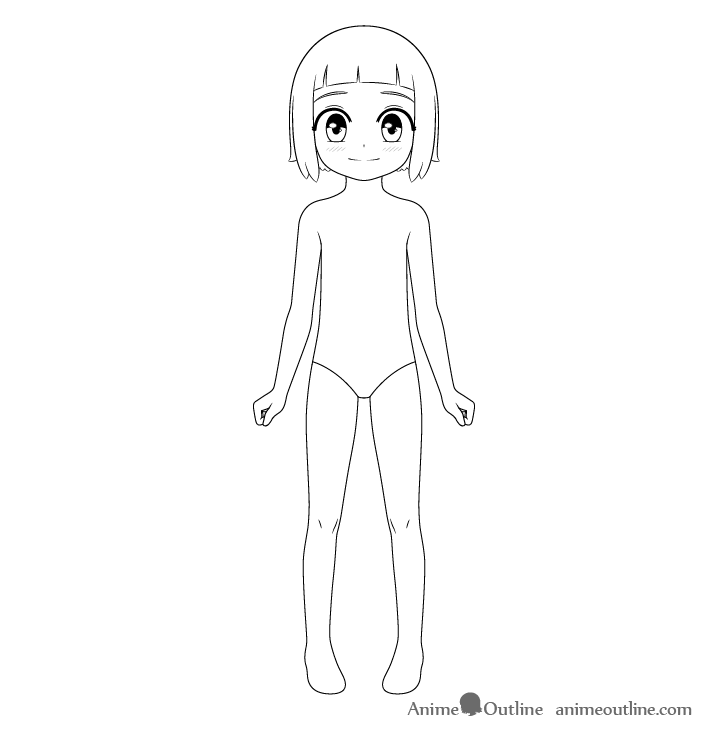
Once you have all of the different hair section outlined erase the parts of the head covered by them so that you have a clean drawing similar to the above.
Step 8 – Draw the Clothes
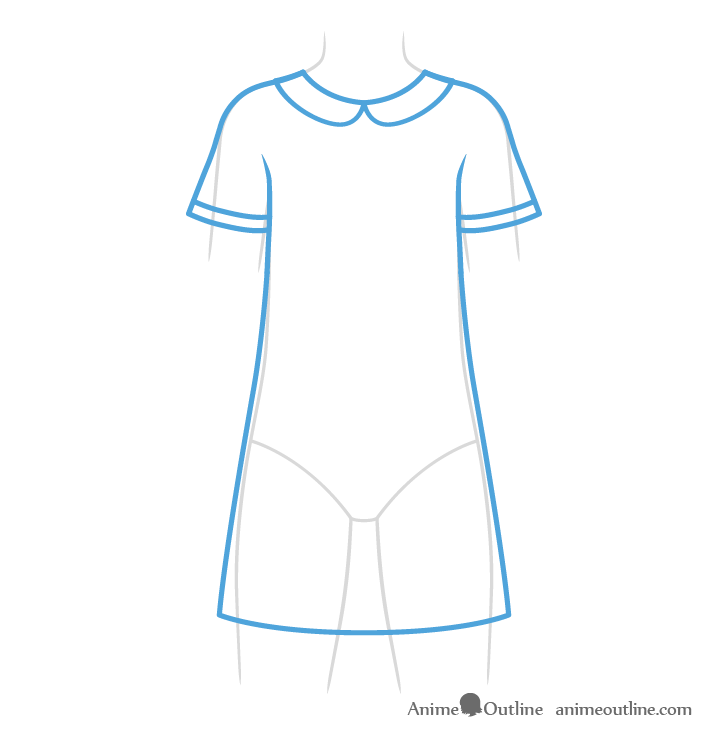
For the little girl’s clothes draw a simple dress (the kind kids might wear) right over top of the body’s outline.
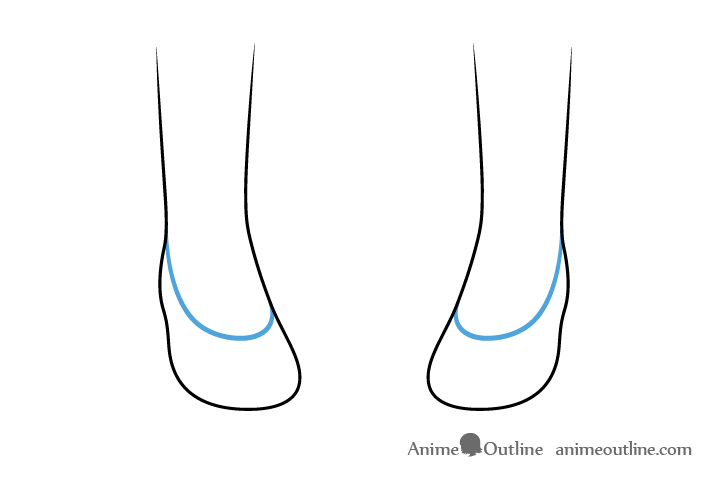
Afterwards outline the openings of the shoes as shown above.
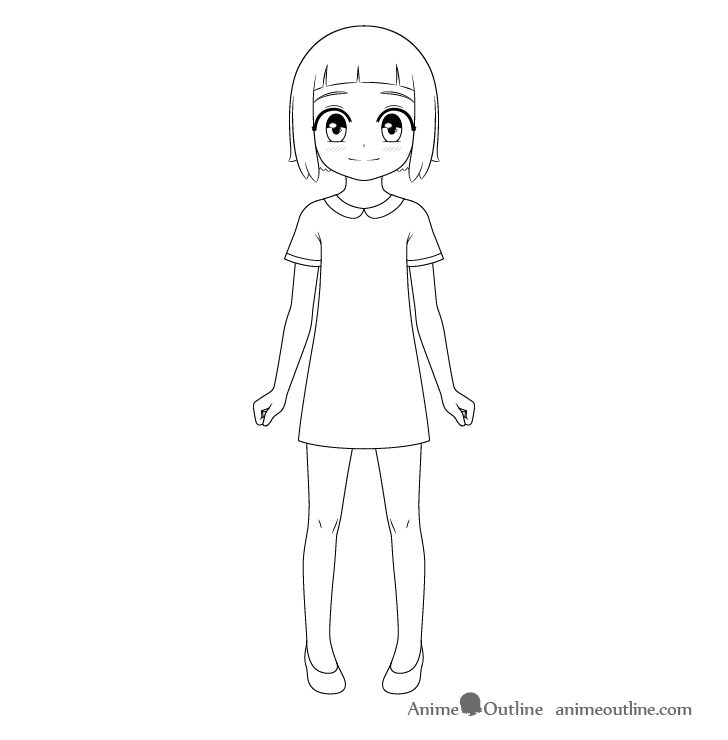
Erase the parts of the body overlapped by the dress after you have it drawn out.
Step 9 – Add Shading or Color
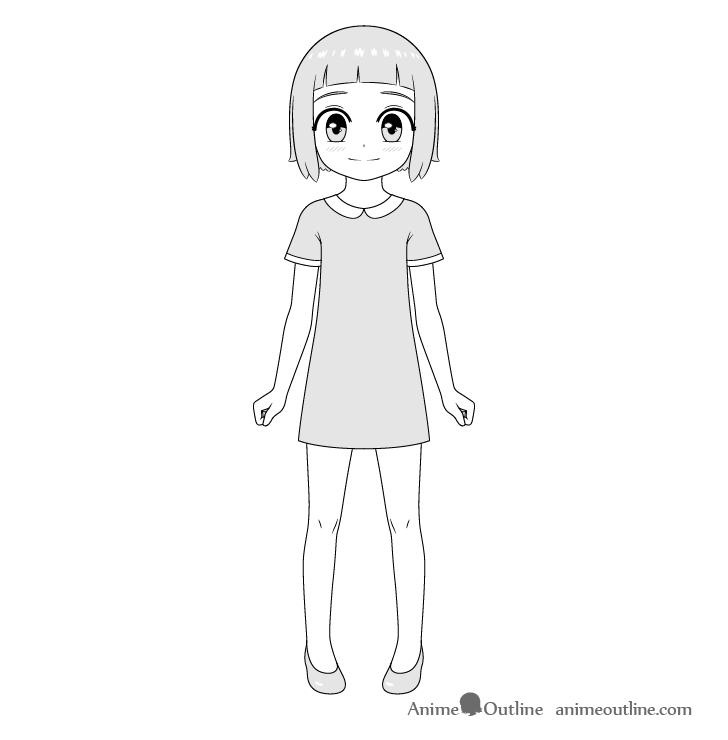
Shade or color the following parts of the drawing:
- Hair
- Eyebrows
- Irises
- Dress
- Shoes
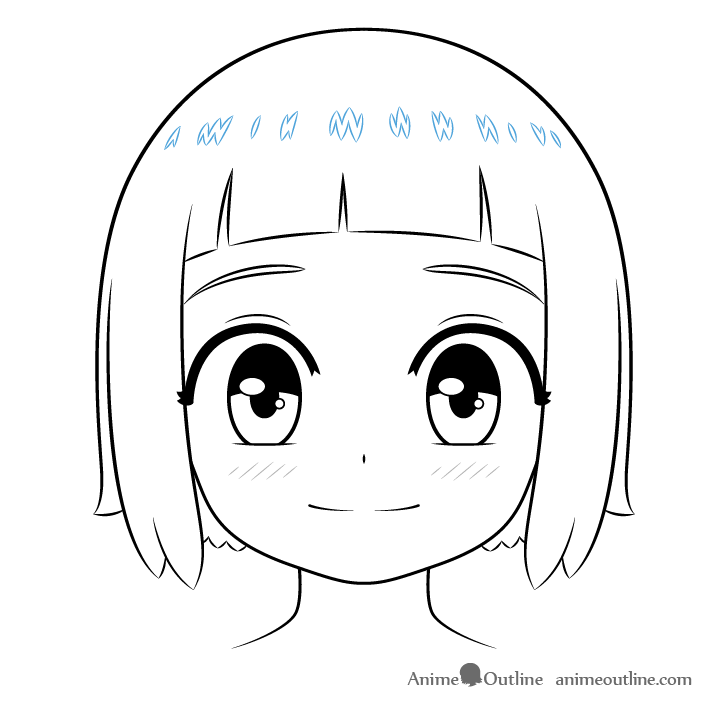
When shading or coloring leave a little white streak of highlights in the hair (light reflecting from it). You can either outline these beforehand or create them as you shade.
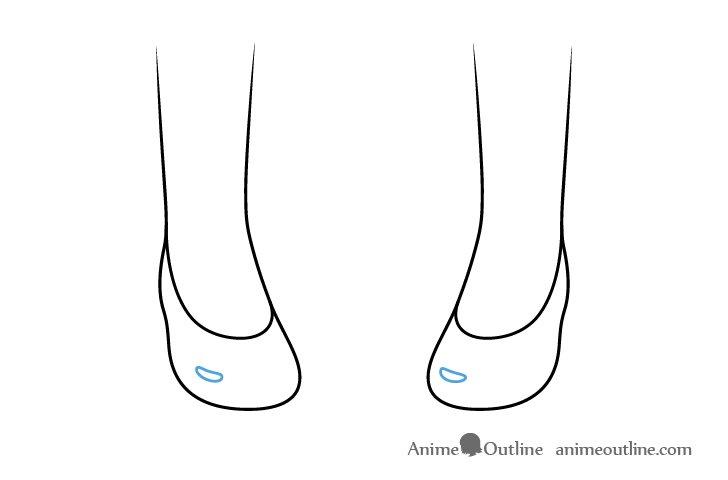
Also leave a small highlight on each of the shoes (to help show that they’re shiny).
Step 10 – Add the Shadows
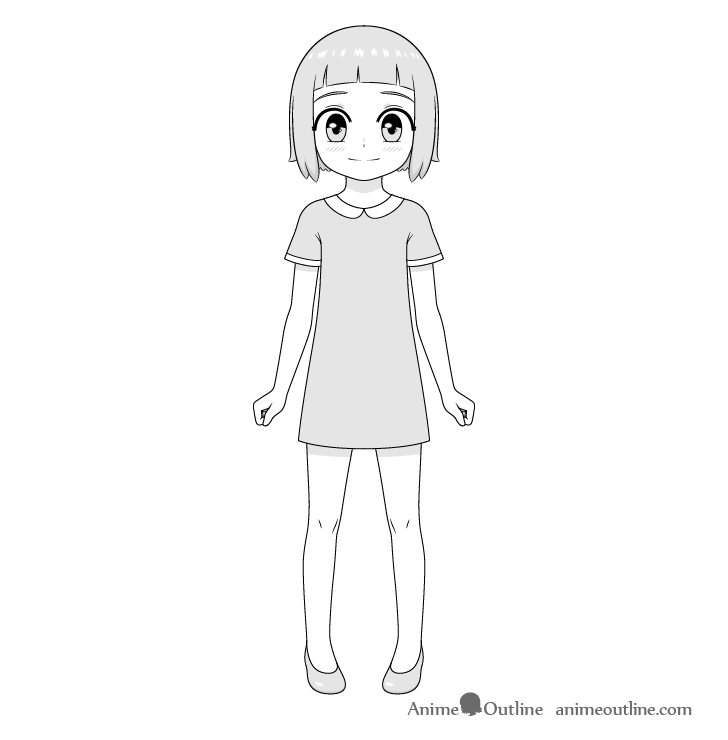
Finally add some shadows to finish the drawing. To keep the tutorial simple these will be kept to a minimum. They will also be placed in a fairly generic way (as though the girl is outside during daytime or in a well lit room). In these kinds of setups most of the light is generally coming from above and the shadows are cast downwards.
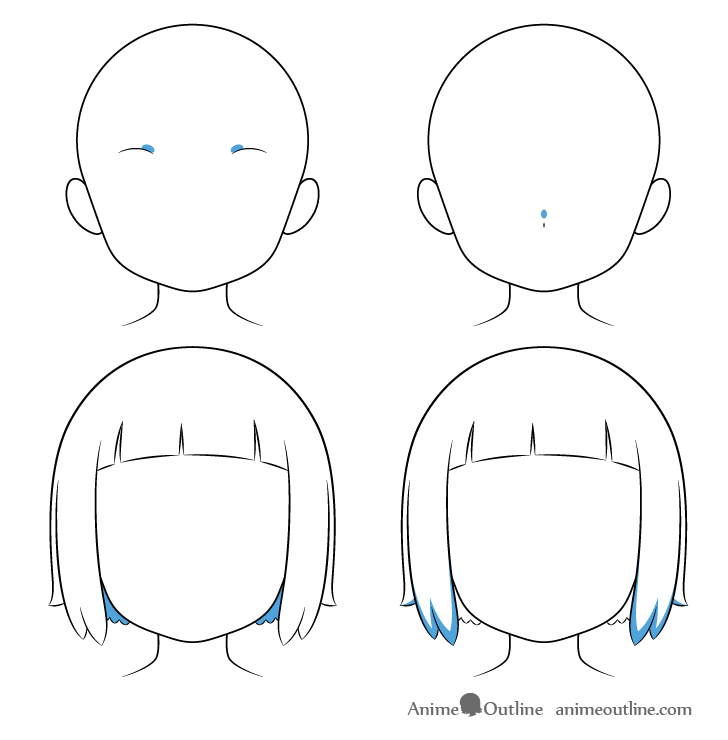
For the face add shadows in the follwing places (shown in blue above):
- Tiny shadows above the eyelids
- A tiny shadow above the nose
- Fully shade the background parts of the the hair between the neck and side sections
- Shadows along the bottoms of the side sections of the hair and the bottom/back hair tips next to them
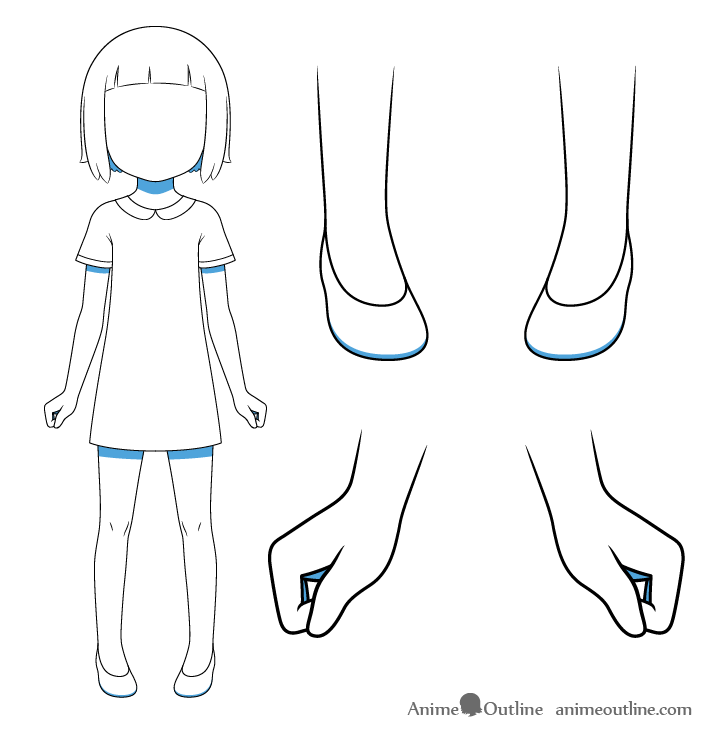
For the body add the shadows as follows (shown in blue above):
- A shadow below the head on the neck (cast by the head)
- A pair of shadows on the arms (cast by the sleeves)
- A pair of shadows on inner parts of the hands (barely visible)
- A pair of shadows on the legs (cast by the dress)
- A pair of thin shadow along the bottoms of the shoes
Conclusion
As mentioned at the start of the tutorial, due to the anime and manga style many characters appear younger then their actual age. For this reason drawing kids can sometimes be a bit of a challenge. To show how it can be done the tutorial gives the proportions and facial feature placement for creating a drawing of a little girl in the anime style.
Hopefully the provided examples and instructions have helped you gain a better understanding of how to draw a young looking character.
For more similar tutorials also see the following:
- How to Draw an Anime Boy Full Body Step by Step
- How to Draw a Cute Girl Step by Step
- How to Draw Anime Face Side View (With Proportions)
- How to Draw Anime Cat Girl Step by Step (Pictures & Video)
- How to Draw an Anime Face (Structure & Proportions)

