
How to Draw Anime “Hime Cut” Hairstyle
This tutorial shows how to draw an anime “Hime Cut” hairstyle (trimmed hair). It consists of six steps with illustrated examples as well as a line by line drawing video.
A “Hime Cut” or “Princess Cut” is one of the most popular anime and manga hairstyles. It usually consists of straight, long and neatly combed hair with trimmed ends. This guide is dedicated to this particular hairstyle and breaks the drawing process down into easy to understand steps.
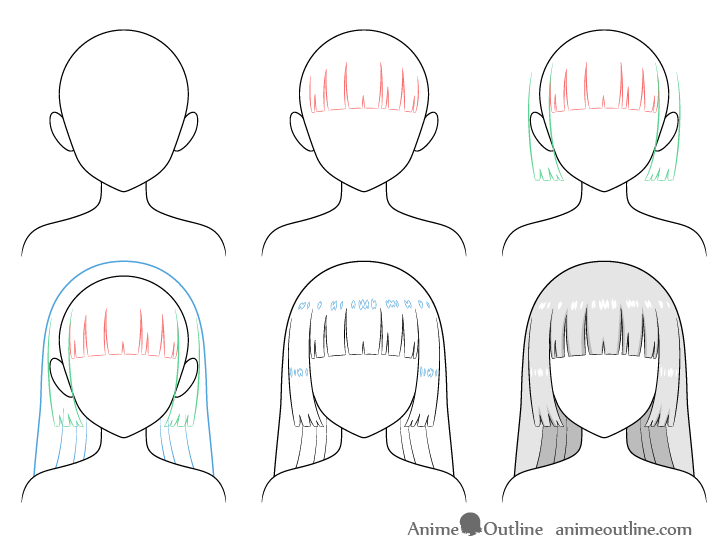
You can see a preview of the main stages of the tutorial in the image above. There are also additional examples provided below to make it even easier to follow along.
Unless drawing digitally it’s recommended that you use a pencil and start with light and easy to erase lines. You can darken them before shading.
For drawing more natural looking long hair see:
Easy Way to Draw Long Anime Hair (6 Steps)
Above is a video of the “Hime Cut” drawing. You can watch it for line by line examples of how to draw this particular hairstyle and then read the instructions and explanations below.
If you like this video tutorial please be sure to leave a like and to subscribe to the AnimeOutline channel. Your likes and subscriptions are VERY helpful in insuring the tutorials are seen by more people.
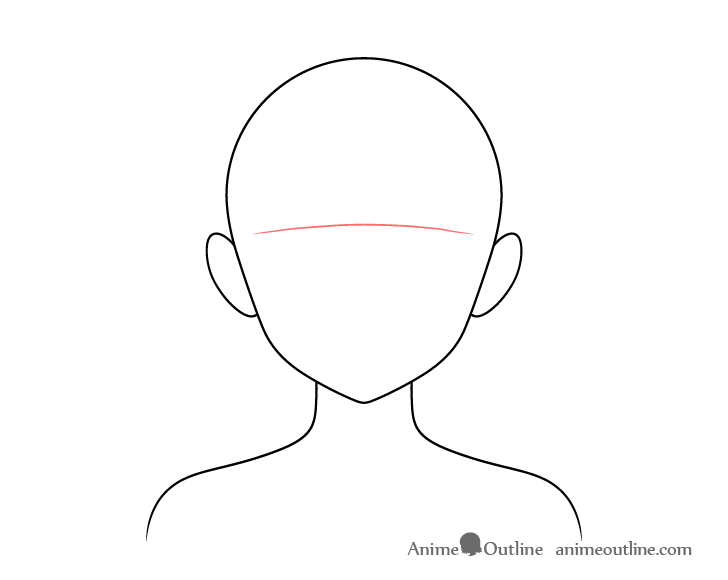
Step 1 – Make a Drawing of the Head & Shoulders

Before drawing the “Hime Cut” you will of course want to create a simple drawing of the head as well as a little bit of the body (down to the shoulders). As the main focus of this tutorial is on the hairstyle it will not go into the details of drawing these but you can use the example above for reference.
Step 2 – Draw the Hair Along the Forehead
To make the drawing process easier to manga this tutorial splits the hair into three parts. The front, sides and top/back. In the examples these are shown in red, green and blue to make it easier to distinguish between them. You can however simply draw everything in one color.
For more on this drawing approach read:
How to Draw Anime and Manga Hair – Female
Begin the drawing of the “Hime Cut” with it’s front section. As this hairstyle is usually neatly trimmed along the forehead you can draw a curved line to act as a guide for the hair clumps.
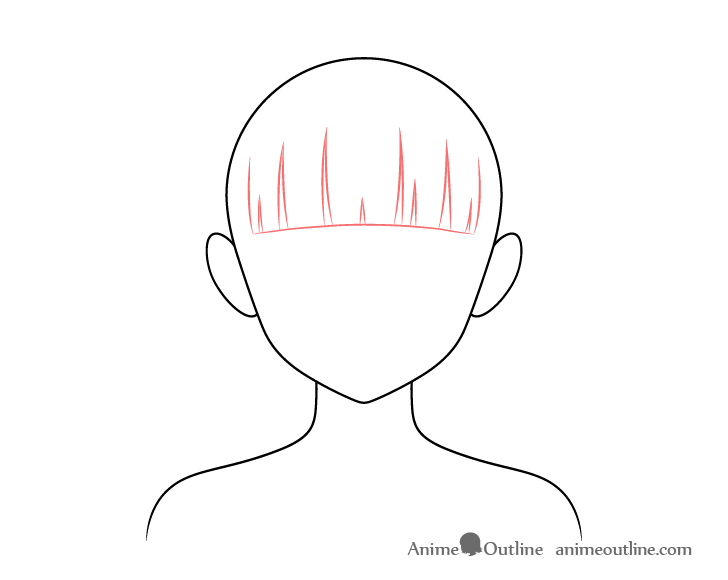
Next draw some splits coming up from the guide line. Make these slightly different in shape, size and length but at the same time try and distribute them fairly evenly throughout the forehead.
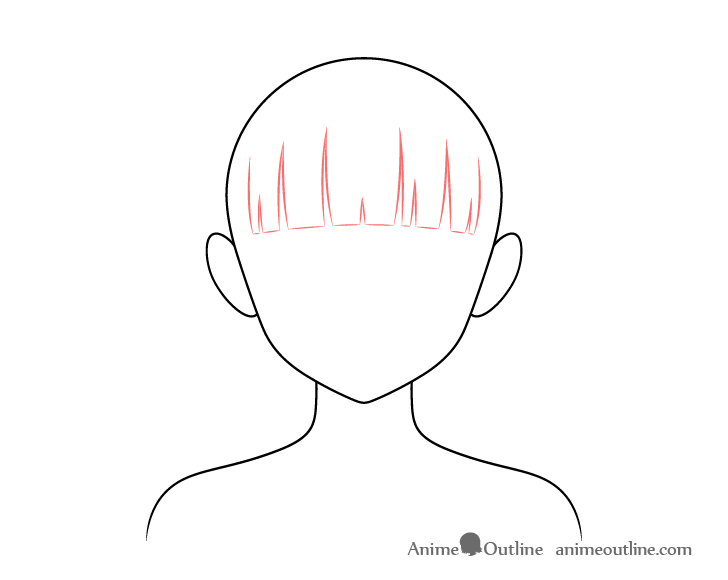
Once you have the splits in place and are happy with the way they look you can erase the the parts of the guide line between them to create trimmed looking hair clumps.
Step 3 – Draw the Hair Along the Sides of the Head
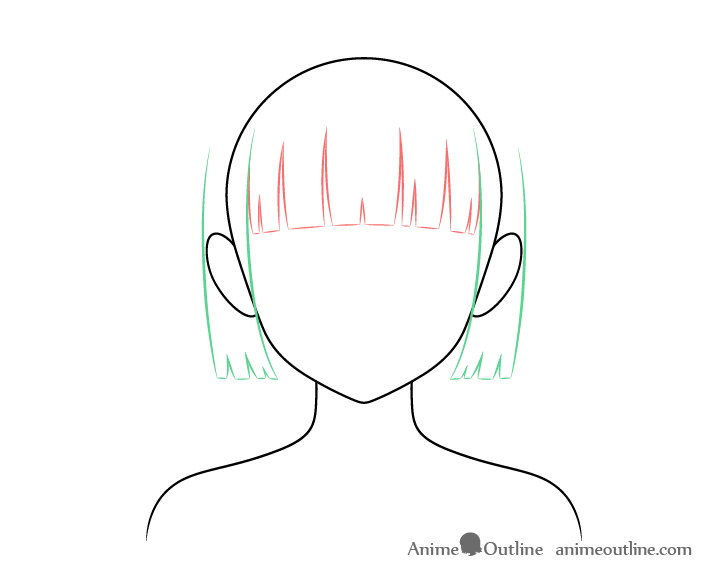
Add the sides sections of the hair slightly curving around the head and make them wider as they go down. Draw their bottoms ends trimmed off similar to those along the forehead.
Step 4 – Draw the Hair on Top & at the Back of the Head
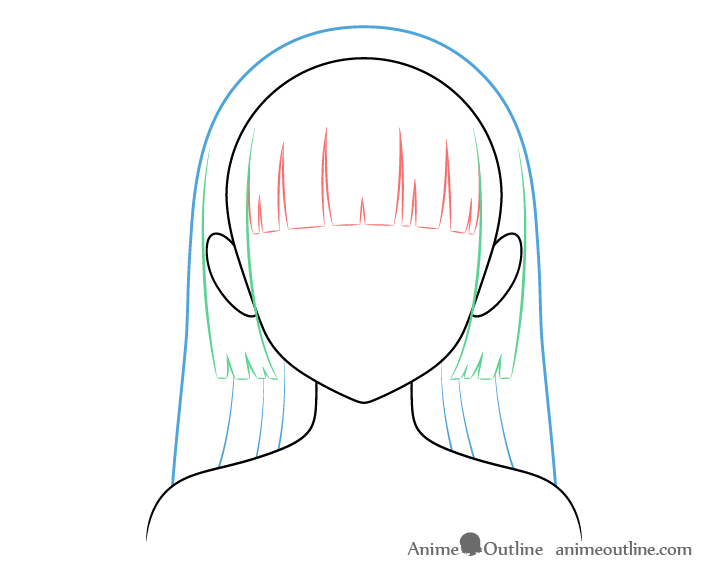
Finally draw the top/background part of the hair. This should first follow the shape of the head (some distance away from it as hair has volume) and then get wider as it runs down to the shoulders. Next, add a few folds to the lower background area (around the neck) to finish this part of the hair.
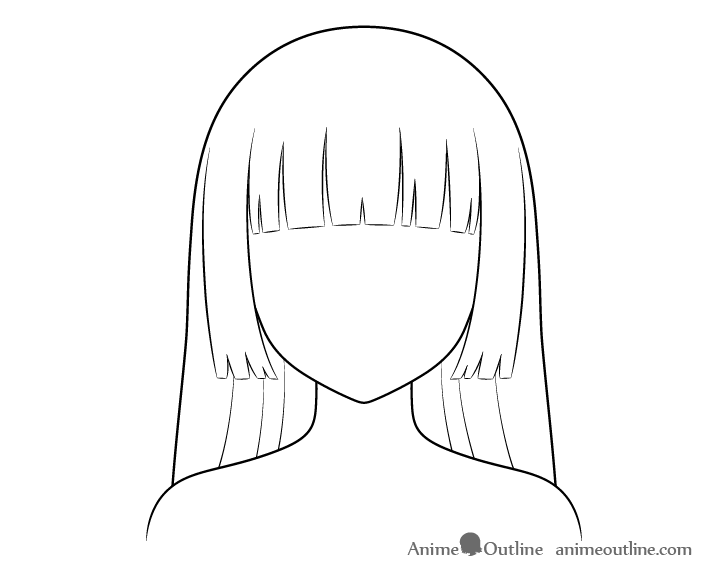
Once all of the hair sections are outlined erase the parts of the head that are covered by them and trace over your drawing with darker lines.
Step 5 – Outline the Highlights
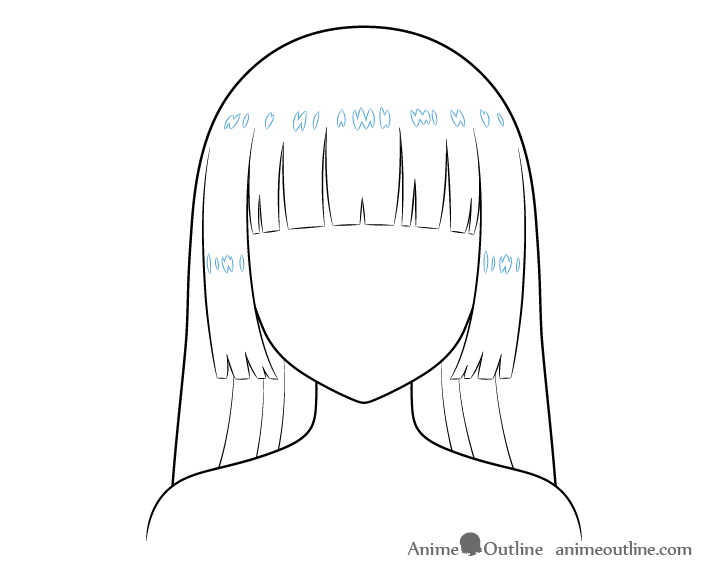
Before shading you can outlined some hair highlights (light reflecting from the hair’s smooth surface). You can place these as shown in the example.
Alternatively you can also create them right as you shade or color. If drawing digitally you can add these over top of the shading/color layers. You can also do something similar with a white correction pen if drawing on paper.
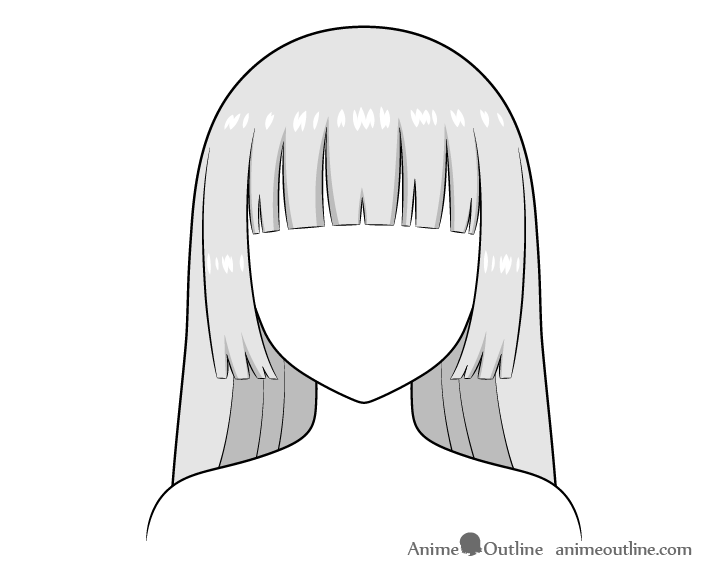
Step 6 – Add Shading to Finish the “Hime Cut” Drawing
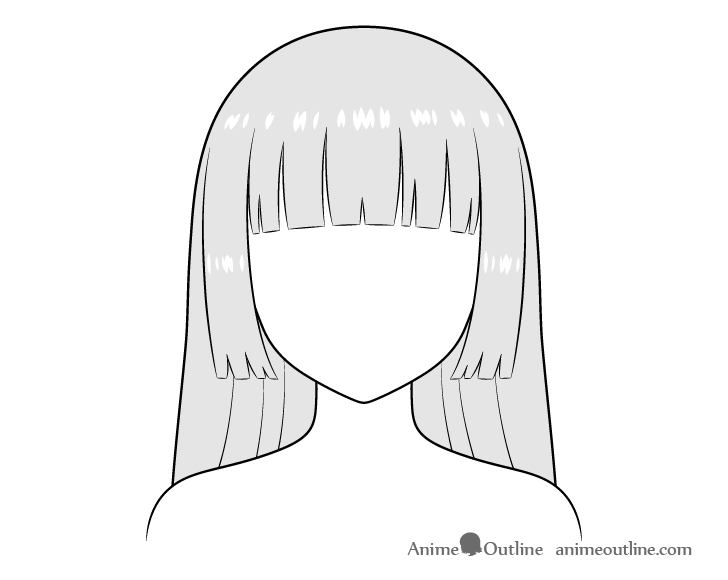
First fully shade or color the hair (leaving the highlights white) as shown above.
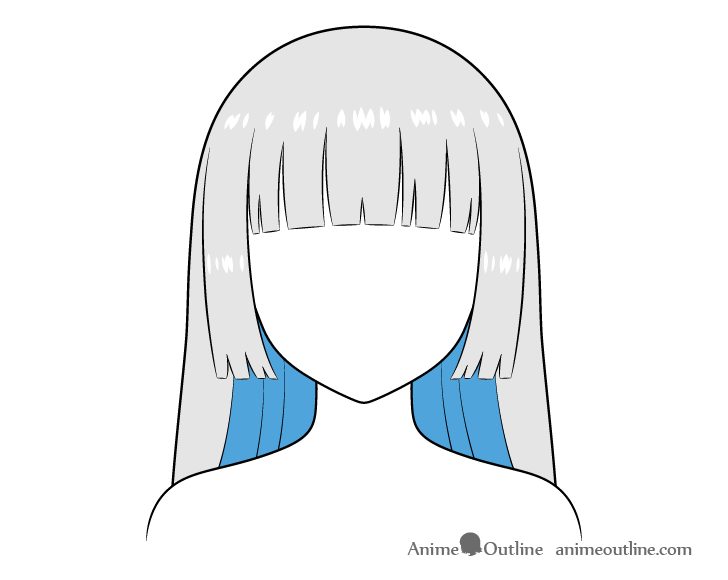
In this example the shadows will be placed as they tend to appear in more common lighting conditions (outdoors during daytime or in a well lit room indoors). Also please note that each section is first shown in blue just to make it easier to see.
Begin by darkening the inner background part of the hair (around the neck).
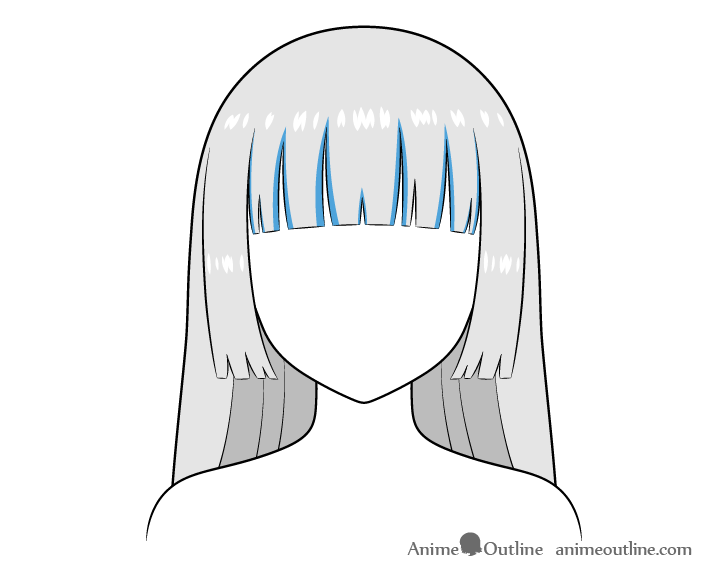
Next add some shadows around the splits along the forehead.
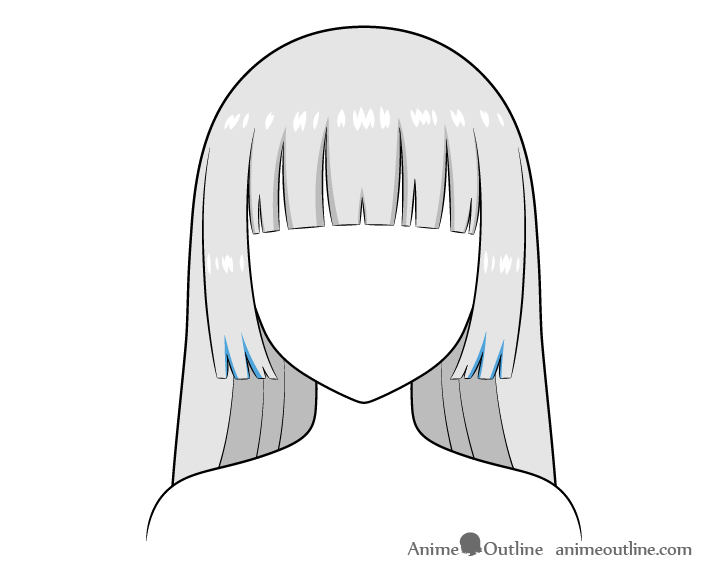
Finally add a few shadows around the splits on the sides.
With the last set of shadows added you should have a finished drawing of the “Hime Cut”.
Conclusion
The “Hime Cut” or “Princess Cut” hairstyle is one that is very popular in both anime and manga. As mentioned at the start of the tutorial, it generally consists of long, straight and neatly combed/trimmed hair. Drawing this hairstyle is not particularly difficult, especially if you do it using the section by section approach outlined in this guide. Hopefully you’ve not had too much trouble following along.
If you’ve enjoyed this tutorial you may also like the following:
- How to Draw Anime Hair Over One Eye
- How to Draw Anime Pigtails Hair
- How to Draw Messy Anime Hair
- How to Draw Curly Anime Hair
- How to Draw Anime Characters Tutorial
- How to Draw an Anime Little Girl (Entire Body)
- How to Draw Anime Face Side View (With Proportions)


