
How to Draw an Anime Wizard Girl Step by Step
This tutorial shows how to draw a an anime wizard girl, a character that looks like a spell caster out of a fantasy themed show or manga.
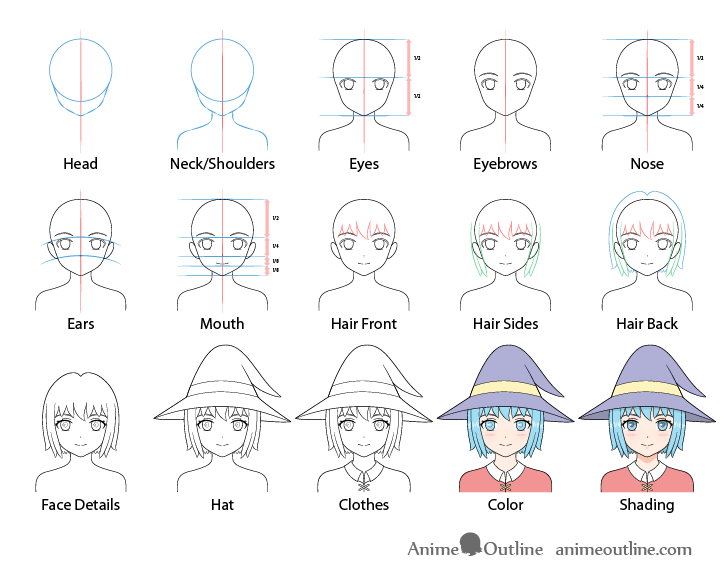
You can see a preview of the main stages of the drawing process in the image above.
Wizards, sorcerers and characters with magic powers are fairly common in fantasy themed anime and manga. While their appearances can vary this tutorial will focus on creating a wizard girl with the type of looks that is one of the most popular. She will have a friendly and perhaps a slightly shy appearance that can be appropriate for a young adventurer who is just starting out. She will also have clothes and a color palette suitable for this character type.
Unless drawing digitally be sure to start the tutorial in pencil and to keep your lines light as you will need to do some erasing in a few of the steps. You can darken them before coloring once you feel that everything is in the right place.
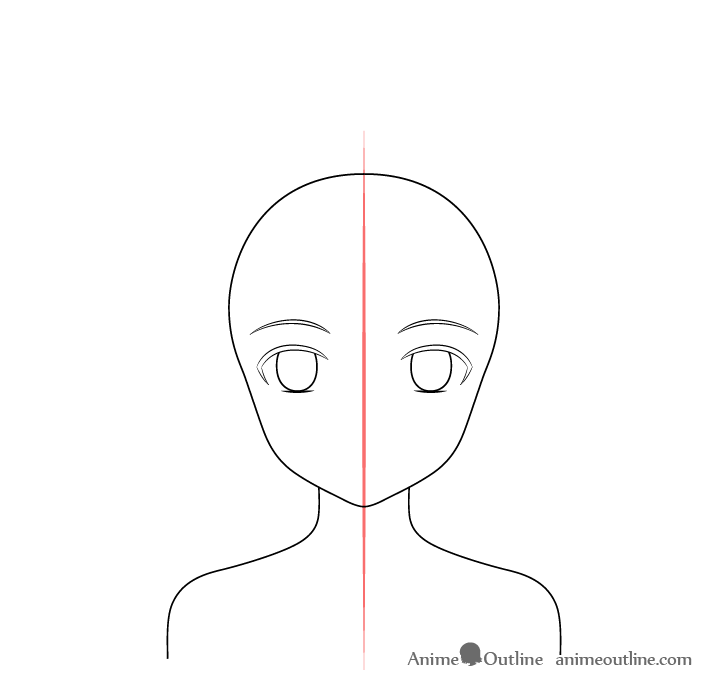
Step 1 – Draw the Head of the Wizard Girl
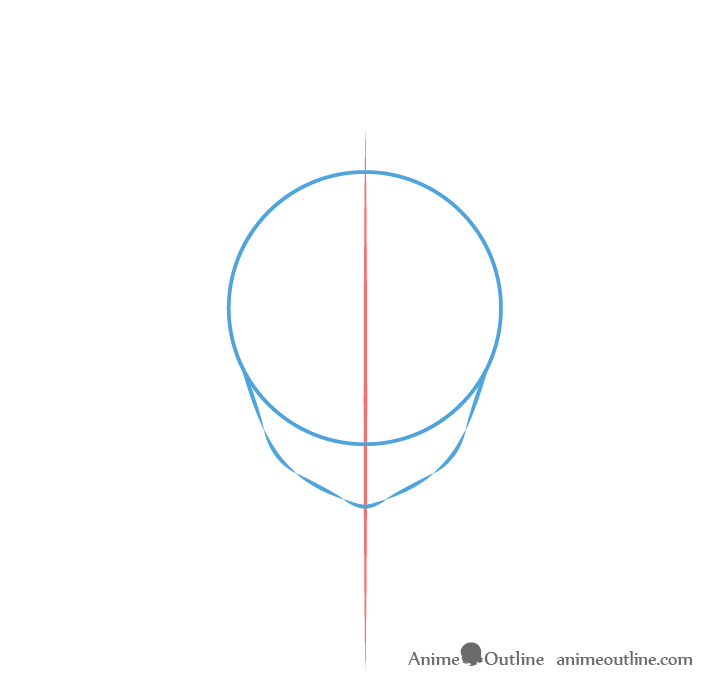
Begin by making a straight vertical line through the middle of your page (or drawing area). The purpose of this is to act as a guide to help insure that the drawing doesn’t get skewed and to see if both sides are relatively even in width.
Towards the upper part of the line draw a circle to represent the top of the head. Be sure to leave quite a bit of room above it for the fairly tall wizard hat.
Going down from the circle add the bottom portion of the head. Make it’s shape as shown with the line segments above. On each side of the head you will first want to draw a straight line angled towards the center of the head, followed by a curve (for the corresponding cheek) followed by another straight line angled even more towards the center of the face. Finally there will be a small curve for the bottom of the chin.
Please note that you do not necessarily need to create the outline in segments. If you can get the correct shape of one side of the face with one continuous line without stopping or pulling the pencil away form the paper you can definitely draw that way.
Step 2 – Draw the Neck & Shoulders
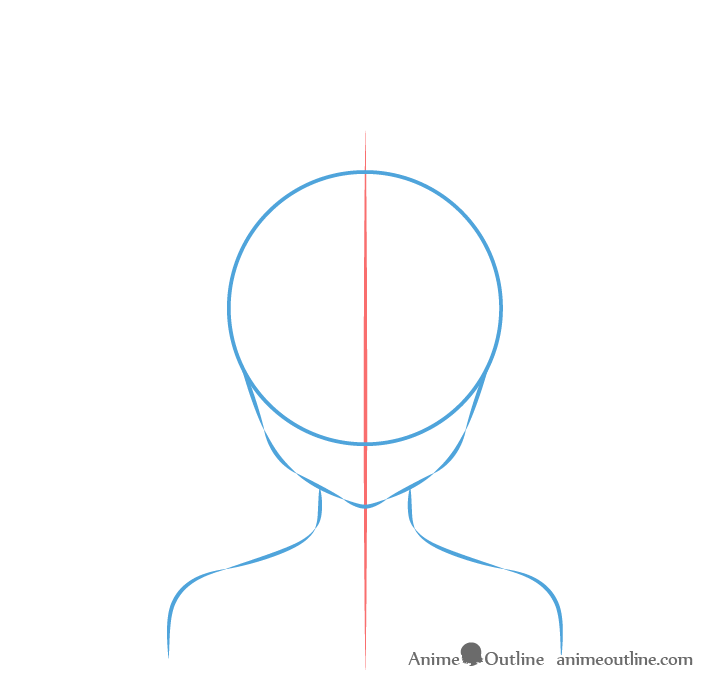
Going down from the bottom of the head add a fairly slender neck followed by a bit of the shoulders.
You can again see a general breakdown of their shapes shown with the line segments in the example above.
Step 3 – Draw the Eyes
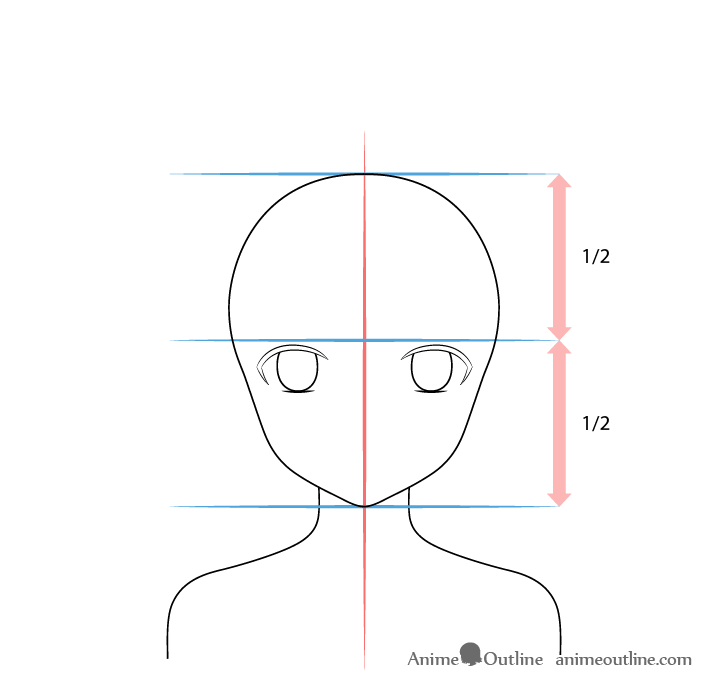
To place the eyes on the head you can horizontally divide it in half and position them just slightly below that halfway point. To get a friendlier looking character make the eyes fairly tall with large irises that fill up a good portion of each eye.
At this stage simply add a basic outline of the eyelashes (to set the shape of the eyes).
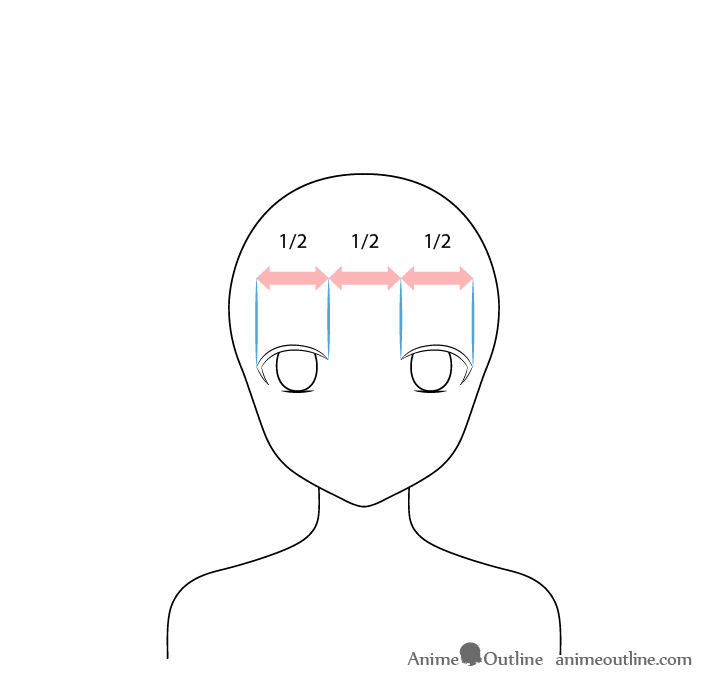
Space the eyes far enough apart so that you can fit another eye in between them.
Step 4 – Draw the Eyebrows
Slightly above the eyes add the eyebrows. You can define each one with a pair of curves. Make each one slightly thicker towards it’s inner end (towards the middle of the face).
Step 5 – Draw the Nose
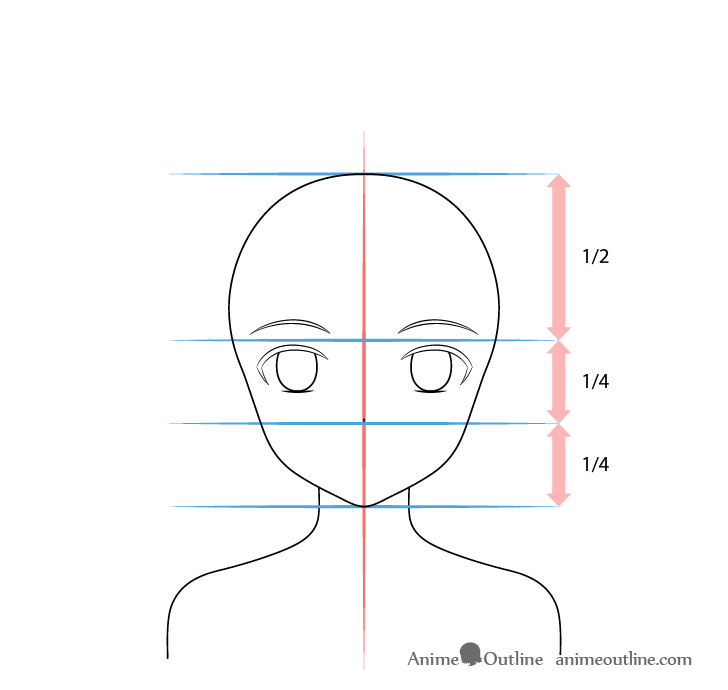
Place the nose right above the horizontal halfway point and of the head and the bottom of the chin. Draw it as a tiny vertical dash.
Step 6 – Draw the Ears
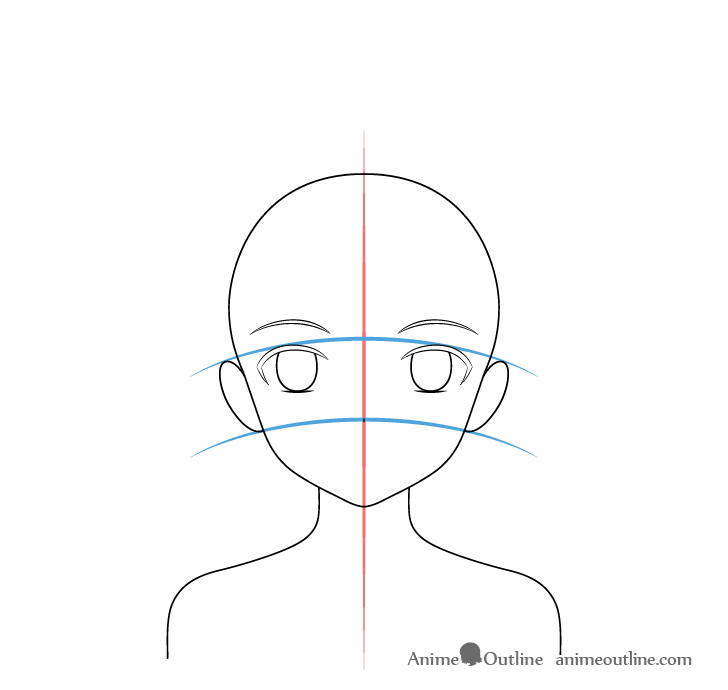
Place the ears so that their tops are slightly below the eyes and their bottoms slightly below the nose.
This part of the tutorial is mainly for reference in case you want to draw a different hairstyle as the ears will be fully covered by the hair in later steps.
Step 7 – Draw the Mouth
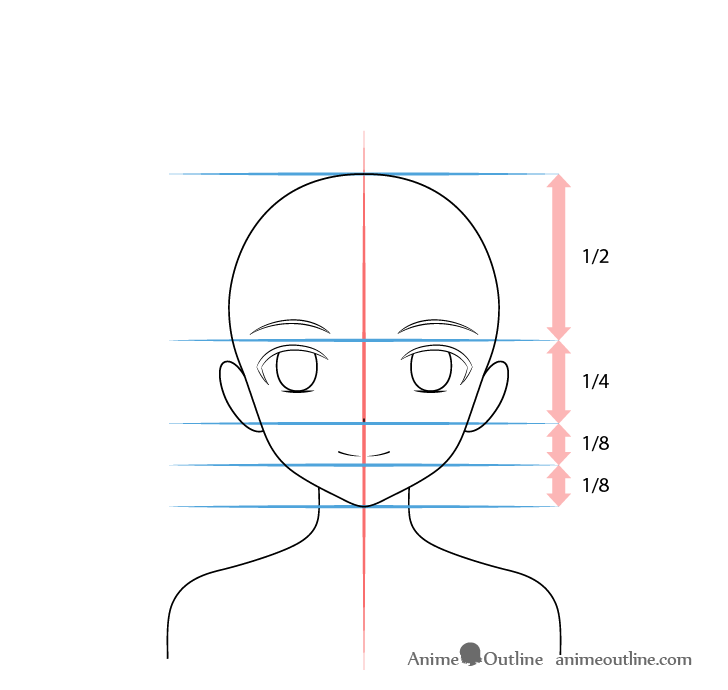
Finally add the mouth as a broken up curve that is slightly above the halfway point between the nose and the chin.
In this case the wizard girl will have a light smile so the mouth will be drawn a little winder than it would be otherwise.
Step 8 – Draw the Front of the Hair
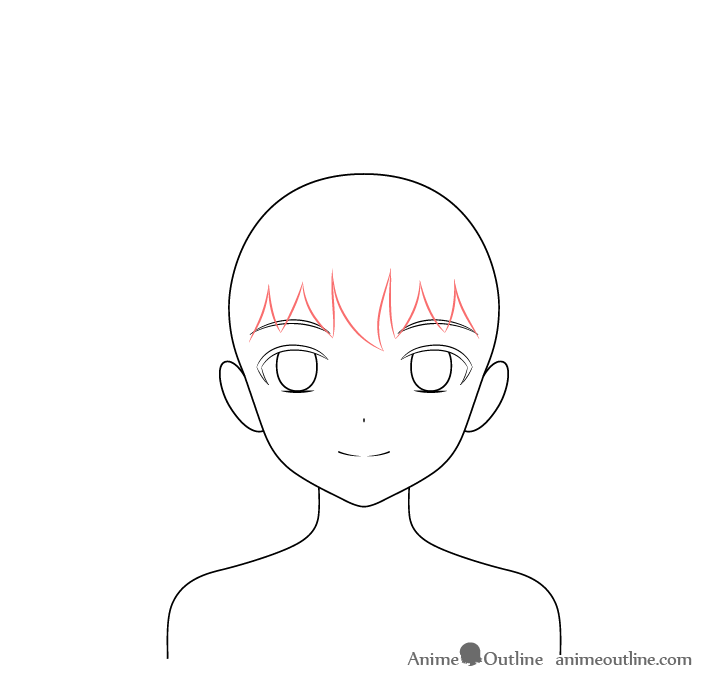
While the character will be wearing a hat a large part of the hair will still be visible. A good way to add the hair is by splitting it into three sections. The front, sides and back/top. You can read more about this approach and see examples of other hairstyles in the following tutorials:
Star by drawing the front section of the hair along the forehead. In this case it will be a series of fairly large clumps that curve in slightly different directions (as is very typical of anime/manga hair).
Step 9 – Draw the Sides of the Hair
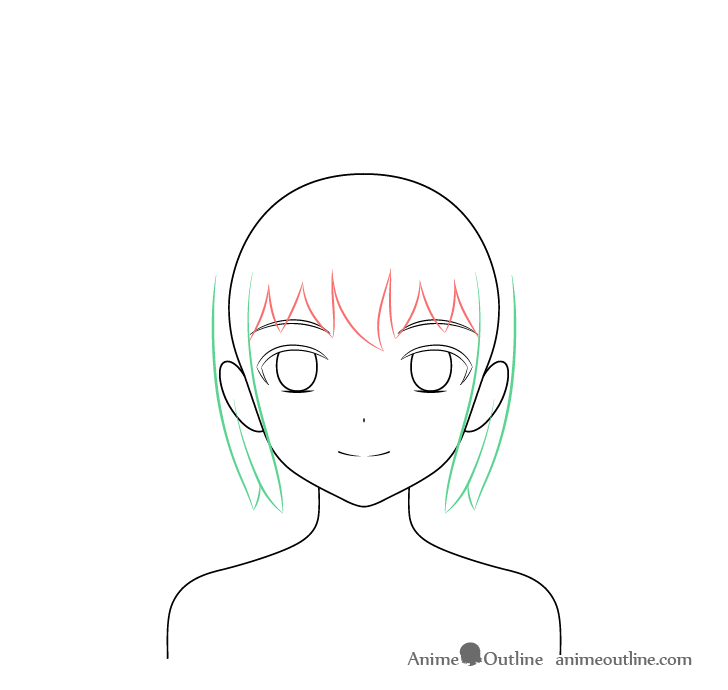
Add the hair along the sides curving slightly inwards (towards the center of the head) as it goes down. You can give each part a split as the bottom that transitions into a fold that goes up.
Step 10 – Draw the Top/Back of the Hair
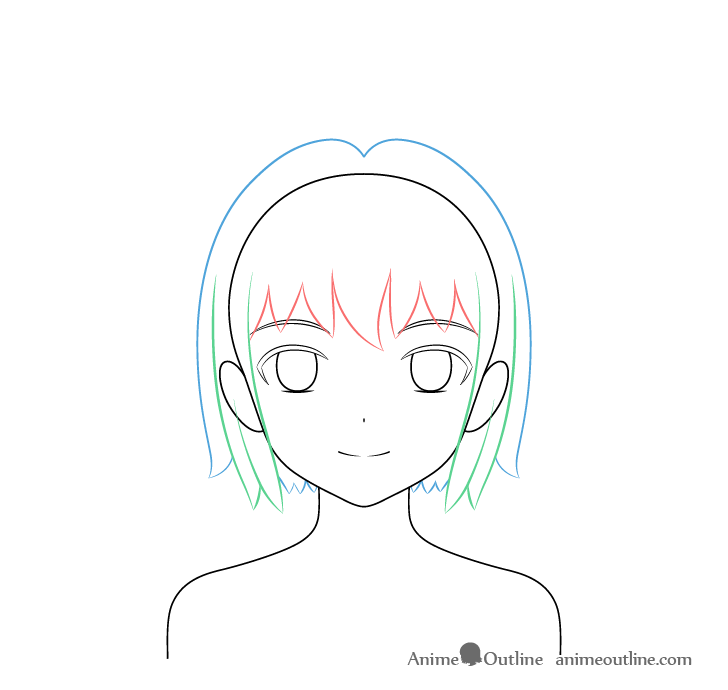
Add the back/top part of the hair starting from a split at the top/middle of the head and going down in smooth curves that somewhat follow the the head’s shape. You can then add a pair of outwards curving clumps on the bottoms ends of each of these lines.
Next add some smaller clumps around the neck for the hair in the back of the head.
Once you have all parts of the hair outlined you can erase the areas of the head that it covers so that you have a drawing similar to the above.
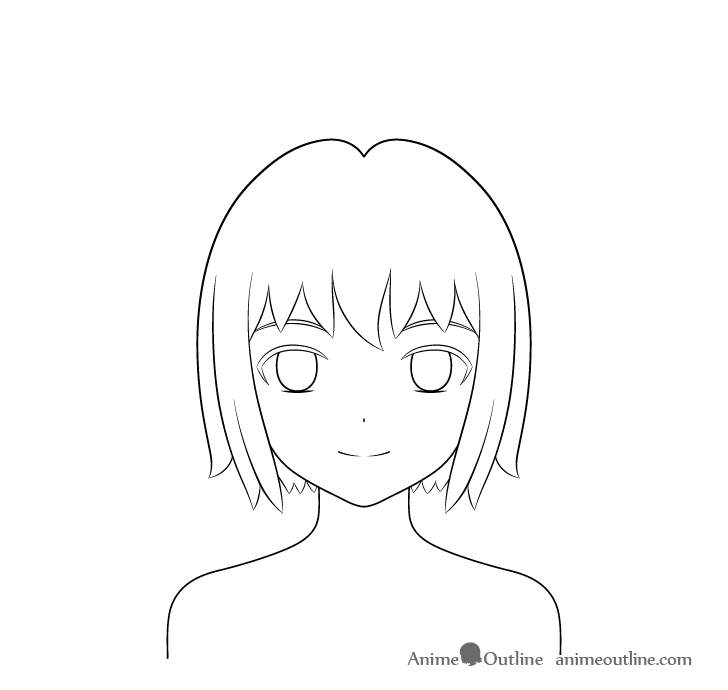
Step 11 – Draw the Small Details of the Face

Withe the main part’s of the character outlined you can now add some of the smaller details. These will be a hint of the eyelids (a tiny bit above the eyes), the pupils and highlight inside the eyes and some hints of individual eyelahes.
You can also fill in the outlines of the eyelashes with black or dark pencil shading.
Step 12 – Draw the Wizard Hat
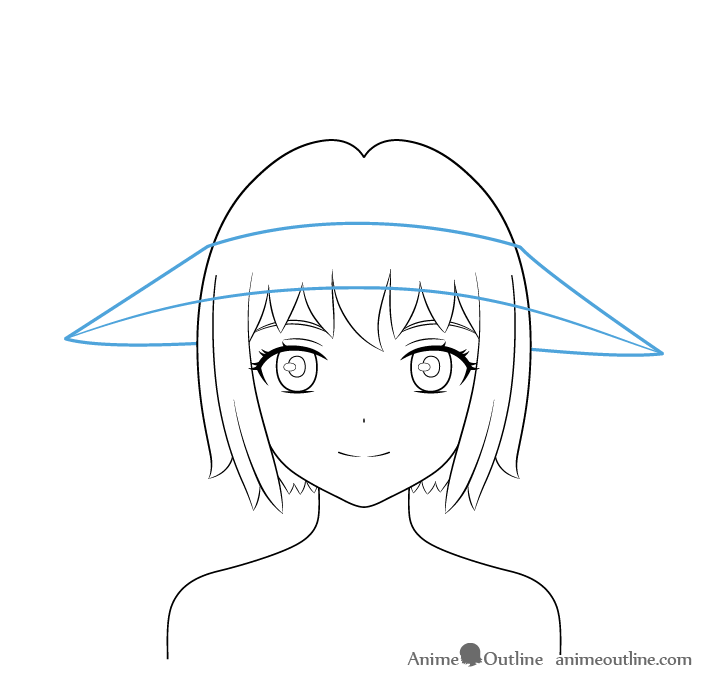
To make the girl look like a wizard/spell caster add the very characteristic pointy hat.
First draw it’s brim as shown shown in the example above. Make it fairly wide with it’s front end higher up and it’s back end lower down.
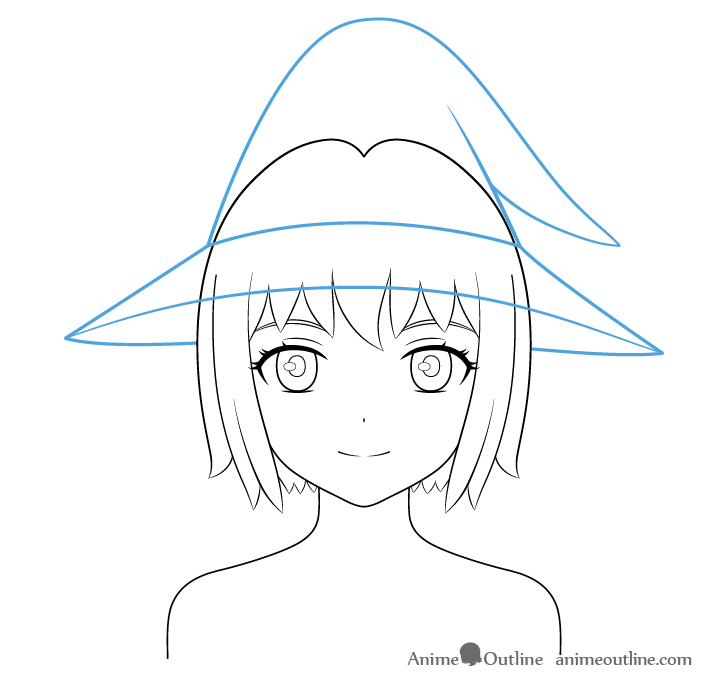
Above the brim draw the upper part of the hat with it’s pointy tip bending downwards.
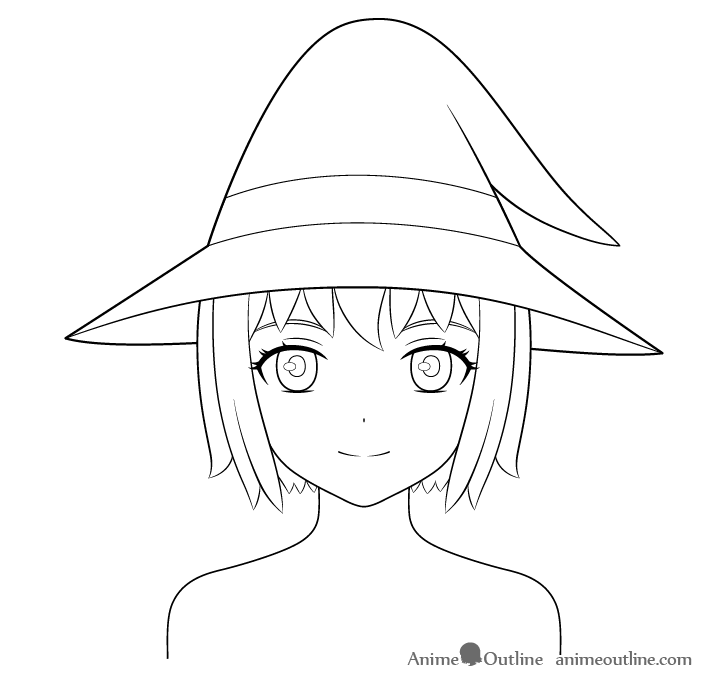
Once you have both halves of the hat outlined you can erase the part of the hair that is covered by it. You can also add a little stripe running between the top and bottom part of the head as a simple design element.
For drawing other types of hats see the following tutorial:
How to Draw Anime Hats & Head Ware
Step 13 – Draw the Clothes & Finish the Line Drawing
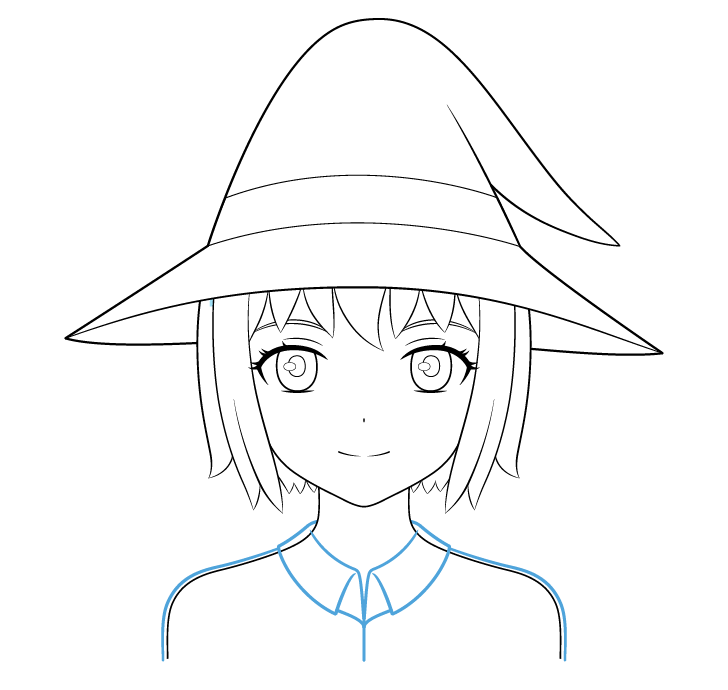
To show a little bit of clothing you can draw a collar sticking out from below a cape that will be worn over top.
Be sure to draw the outline of the collar and cape some distance away from the neck/body so that they appear to have some volume to it.
To make the cape look more interesting and old fashioned you can draw it being tied with a lace (shaped like an “X”).
Again you can erase any parts extra/overlapping lines as needed.
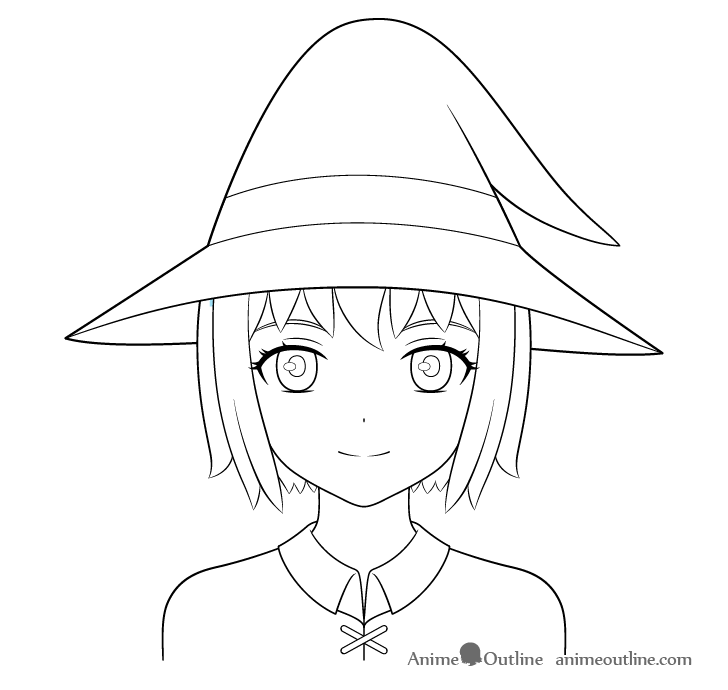
Once done adding the clothes confirm that your drawing looks the way you want it to. Make any corrections if required and then darken your lines by tracing over them.
Step 14 – Add Color
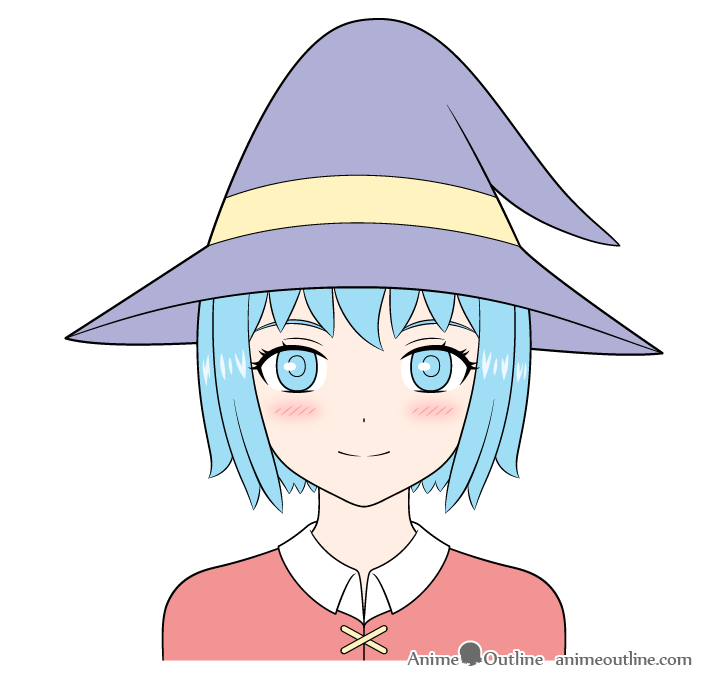
In this case the wizard girl will be fairly colorful. The colors used can also somewhat represent the spells she might cast. For example yellow can be lighting, blue can be ice, red can be fire, and purple can be some sort of dark magic.
These colors will be distributed as follows:
- Hat – purple with a yellow strip
- Hair/Eyes – light blue
- Cape – red
- Lace – yellow
- Collar – white
When coloring the hair leave a few white highlights on the sides as in the example. Leave the highlights in the eyes white as well. This will make both looks shiny.
As already mentioned in this case the character will be fairly friendly and little shy. To emphasize this you can give her some blush along the cheeks. Draw this as a series of red stripes along with a bit of blended red around them.
For more on drawing anime style blush see:
How to Draw Anime & Manga Blush in Different Ways
Step 15 – Add Shading & Finish the Wizard Girl Drawing
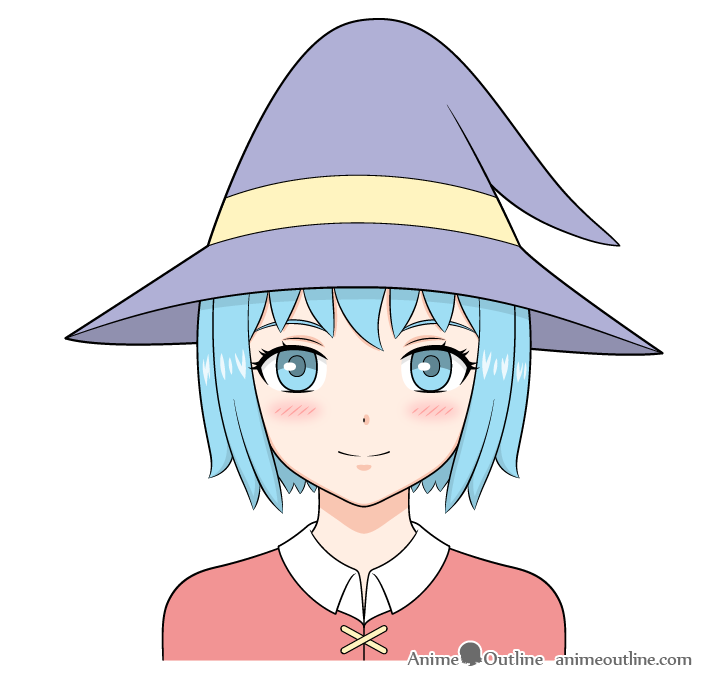
While the colored drawing in the previous example may look fairly lively compared to just outlines you may notice that it still looks a little flat. An easy way to fix this is to add some simple shading and to darken a few parts of the drawing.
Generally the way a character is shaded can depend on the lighting condition of the scene they are being drawn in. However the shading shown in this tutorial is generic enough to work for most common scenes (outdoors during the day or a well lit indoor space). In these types of environments the main light source is generally above the character so you can place the shadows as follows:
- Fully shade in the inner side of the hat.
- Add a shadow along the hair in the shape of the front part of the brim of the hat.
- Darken the areas along the outlines of the hair clumps at the bottom of the head an fully shade in the hair in the back (around the neck).
- Draw small shadows along the forehead cast by the hair clumps.
- Darken the upper parts of the irises and darken the pupils even more.
- Add a tiny shadow to one side of the nose.
- Place a tiny shadow a little bit below the mouth (cast by the bottom lip that is not actually drawn).
- Add a long and thin shadow running along the bottom of the face to help emphasize it’s shape.
- Add a large shadow along the neck in the shape of the chin (cast by the head).
Once done with the above you should be finished with the drawing.
For more on shading anime characters also see:
Conclusion
This tutorial shows how to draw an anime girl to look like a wizard by giving her clothes, colors and facial features that can be appropriate for this type of character. As was explained throughout the different steps. Hopefully you’re happy with the way your drawing turned out.
If you like these types of detailed breakdowns along with explanations of why things are drawn the way they are also be sure to check out these other fantasy themed tutorials:
- How to Draw a Princess in 12 Step (Anime or Manga)
- How to Draw an Anime Vampire Girl Step by Step
- How to Draw an Anime Fox Girl Step by Step
- How to Draw an Anime Elf Girl Step by Step
- How to Draw Anime Dog Girl Step by Step


