How to Draw Anime Dog Girl Step by Step
This tutorial shows how to draw an anime dog girl with hair that looks like animal ears. It provides the proportions, facial expression and overall design that can be appropriate for such a character.
In anime and manga there is a variety of girls with anime features. This tutorial focuses on drawing one with the characteristics of a dog. She will have a cute, somewhat shy and slightly “Tsundere” look.
For an explanation of common anime character archetypes see the following tutorial:
How to Draw Anime Characters Tutorial
If drawing on paper it’s recommended that you start in pencils and make light lines as you will need to do some erasing in several of the steps. You can darken them later on before coloring.
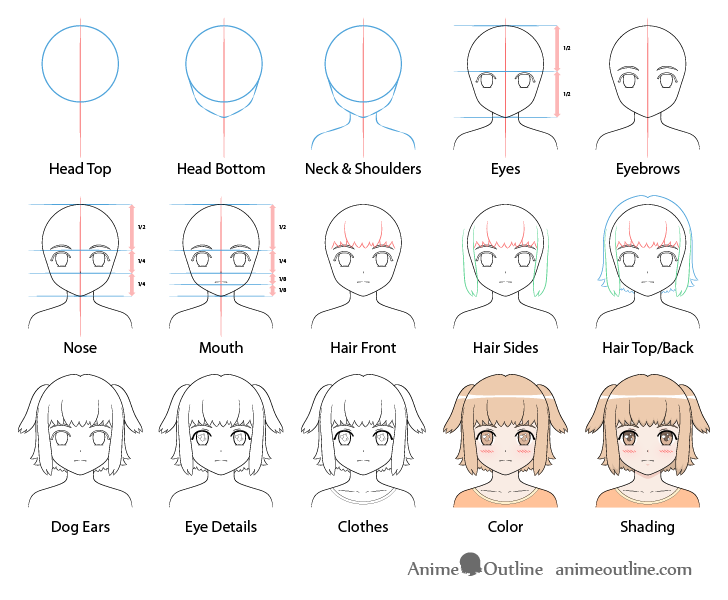
Step 1 – Draw the Top of the Dog Girl’s Head
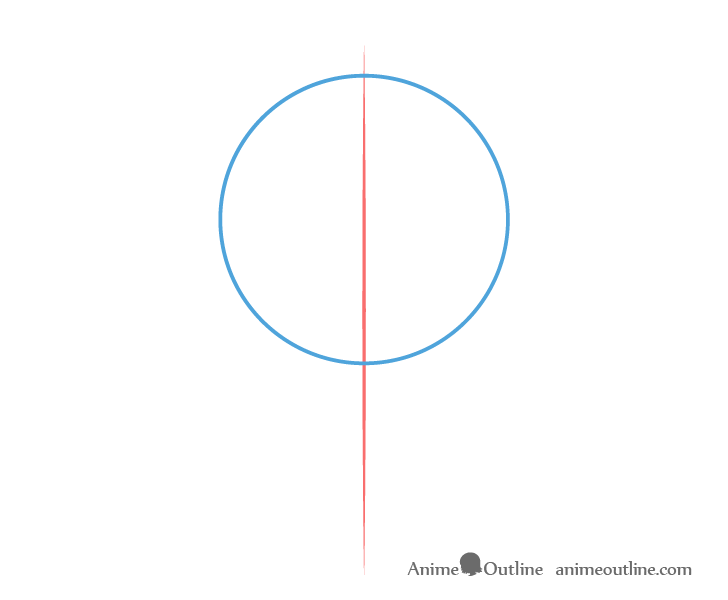
Begin by making a straight vertical line through the middle of your drawing area. This can help you see if both halves of the face are relatively even in width and that the facial features are evenly spaced.
Towards the upper part of this line draw a circle for the top part of the head. The reason you want to draw out the full circle instead of just the upper half is because it’s easier to see if it’s actually round when you have the whole thing.
Step 2 – Draw the Bottom of the Face
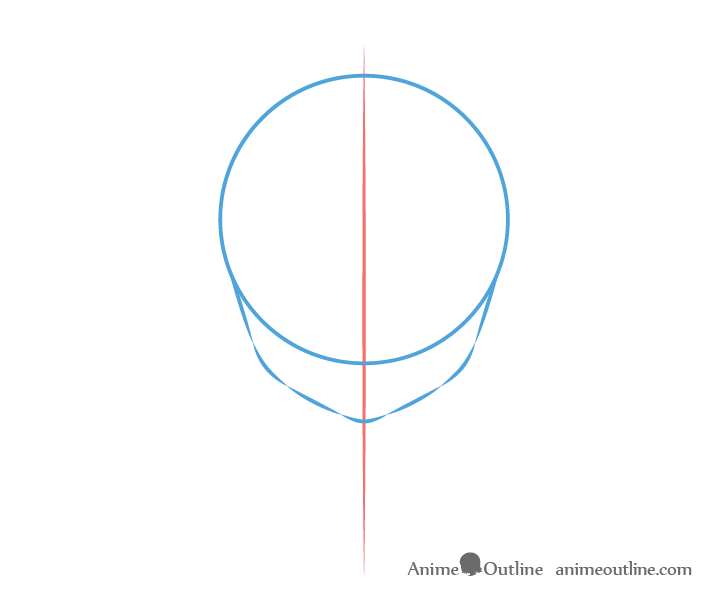
Going down from the the circle add the lower part of the head/face. In the example it’s shape is broken down into several line segments to make it easier for you to understand how to draw it.
The shape consists of a pair of roughly straight lines that are angled towards one another followed by a pair of curves. The curves will then be followed by another pair of straight lines (angled even more towards one another) that are then joined at the bottom by a smaller curve.
You can erase the lower part of the circle from step one once done with this step.
Step 3 – Draw the Neck & Shoulders
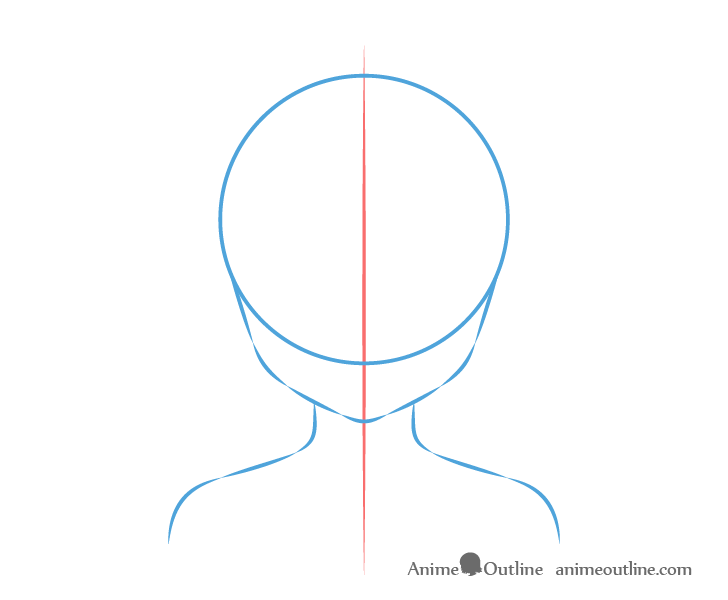
Similar to the lower part of the head the neck and shoulders are also broken down into several line segments to make it easier to see their shapes. The first pair of lines going down from the head define the neck (gradually curve outwards as they go down). The next pair of lines define the shoulder muscles (relatively straight) and the final set (the curves) define the shoulders.
As this is a stylized anime character the head will be quite large in relation to the neck/shoulders. Keep this in mind when drawing.
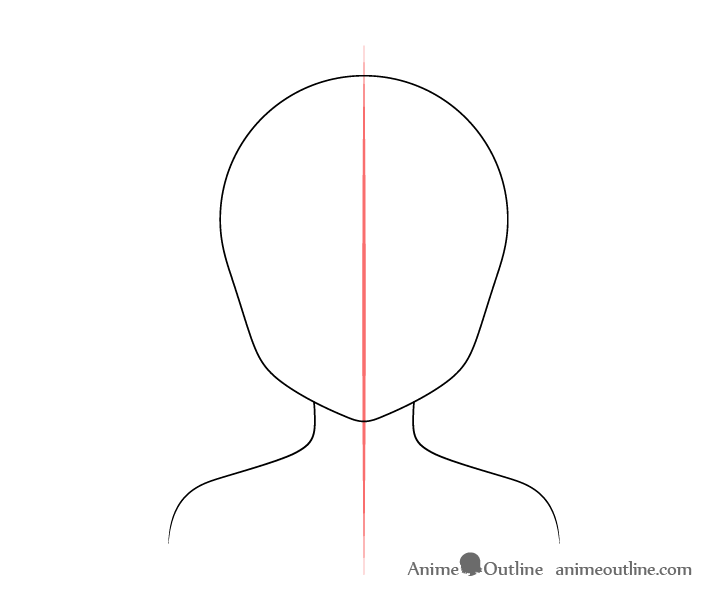
When finished you should have something similar to the above.
Step 4 – Draw the Eyes
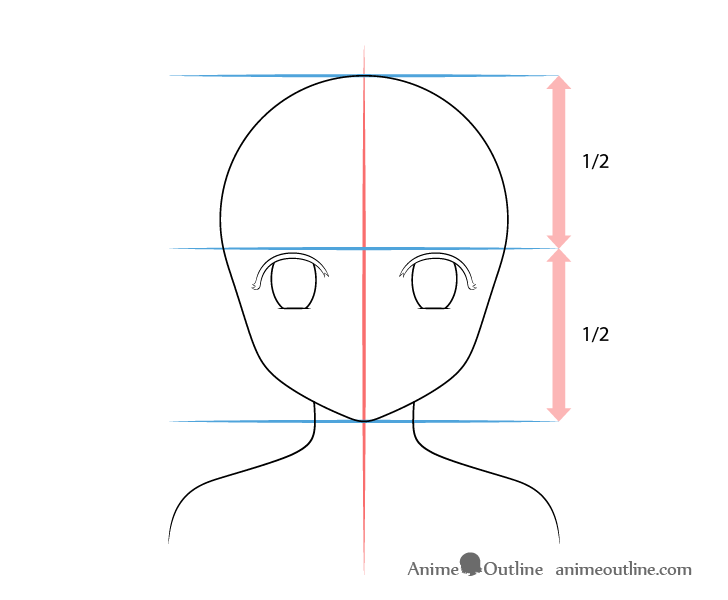
Draw the eyes below the horizontal halfway point of the head (as shown in the example). Make the them fairly big and tall. At this step you should only draw an outline of the eyelashes and irises. Leave the other small details for later.
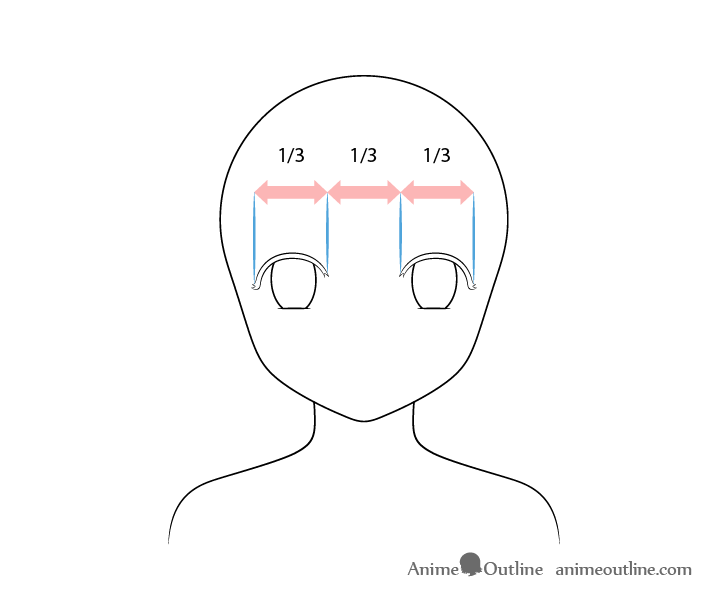
Placed the eyes far enough apart that you can fit a third one in between. If you need to see a close up example you can scroll down to step twelve.
Step 5 – Draw the Eyebrows
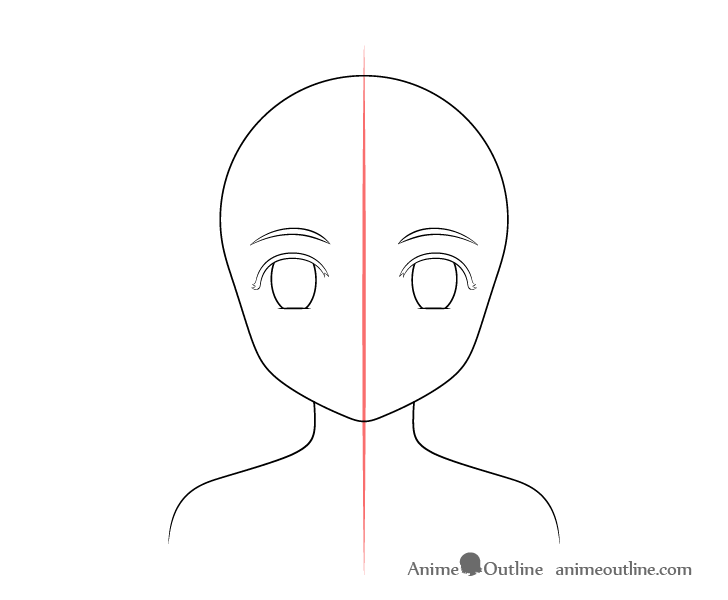
Position the eyebrows a little bit above the eyes. For this particular character they will be slightly thicker than normal.
Step 6 – Draw the Nose
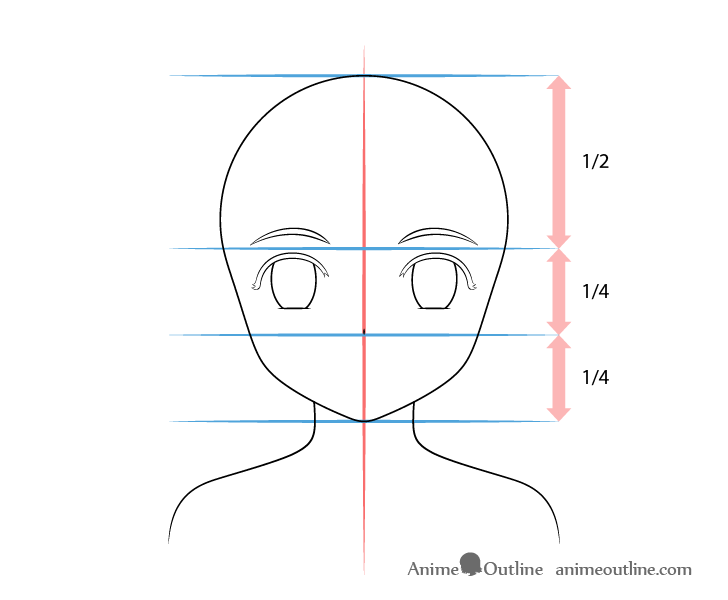
Place the nose halfway between the top of the eyes and the bottom of the chin. You can draw it as a tiny vertical dash or a dot (same as most generic anime characters).
For more on drawing anime noses see:
How to Draw Anime and Manga Noses
Step 7 – Draw the Mouth
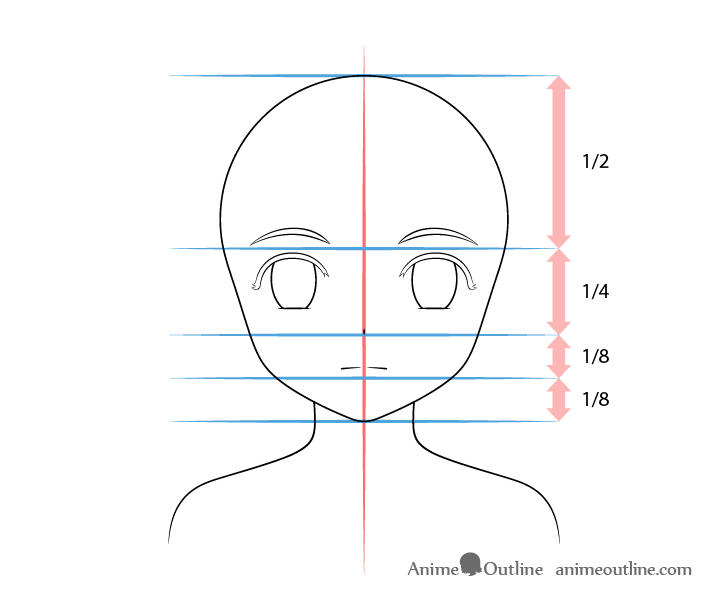
Position the mouth just a bit above the halfway point between the nose and the bottom of the chin. Draw it with an upside down curve as though the character is frowning. This will give her a bit of a “Tsundere” look mentioned at the start of the tutorial. This expression can be appropriate for a dog-like character. For example some dogs might bark while at the same time wagging their tail and wanting to play with you.
For more on drawing anime mouths see the following:
Step 8 – Draw the Front Hair
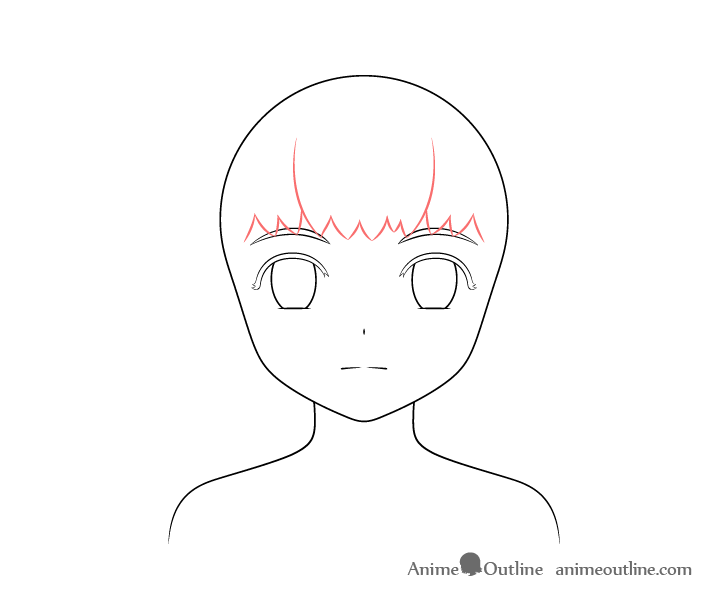
In this example the girl will have a fairly short hairstyle. As is done with most similar tutorials here on AnimeOutline the hair will be broken down into three parts to make it easier to draw.
For more on this approach you can see the following:
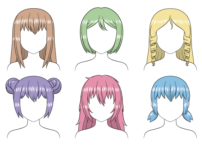
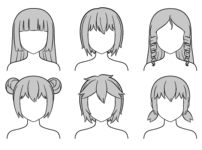
How to Draw Anime and Manga Hair – Female
At this stage you will want to add the hair right over top of the outline of the head as though it’s see through. Begin by drawing the hair along the forehead. Outline the ends a series of little clumps. You can generally define each one with just two lines.
Step 9 – Draw the Sides Hair
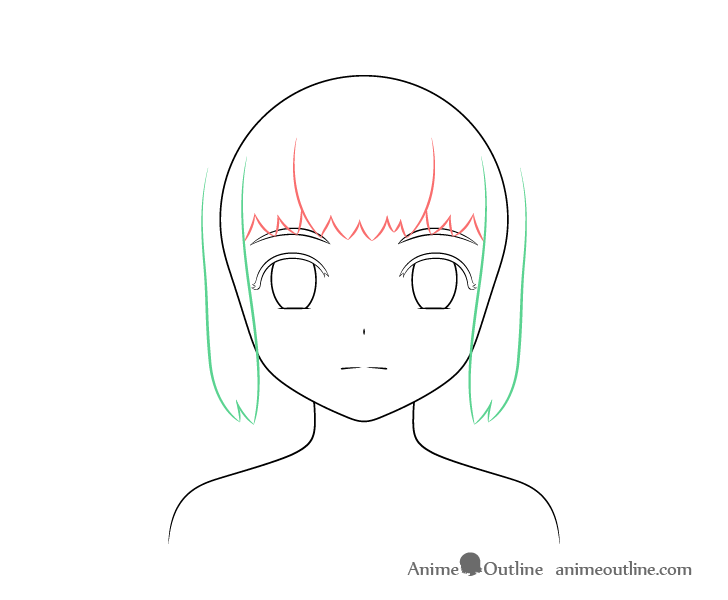
Add the hair on the sides as two large clumps. Draw these curving around/hugging the upper part the head/face and then hanging down with splits on their ends.
Step 10 – Draw the Top/Background Hair
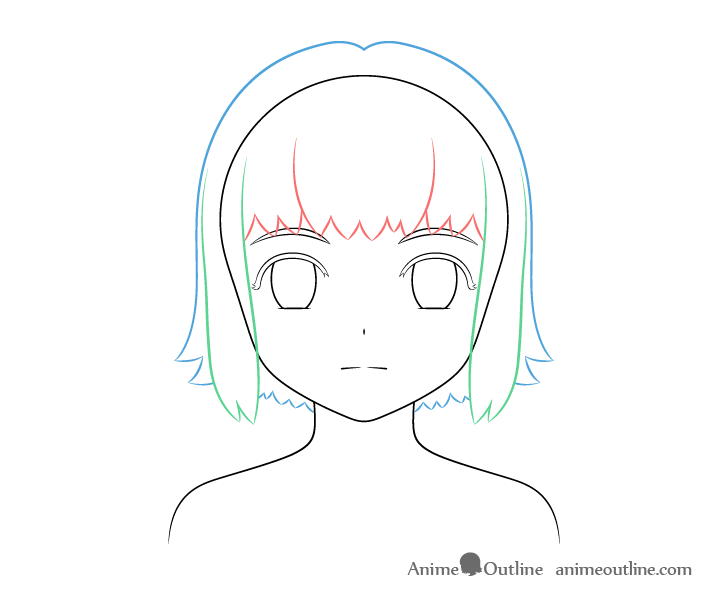
For this section start with a pair of curves that run down from the top/middle of the head. Be sure to leave a good distance between them and the head outline to give the hair some volume. For this particular hairstyle the curves will end with a pair of clumps on each side.
Once you have the above you can add the hair at the bottom between the side sections and the neck. Draw this as a series of little clumps.
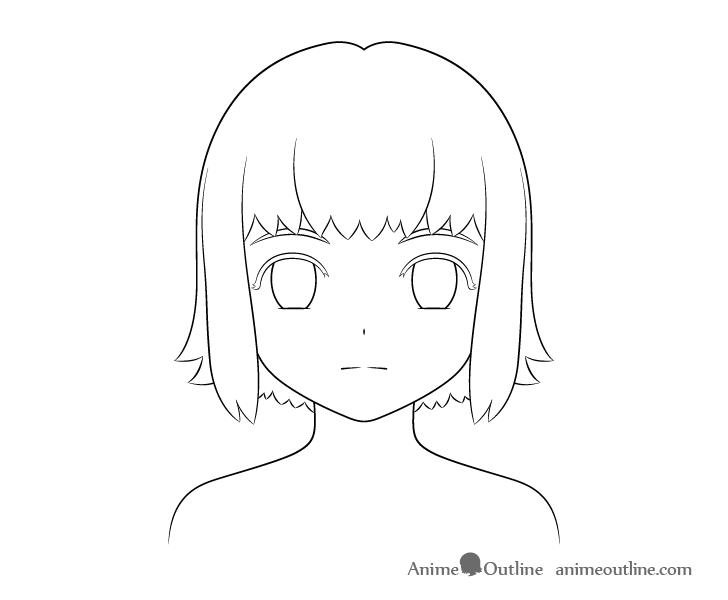
When you have all three sections of the hair outlined you can erase the parts of the head that are covered by it so that you have a clean drawing like in the example.
Step 11 – Draw the Dog Ears
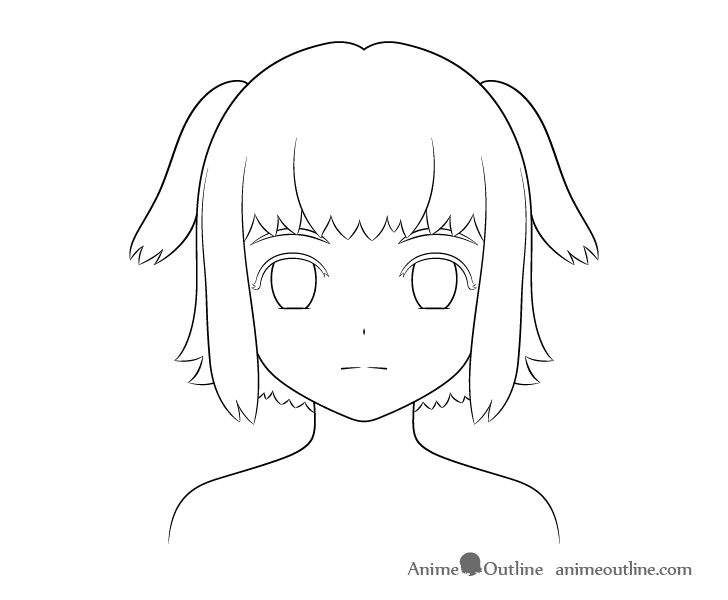
In this case the ears will be drawn in a way where they could also simply be hair (a pair of pigtails). Some anime characters tend to have these instead of the more obvious animal ears.
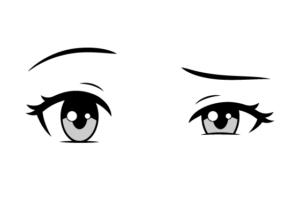
Step 12 – Draw the Eye Details
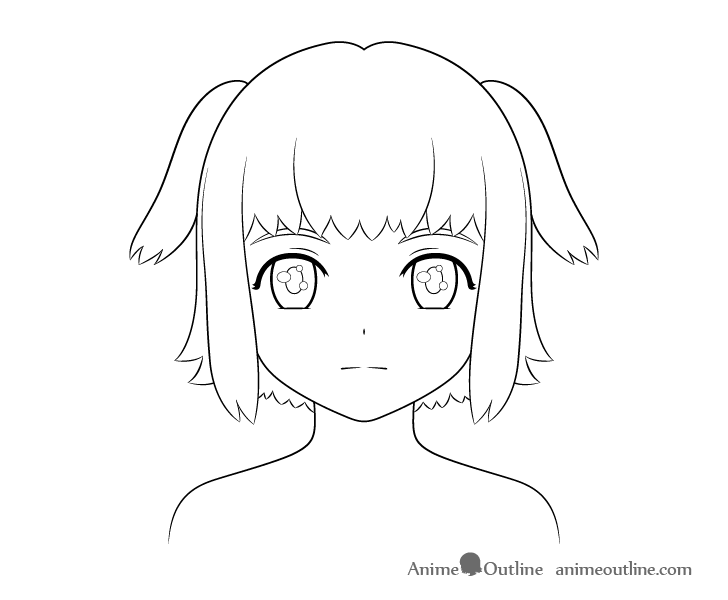
Once the larger parts of the dog girl are outlined you can add the small details of the eyes. Inside each iris draw an oval shaped pupil (as is common in anime). Next add several highlights overlapping both of these and erase the parts where they overlap.
To make the character appear a little more emotional you can make the highlights slightly bigger and add a few more of them than the character would normally have. In this case it will be three for each eye. Afterwards you can also add a hint of the eyelids as a pair of curves slightly above each eye.
You can also fill in the eyelashes with black or pencil shading and make the outlines of the irises a little thicker.
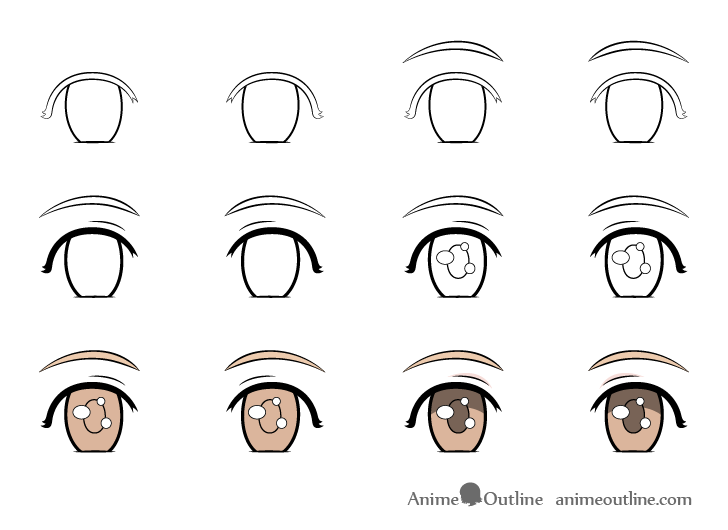
You can see a step by step breakdown of drawing the eyes above. At this stage of the drawing the first two step should already be done. You will want to refer to step three and four. Save steps five and six for when you do the coloring and shading.
Step 13 – Draw the Clothes & Collar Bones
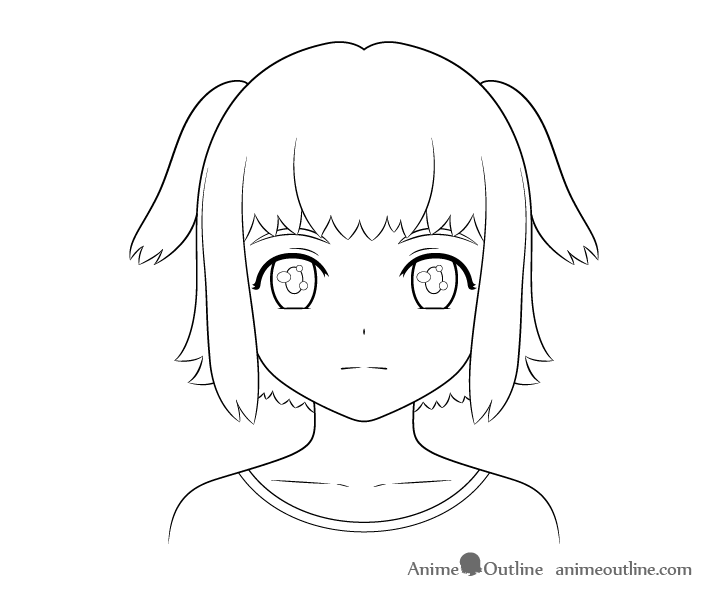
As only a little bit of the body is shown you can give just a hint of the clothing. In this case it will be t-shirt. You can define it’s neckline with a pair of curves as shown above. You can also add a hint of the collar bones as shown in the example. Once done you can trace over your drawing with darker lines.
Step 14 – Add Color
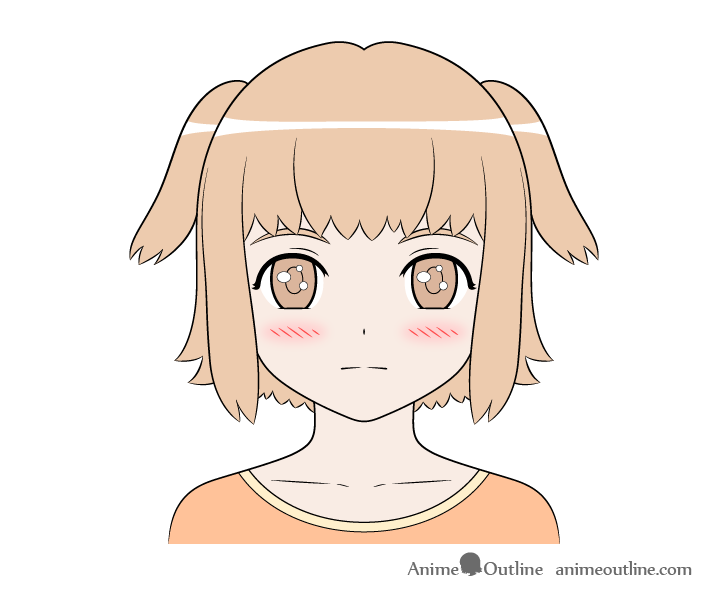
To color the character you can make her hair and eyes a light brown and the shirt orange. Be sure to leave a white streak in the hair for the highlight (light reflecting form it). You can either outline this beforehand or simple create it as you color. Also be sure to keep the highlights inside the eyes white as well.
For more on hair highlights see:
Different Ways to Draw Anime Hair Highlights
If you are coloring digitally you can add the white over top of the color. Alternatively you can also add it in with a white correction pen if drawing on paper.
When done coloring add some blush by making two sets of angled red lines along the cheeks and then blending some lighter red color around them. If drawing on paper an easy way to do this is with a red pencils. The blush will help create a cute and slightly embarrassed look, especially when combined with the lightly frowning mouth. Giving the dog girl that “I like you but don’t want to show it expression”.
For more on drawing anime and manga style blush see:
How to Draw Anime & Manga Blush in Different Ways
For a tutorial on picking colors for an anime/manga style character see:
Beginner Guide to Picking Colors When Drawing Anime & Manga
Step 15 – Add Shading & Finish the Dog Girl Drawing
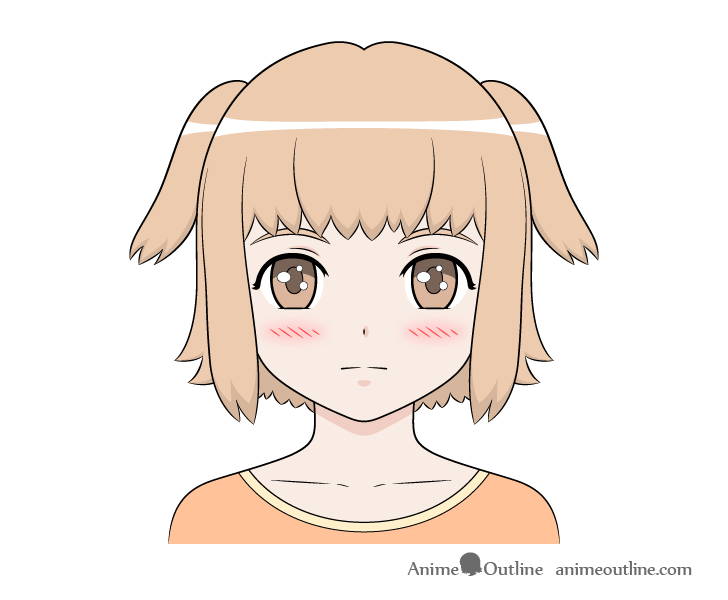
You may notice that the drawing looks a little plain and flat with just the basic colors added in the previous step. To fix this you can give it some basic/generic shading and darken parts of the eyes.
In this case the character will be shaded as though she is in a well lit room or outside during the daytime when most of the light tends to be coming from above. This means that the shadow will generally be on the bottom.
For the eyes darken the pupils as well as the upper parts of the irises.
Add the shadows as follows:
- Along the bottoms of the hair clumps
- Above the eyelids
- At the upper parts of the white of the eyes
- To one side of the nose
- The hair in the back (between the neck and the side sections)
- Below the mouth (actually below the bottom lip that is not drawn)
- Below the head along the neck
For shading a face in different lighting see:
How to Shade an Anime Face in Different Lighting
Conclusion
This tutorial show how to draw an anime girl with the characteristics of a dog (mainly the ears but also an appropriate facial expression). It also gives the proportions for getting a general anime or manga look.
In addition to the above this guide also shows a good overall approach to drawing that can help you minimize mistakes and backtracking.
For drawing other types of anime girl also see the following tutorials:
- How to Draw Anime Cat Girl (With Video)
- How to Draw an Anime Fox Girl Step by Step
- How to Draw an Anime Elf Girl Step by Step
- How to Draw an Anime Vampire Girl Step by Step
- How to Draw an Anime Panda Girl Step by Step
- How to Draw Anime Cat Girl Ears Step by Step
- How to Draw Anime Wolf Girl Step by Step
For drawing an actual dog see:
How to Draw a Cute Anime Dog in 7 Steps

