
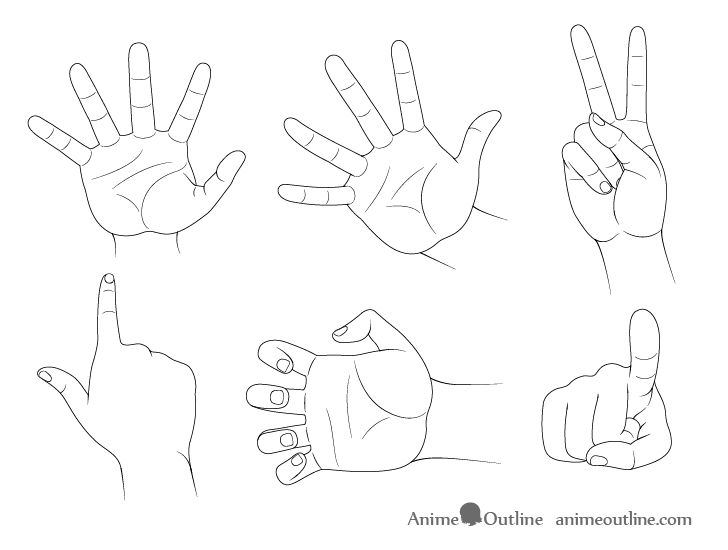
How to Draw Hand Poses Step by Step
This tutorial shows how to draw different hand poses. The examples can be applied to drawing in the anime, manga and traditional styles.
Before going into this tutorial you may also want to see (if you have not done so already):
How to Draw Anime and Manga Hands Step by Step
Also please note that if you are going to be following the tutorial drawing with pencil and paper you should make very light lines for at least the first few steps of each hand pose. You will need to erase parts of the drawing as you move through the different steps.
How to Draw a Hand Reaching Step by Step
This type of hand pose can be used when a whoever you are drawing is reaching for something. For example reaching for a helping hand or reaching to grab onto a ledge when climbing.
As the hand is tilted forward it will appear vertically narrower then if you were looking at it with the palm facing directly towards you. Keep this in mind when drawing.
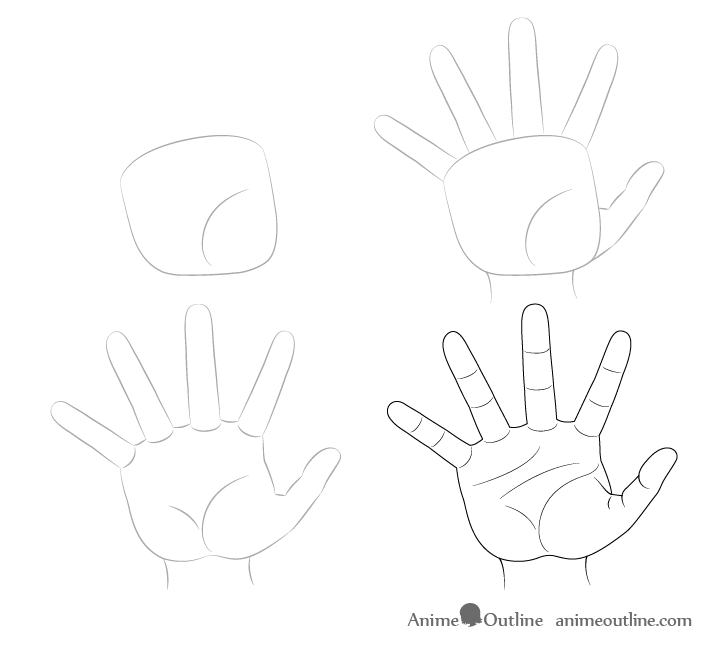
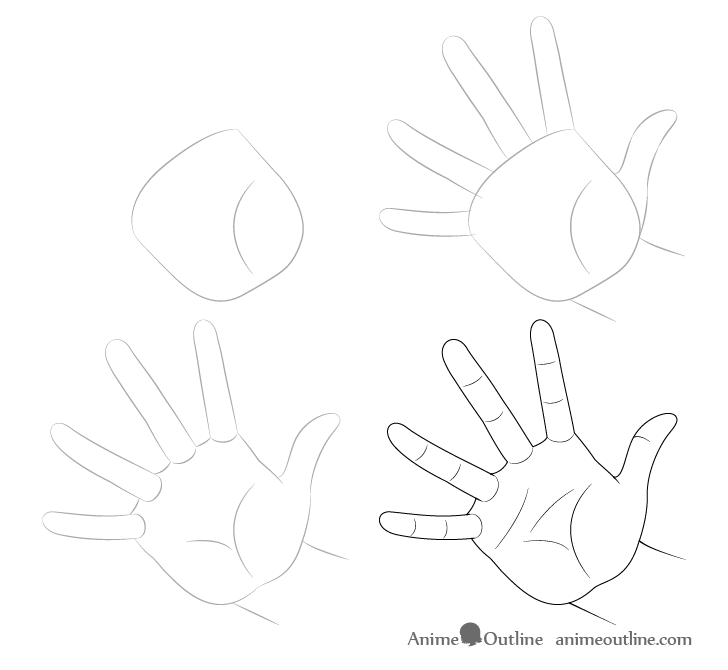
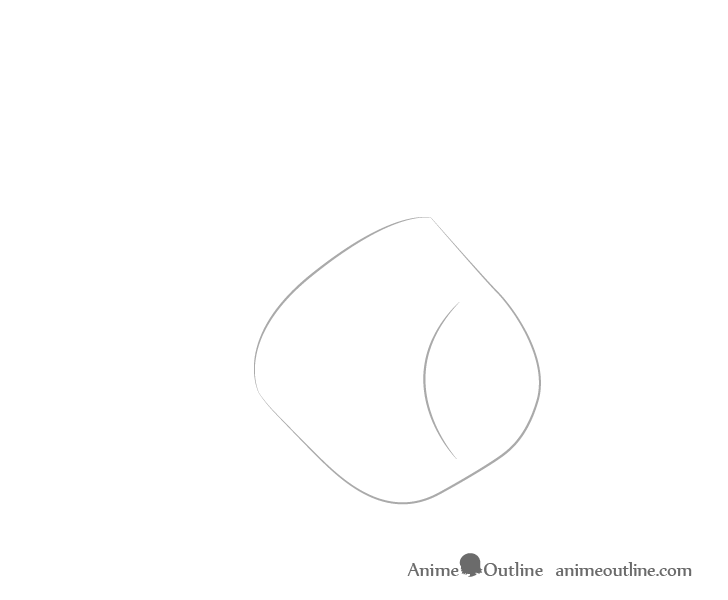
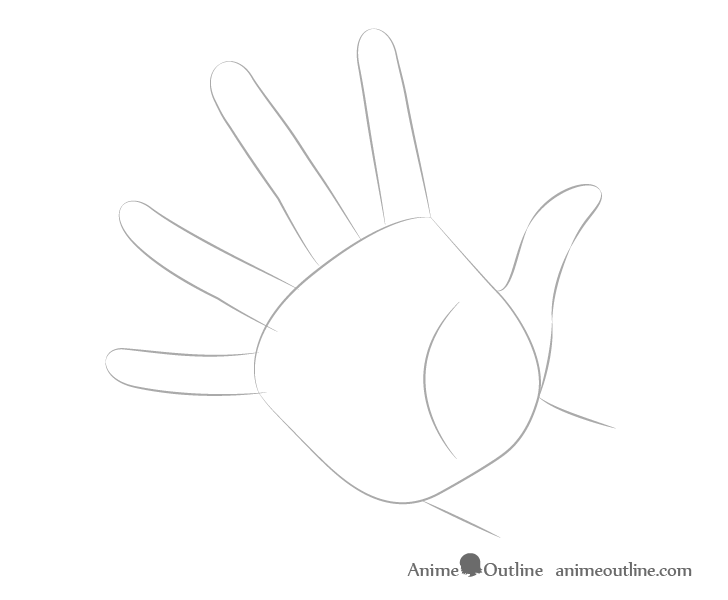
Step 1 – Draw the Outline of the Palm
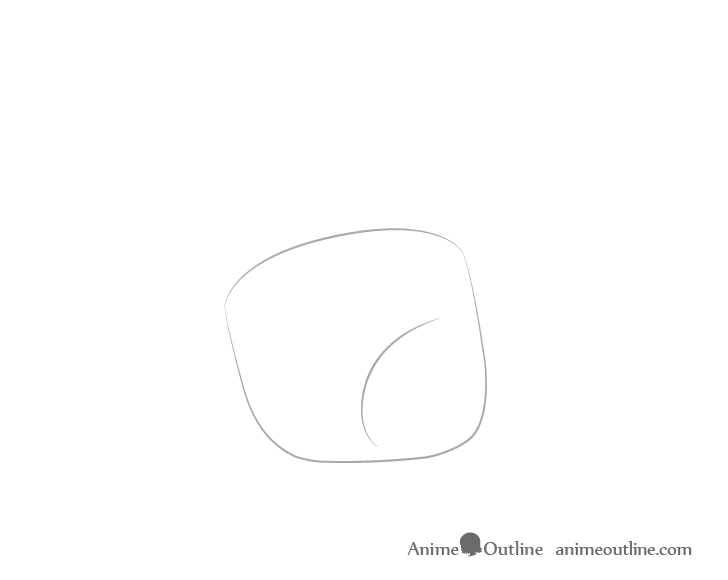
Start the drawing with a rough outline of the palm of the hand. You can also give a hint of the base of the thumb with just one curve.
The palm will generally be wider towards the thumb and narrower towards the pinky finger.
Step 2 – Draw Fingers & Thumb
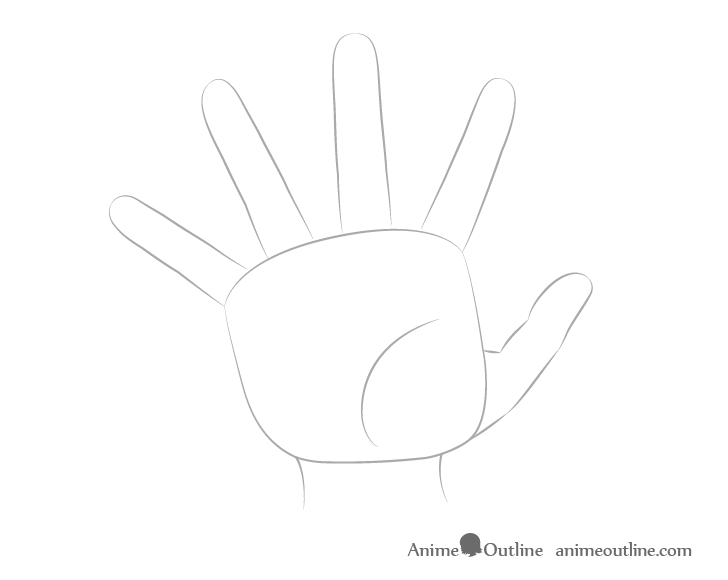
Onto the palm add the outer shapes of the fingers and the thumb. Draw the fingers pretty much straight and fanning out from the palm. You can make the thumb lightly bent.
Don’t worry about being too accurate in this stage of the drawing as the goal is to simply establish the size and position of the fingers.
Step 3 – Draw the Smaller Bends & Curves

Once you finish the rough outline of the hand you can add some of the smaller curves such as those at the base of each finger and the bottom of the palm. Also see the example below for the placement of the joints and make sure the bends of the thumb and the light bends of some of the fingers are in the the right place.
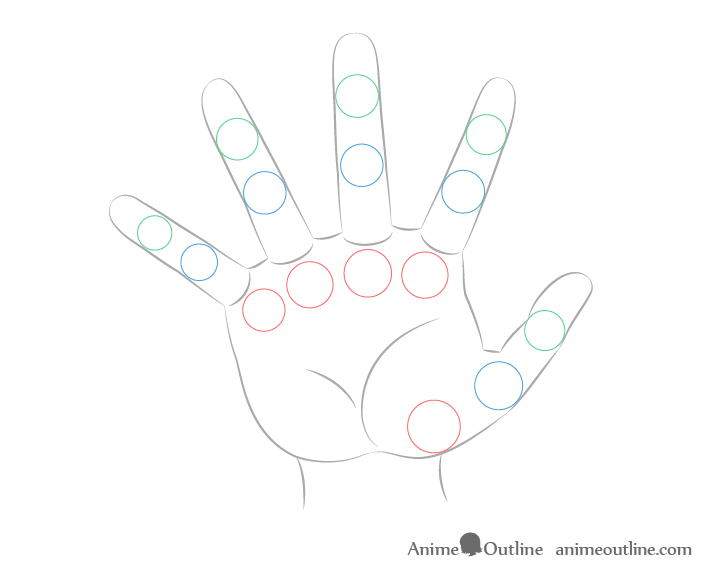
You can see the rough position of the finger/thumb joints in the example above. This can be helpful in estimating where they bend as well as the positing of some of the smaller wrinkles on the hand.
Step 4 – Finish the Reaching Hand Drawing
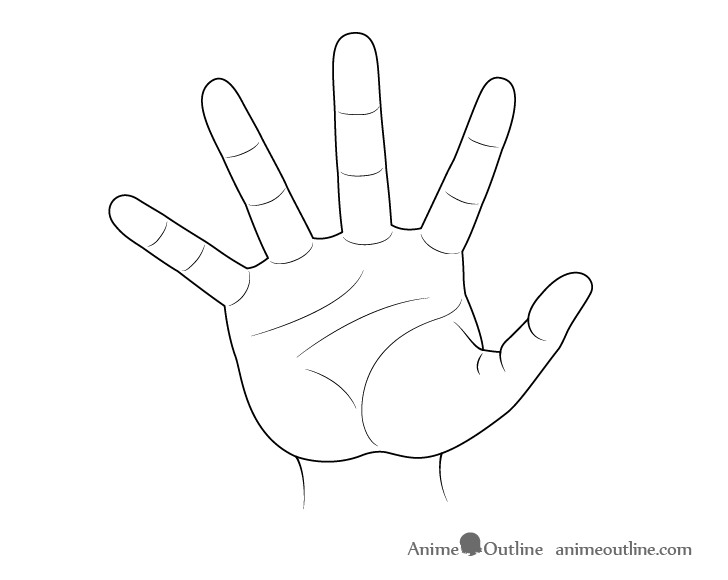
To finish the drawing you can add the various lines and wrinkles around along the palm and fingers and go over your drawing with darker lines.
As mentioned the wrinkles will generally be around the joints of the fingers. The two lines in the upper part of the palm are usually around the same area as the knuckles (if you flip the hand over). One mistake beginner artists tend to make is drawing the fingers bending directly from the top of the palm when they actually bend from around these two lines.
How to Draw a Hand Casting Step by Step
This pose is somewhat similar to the previous and can be used to show that a characters is casting a spell or gesturing someone to move forward. For example casting a fireball or signalling an army to attack.
Step 1 – Draw the Outline of the Palm
Start with a rough outline of the palm. For this particular example it will be tilted on about a 45 degree angle and will pint slightly towards the viewer. Inside the palm draw a hint of the bottom portion of the thumb.
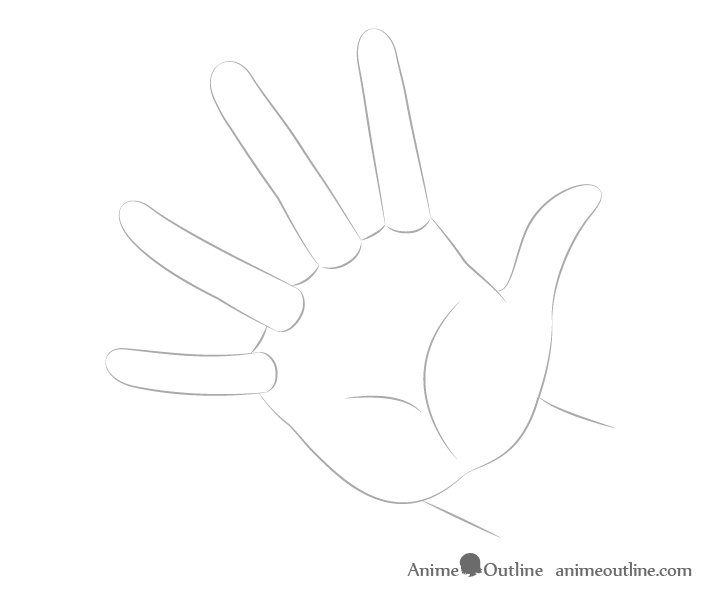
Step 2 – Draw Fingers & Thumb
Draw the outer shapes of the fingers fanned out fairly evenly around the palm and the thumb pulled back. Draw the pinky and the ring finger bent slightly inwards towards the palm from the knuckles. To create this effect draw them slightly cutting into the palm of the hand.
Step 3 – Draw the Smaller Bends & Curves
Add the smaller curves of the hand to the bottom of the palm and around the fingers.
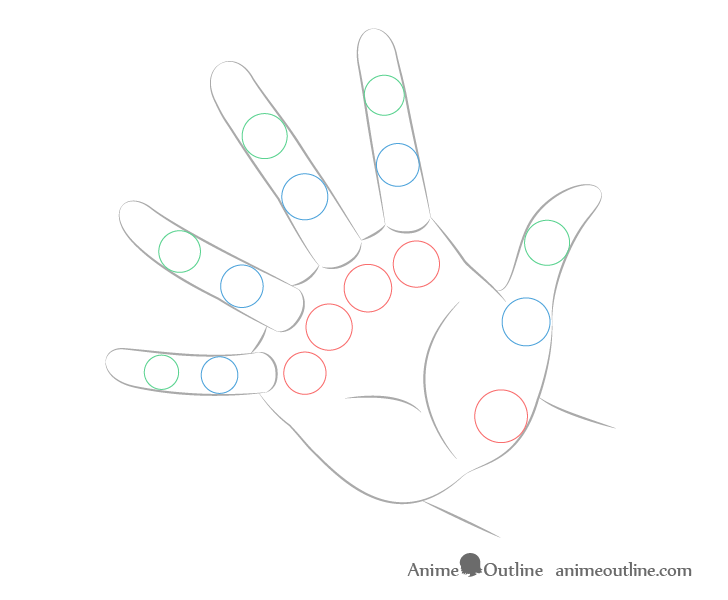
You can see the estimated placement of the joints of the hand in this position in the example above.
Step 4 – Finish the Casting Hand Drawing

Add the lines along the palm and the smaller wrinkles along the fingers and thumb. Keep in mind that as the thumb is pulled back some of the wrinkles on it will be smoothed out. To emphasize this you can even leave out some of the wrinkles that would naturally still be visible.
Once you finish adding all of the smaller details of the hand you can go over your drawing with darker more solid lines.
How to Draw a Peace Sign Hand Step by Step
The peace sign is probably one of the most common hand gestures. In anime and manga characters usually make this when having their photo taken.
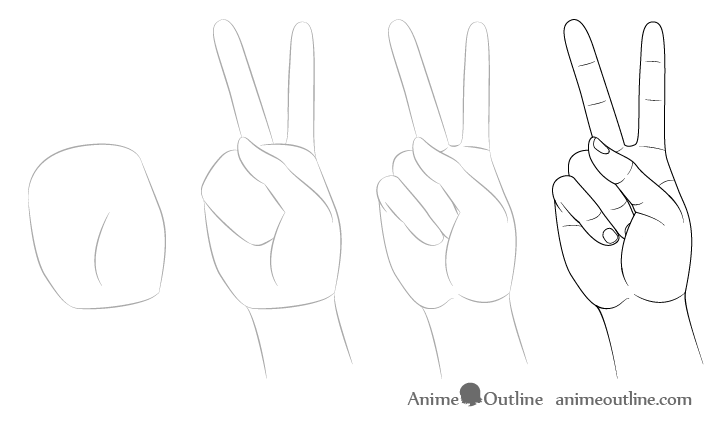
Step 1 – Draw the Outline of the Palm

Same as the previous two examples start by drawing the palm and the base of the thumb. This hand pose will squeeze the palm so draw in narrower than normal.
Step 2 – Draw the Stretched Out Fingers & Thumb
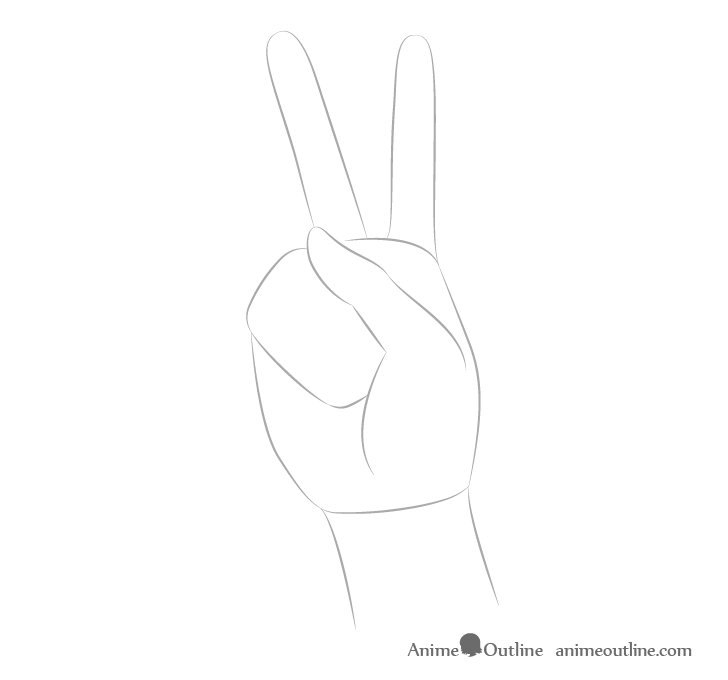
Draw the outer shapes of the thumb and the the two fingers that are sticking up. In this pose the thumb will basically be a flip over of its natural position.
For this stage simple draw the two folded fingers as one combined shape.
Step 3 – Draw the Folded Fingers & Smaller Bends of the Hand
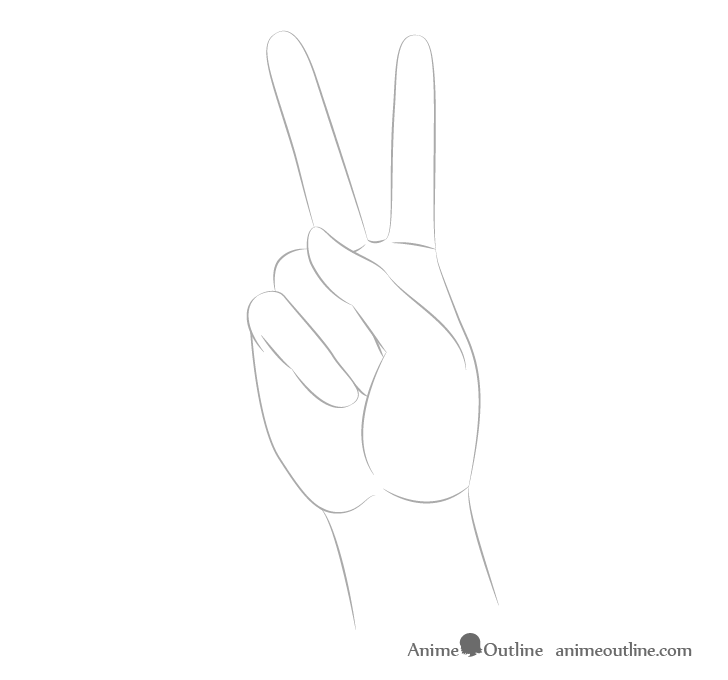
Add the individual shapes of the two folded fingers as well as the smaller curves of the hand. These will be along the bottom of the palm and between the other two fingers. Erase the extra lines from the previous step so that your drawing looks similar to the example above.
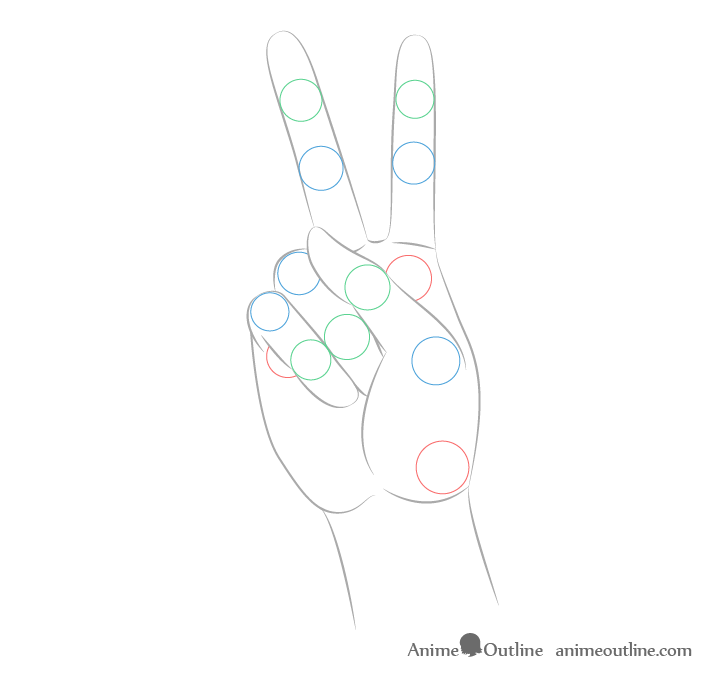
You can see the estimated placement of the joints for the peace sign pose above. The joints overlapped by other parts of the hand are not shown to avoid making the drawing too confusing.
Step 4 – Finish the Peace Sign Hand Drawing
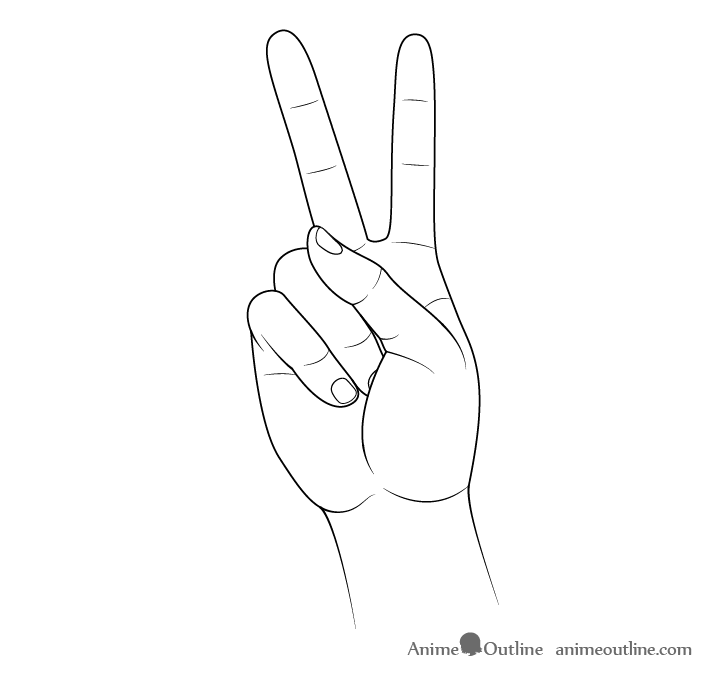
To finalize the drawing add the details such as the finger nails and the small lines/wrinkles of the hand. The nail on the thumb should be drawn narrower as it’s being viewed on an angle. The only other fully visible nail will be on the pinky. You can show just a hint of the nail on the ring finger.
In this view most of the lines on the palm will be hidden by the fingers but you can draw small hints of them on each side of the hand. You can also add a fairly large wrinkle in the middle bend of the thumb. The rest of the wrinkles will be around the finger joint areas.
How to Draw a Hand Pointing Away Step by Step
This hand pose can be good to draw when you want the character to be pointing towards something. For example an airplane up in the sky.
As most of the fingers in this pose are hidden it’s also a fairly easy one to draw.
Step 1 – Draw the Outline of the Palm
Start the drawing by outlining the rough shape of the palm. As the hand is being viewed from the top of the palm there is no need to indicate the thumb like in the other examples.
Step 2 – Draw the Index Finger & Thumb
Add the outer shape of the thumb and the index finger.
As the hand is being viewed on an angle and the index finger is pointing away from the viewer it should be drawn both smaller and shorter. This will give a sense that it is actually pointing away and off into the distance.
Step 3 – Draw the Knuckles
Refine the shape of the hand by adding the smaller curves. In this case it should be the knuckles and a hint of the bone along the wrist.
Again you can see the placement of the joints for the visible parts of the hand.
Step 4 – Finish the Pointing Hand Drawing
Add the finger nails and the small wrinkles along the joints of the finger/thumb. Same as the previous pose draw the nail on the thumb narrower to as it’s being viewed on an angle.
How to Draw a Hand With a Claw Like Grip Step by Step
The gripping or clawing hand can be useful if you want to draw someone that is trying to grab onto something.
Step 1 – Draw the Outline of the Palm
Draw the outline of the palm of the hand with the base of the thumb. In this case they will be drawn horizontally.
Step 2 – Draw the Fingers & Thumb
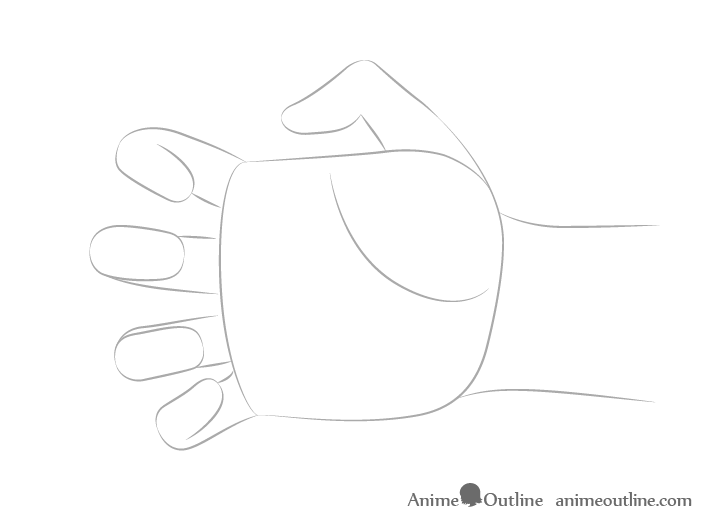
Drawing the fingers for this pose is probably the most challenging part of all of the examples in this tutorial. It may be helpful to first take a look at the joint drawing example further down before drawing this step.
The parts of the fingers from the knuckles to the first joint are fairly simple. Draw these fanning out from the hand similar to the previous examples. The next set of sections up from that is facing the viewer at a very sharp angle making them appear very short or almost invisible. You will need to take this into account when drawing if you want to create a believable pose. From there to the tips each section are pretty much fully visible. Draw the tip of the thumb and index finger pointing slightly more inwards (towards one another) than the first set of sections. You can draw the other two fingers at pretty much same angles as their “knuckles to first join” parts.
Step 3 – Draw the Smaller Bends & Curves

Add the curves as the bottom of the palm as well as the curves and wrinkles at the bottom of the fingers.
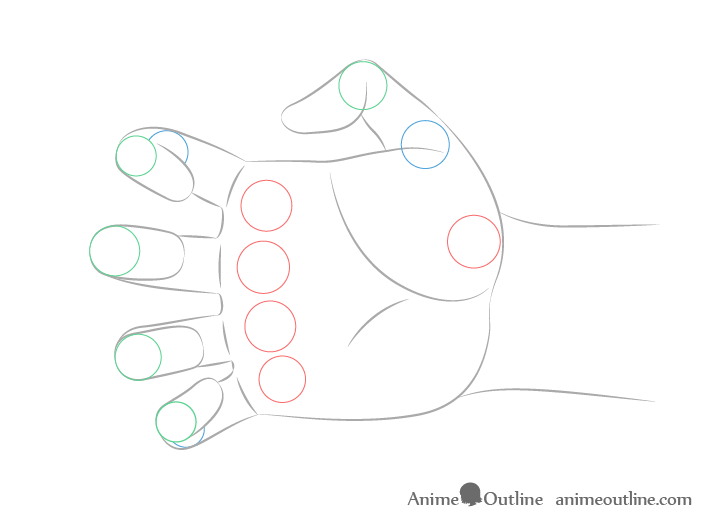
You can see the placement of the visible joints for this pose of the hand in the example above.
Step 4 – Finish the Claw/Gripping Hand Drawing
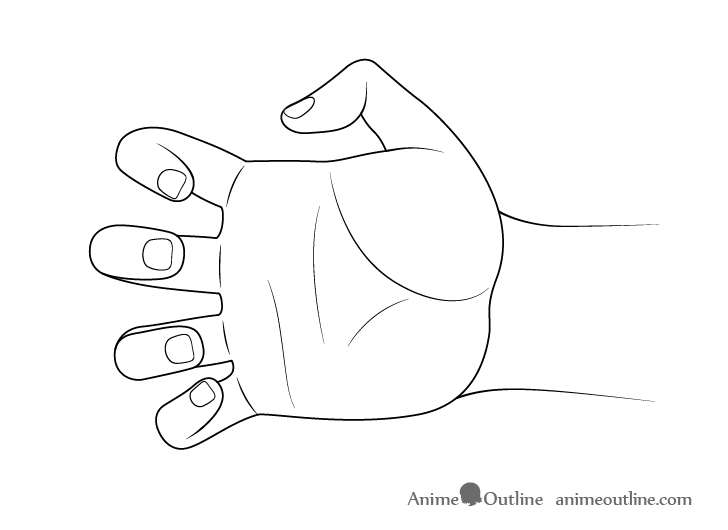
To finish the drawing draw the lines along the palm of the hand and the fingernails. Again same as the other poses the nail on the thumb will be viewed on an angle and should be drawn narrower.
To help that the sections of the fingers from the last joint to the tip are at a slight angle draw the fingernails just a tiny bit farther away from the tips. This will make the bottom of the fingers appear like they are angled facing more towards the viewer.
How to Draw a Hand Pointing Finger at Viewer Step by Step
This is a sort of “in your face” pose that basically points at the viewer. In anime and manga “tsundere” characters tend to be drawn doing this.
For drawing different anime characters archetypes see:
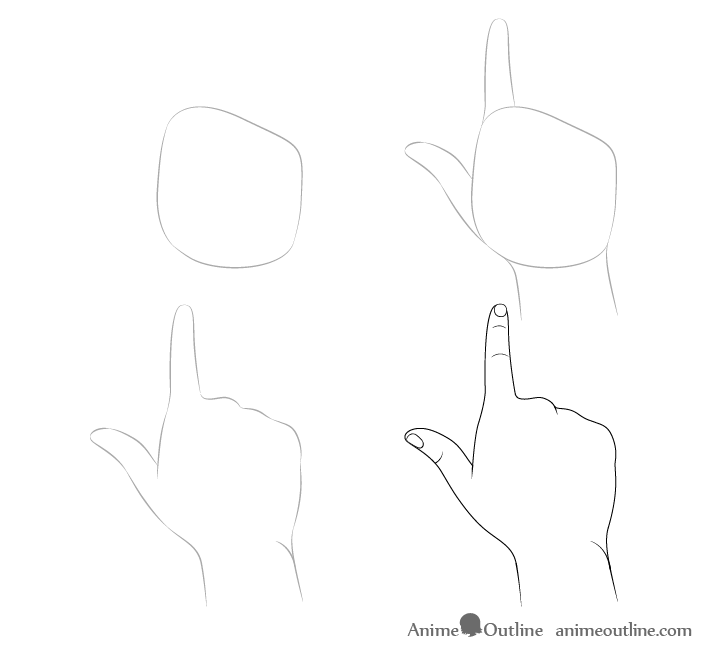
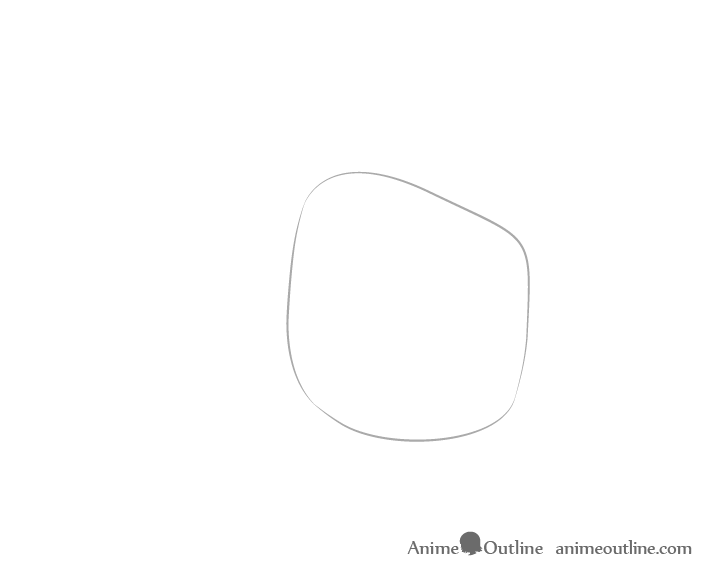
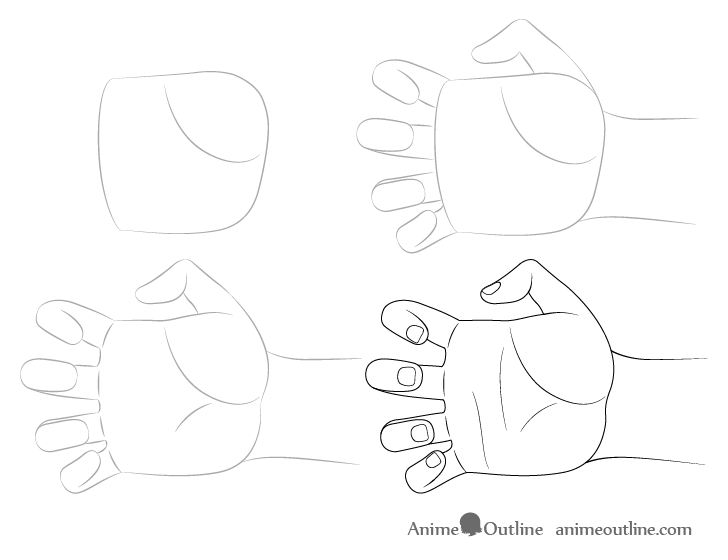
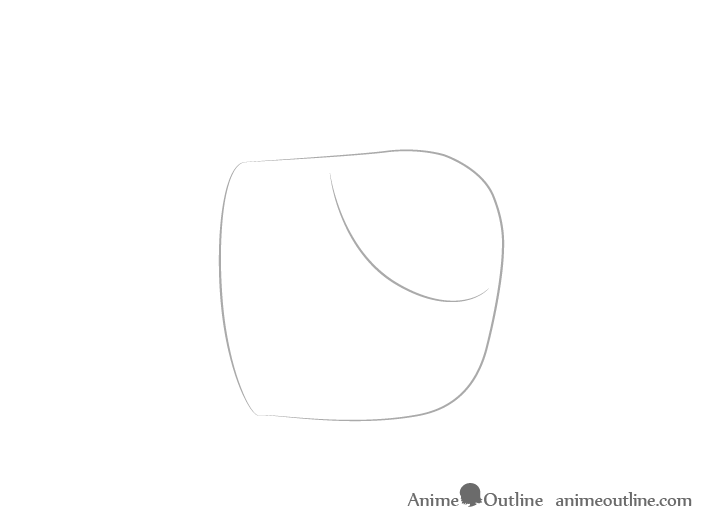
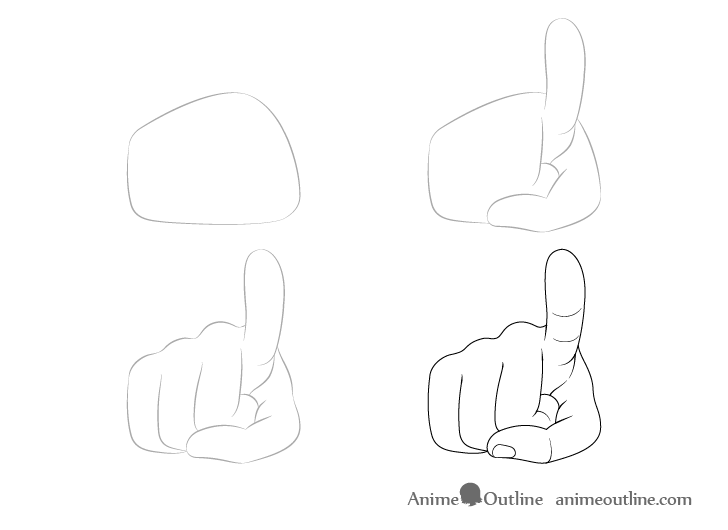
Step 1 – Draw the Outline of the Palm
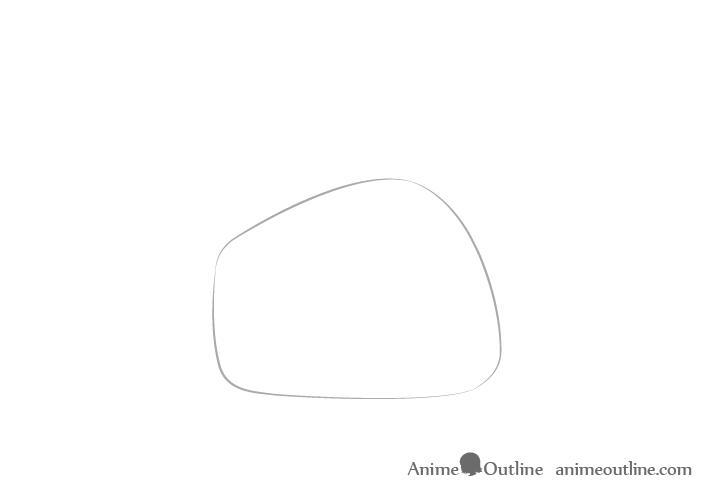
For this pose you can start by drawing the combined outline shape of the palm and base of the thumb. The palm in this view is drawn at a very sharp angle (almost looking at the top of it) so it will appear very narrow.
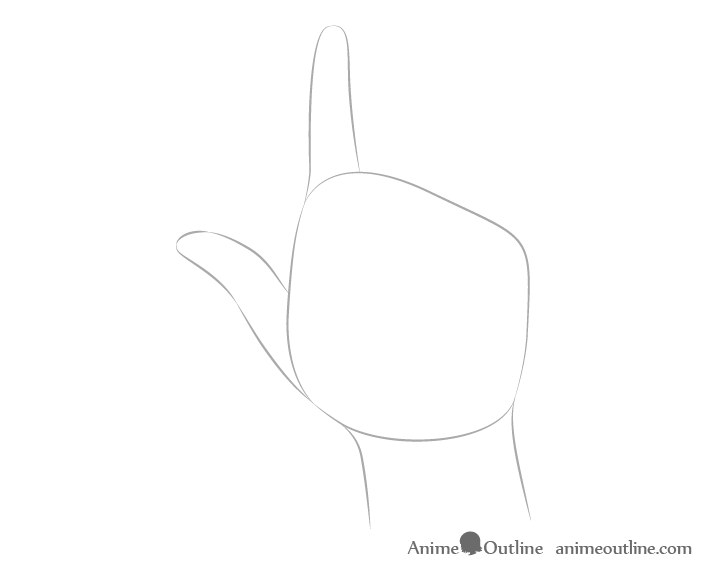
Step 2 – Draw the Thumb & Index Finger
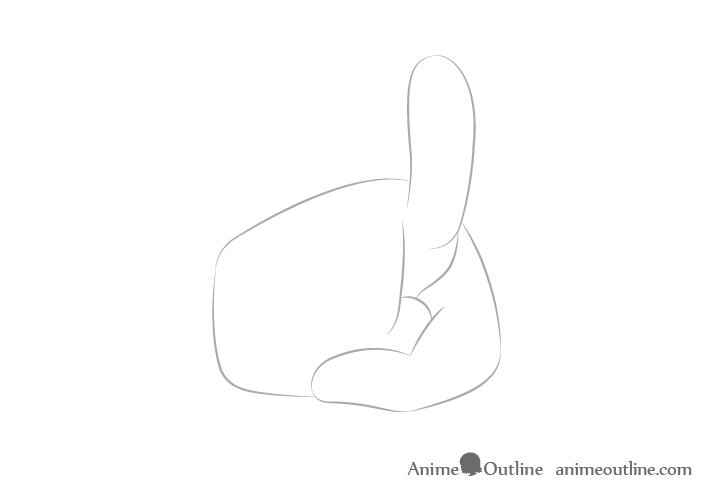
Draw the index finger much larger than normal, especially towards the tip. This will give it that “in your face” type of appearance. Next draw the thumb and the combined shape of all of the other fingers.
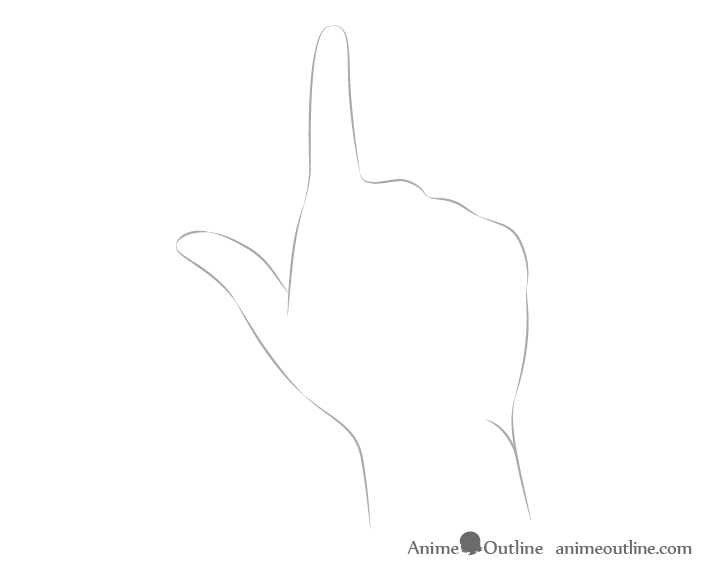
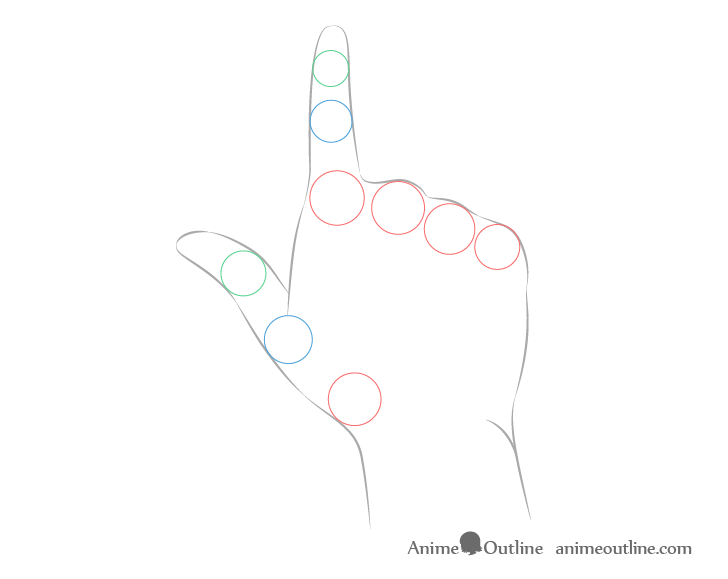
Step 3 – Draw the Fingers & Smaller Bends
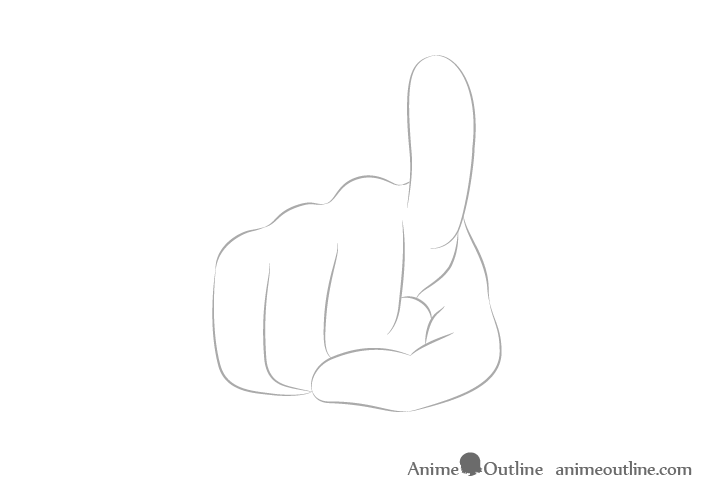
Add the individual shapes of the other fingers as well as the knuckles and smaller bends and wrinkles around the thumb.
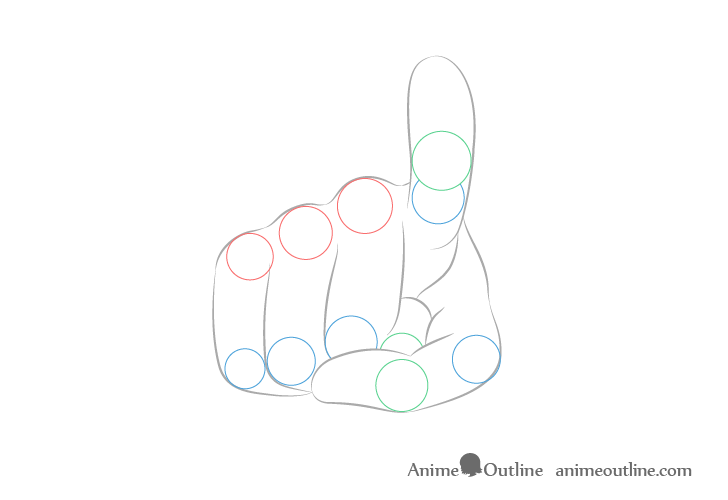
You can see the placement of the visible joints for the finger pointing hand pose above.
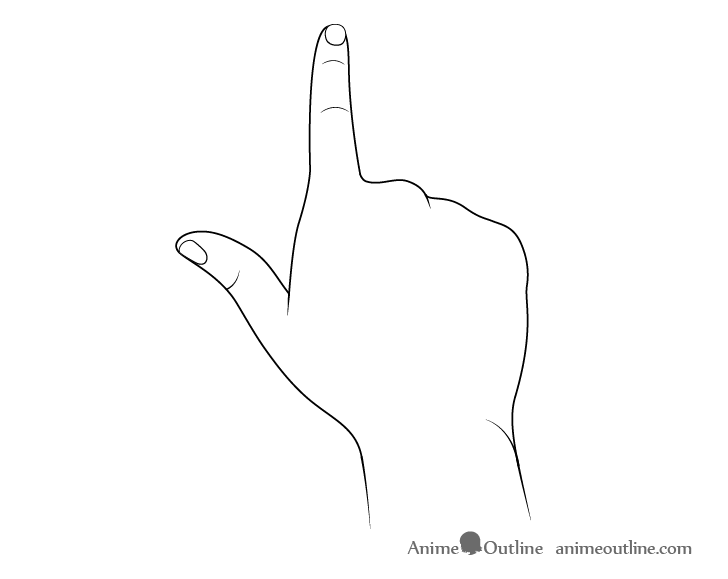
Step 4 – Finish the Finger Pointing Hand Drawing
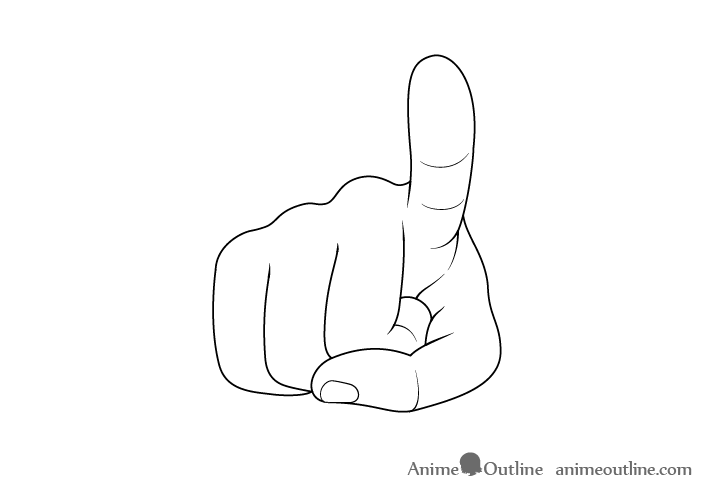
To finish the drawing add the small wrinkles around the index finger and thumb as well as just one wrinkle for the middle finger. You can also add draw the nail on the thumb (once again narrower due to the view angle).
Once done adding the details go over your drawing with darker lines to finish.
Conclusion
Hands in anime and manga are drawn very similar to real hands. Sometimes they may be simplified depending on style or the detail of the character but generally their overall proportions are usually the same or slightly exaggerated. This means if you want to draw other hand poses you can always use real hands as reference. It also means that like real hands anime and manga hands will generally be quite difficult to draw.
If you want some more anime/manga hand drawing tutorials check the following:
- 6 Ways to Draw Anime Hands Holding Something
- How to Draw a Handshake Step by Step
- How to Draw a Thumbs Up (6 Easy Steps)
- How to Draw Hands Holding Chopsticks Step by Step
- How to Draw Fingernails 6 Different Ways
For drawing poses of the entire body see:
How to Draw Anime Poses Step by Step
")


