How to Draw Realistic Eyes with Cel Shading (12 Steps)
Learn how to draw big, beautiful, realistic eyes in 12 steps with cel shading. This style is used in anime, manga and comic books.

The example is of big female eyes with thick eyelashes. Their overall shape is fairly realistic; however, the drawing uses what is known as “cel shading” and dark outlines. Cel shading is a technique common in anime, manga and comic books where the shadows are created with no gradients. Drawing in such a way is fairly easy and can give your artwork a more distinct and interesting look that is reminiscent of those styles.
Unless drawing digitally, it’s recommended that you do the tutorial in regular pencil. Try and keep your lines reasonably light so that they don’t leave marks when erased (in case you need to make a correction). You can darken them before shading.
Above is a video that shows how to draw big realistic eyes line by line. You can watch it for a more detailed breakdown of the drawing process. However, you should also read below for more in-depth instructions on why specific parts of the eyes are drawn a certain way.
For more similar drawing videos visit the AnimeOutline YouTube channel.
Step 1 – Outline the Shapes of the Eyes

Begin by drawing the overall shapes of the eyes. Make them a bit narrower towards their inner ends and leave the outlines open in these areas. Also, draw the inner ends angled slightly downwards.

Space the outlines far enough part that you can fit a third eye in between them.
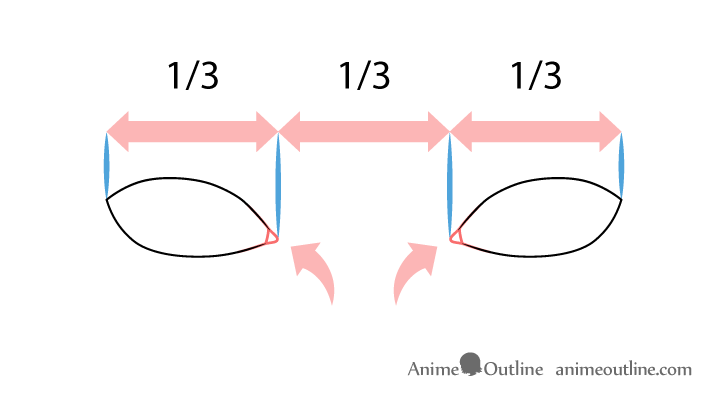
You also want to account for the width of the tear ducts when doing the spacing. However, simply estimate this without actually drawing them. Save that for a later step.
Step 2 – Draw the Big the Irises
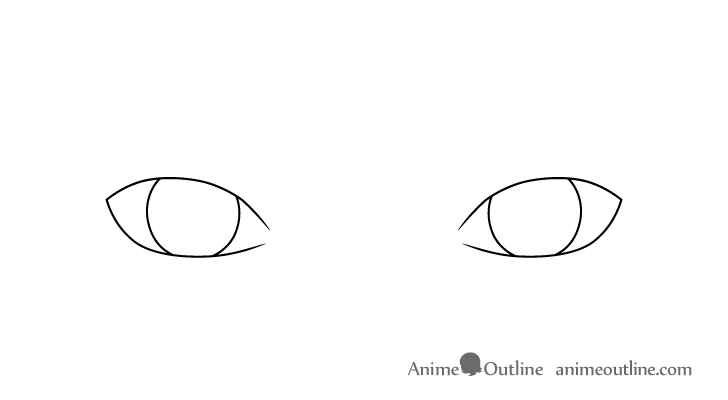
Draw big irises that fill the majority of each eye’s outline. You want large portions of their upper areas and little bits of their bottoms to be covered by the eyelids.
Step 3 – Draw the Tear Ducts

Draw the tear duct areas into the gaps at the inner corners of the outlines. Make these very small in relation to the eyes themselves.
Step 4 – Draw the Eyelids
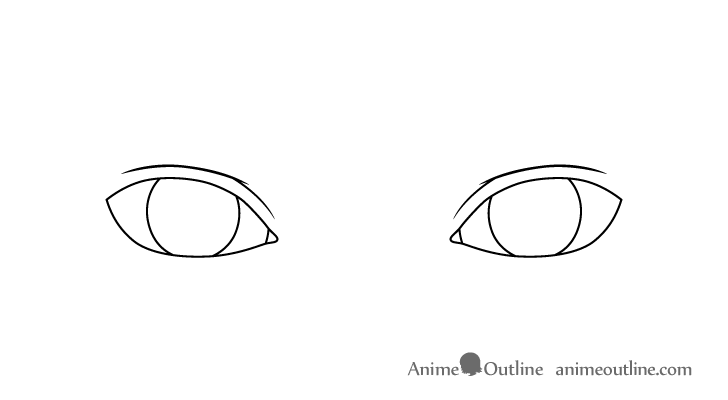
Draw the eyelids closely following the shapes of the upper curves of the eyes. You can define each one with a pair of lines as shown in the above example.
Step 5 – Draw the Eyebrows
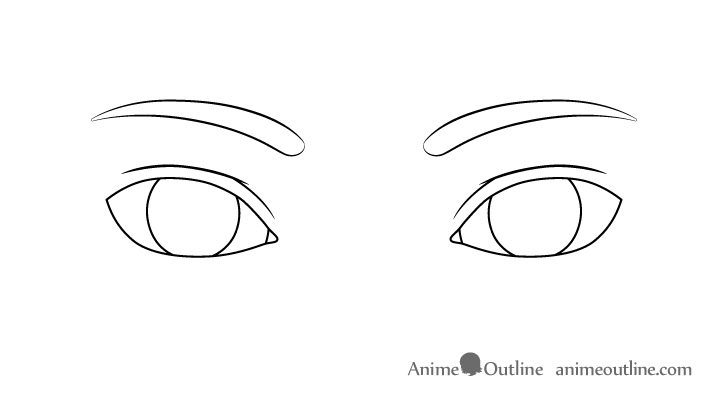
To make the eyes look bigger make the eyebrows fairly small in comparison. Draw them with thicker inner ends and thinner outer ends. Also, draw the inner ends lower down. Make the overall shape of each eyebrow curved.
Step 6 – Draw the Pupils
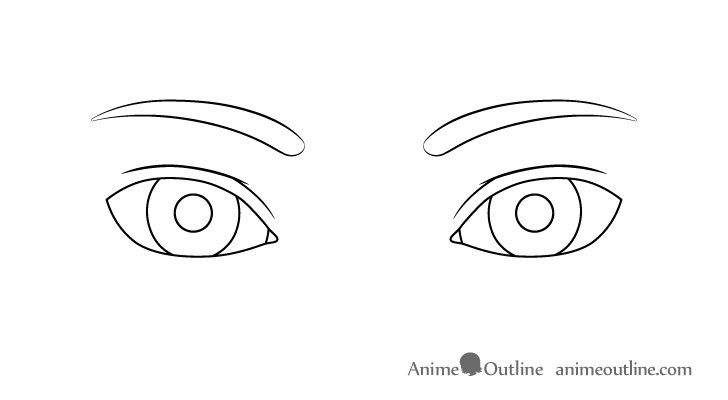
Draw the pupils centered inside the irises. Make them round in shape and also make them significantly smaller than each iris.
Step 7 – Draw the Highlights

Draw a pair of highlights (also called the “catchlights”) overlapping the pupils inside each eye. These are generally created by bright light sources reflecting from the smooth surface of the eyes. Their shapes can vary depending on the shapes of the light sources but if you want to keep things straightforward, simple make them round. In this cause the highlights are drawn as though the two light sources are slightly above the eyes with the larger one a little higher up.
Regardless of how many highlights you draw and what shapes they have, be sure to position them on the same side in each eye. For example, if you have a large highlights on the left in one eye it should also be on the left in the other eye. Beginner artists sometimes draw them mirroring one another but this is incorrect.
After defining the highlights, erase the areas of the pupils overlapped by them.
Step 8 – Draw the Edges of the Eyelids
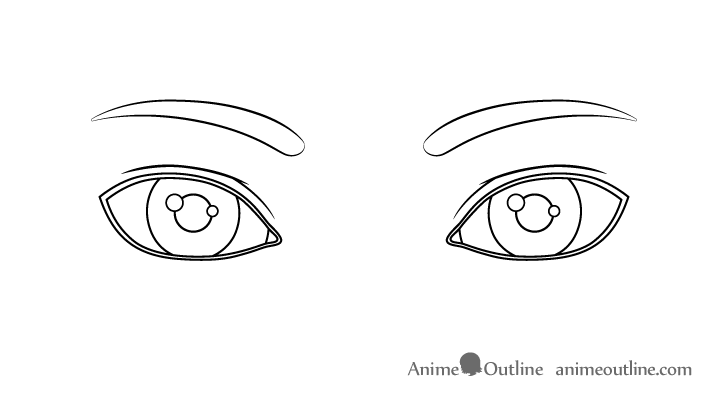
Around the outline of each eye draw the edges of the eyelids. These should pretty much follow their outer shapes. However, draw them getting slightly farther away from the outlines near their outer ends and closer to them near their inner ends.
Step 9 – Draw Hints of Individual Eyebrow Hairs
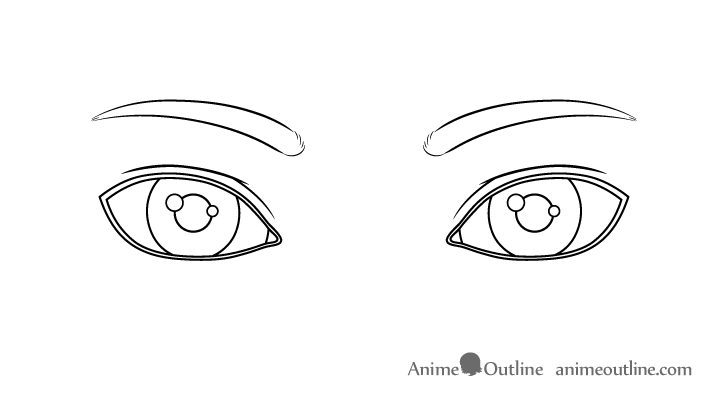
Create some hints of individual eyebrow hairs by erasing little bits of each eyebrows outline and drawing some short curved lines into the gaps. Do this around their outer and upper inner ends.
Step 10 – Draw the Eyelashes
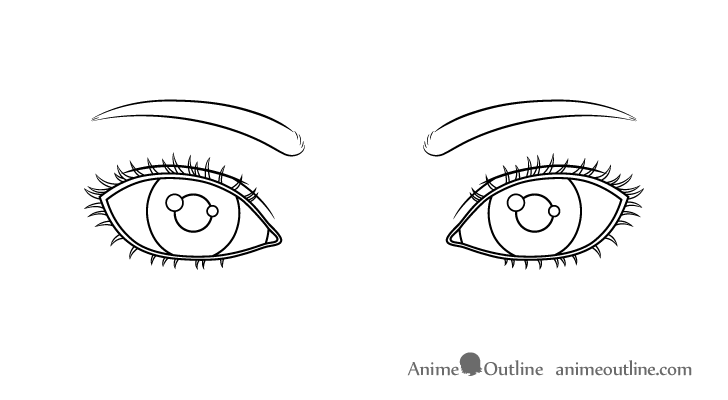
Draw the eyelashes fanning out along the outer edges of each eye. Make them thicker at the base and thinner towards their tips. Make the overall shape of each lash slightly curved. Also, try and keep their lengths and spacing somewhat random. At the same time, make the lashes along the upper eyelids longer than those along the lower eyelids.
Step 11 – Apply the Base Grays
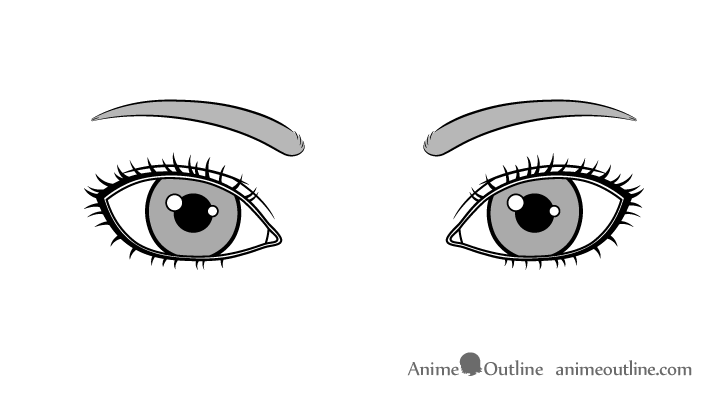
If you are drawing using pencil and paper you may wish to darken your lines before shading. Alternatively, you can go over them with a black marker.
First, give the irises thicker outlines. Next, also make the lines that define the edges of the eyelids much thicker towards their outer ends.
Fill the pupils with black (or very dark pencil shading) and fill the irises and eyebrows with gray. Be sure to leave the highlights white.
If you wish to have a colored drawing you can simply replace the grays with the colors of your choice.
Step 12 – Add the Cel Shadows
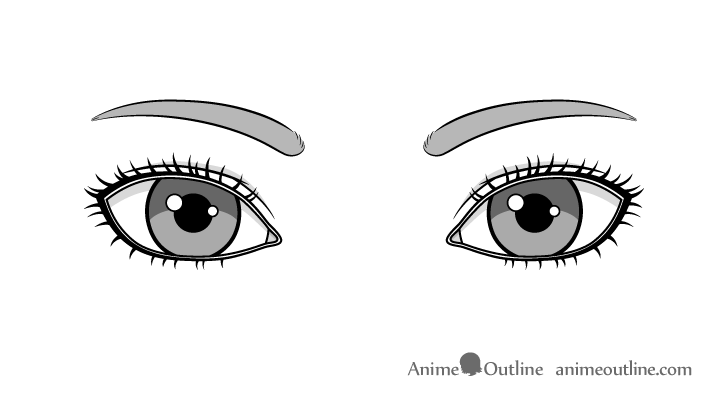
In this case the shadows are placed in areas where they are likely to appear when most of the light is coming from above. Also, as mentioned at the start of the tutorial, they are done using a technique called “cel shading” or shading without gradients.
First, darken the upper areas of the irises. This will help prevent the eyes from looking like they are intensely staring at something. It will also create a slight glow effect at their bottoms. This in turn will make the eyes appear more lively and create a sense of depth. While the tops being darker may seem to contradict the “light coming from above” setup, the transparent coronas of the eyes (that cover the irises) act as a magnifying glass and bend the light downwards. This causes the bottoms of the irises to actually be lighter.
Once done with the irises, add shadows running along the upper ends of the the whites of the eyes (cast there by the eyelashes). Also, darken the areas around the eyelids. As these are indented, less light will tend to reach there.
Conclusion – Cel Shading Can Still Look Quite Realistic
This tutorial shows how to draw a big and fairly realistic looking pair of eyes. It also demonstrates how to shade them using the “cel shading” technique that is common to anime, manga and comic books.
While seeing eyes with this degree of realism in anime is fairly rare, some manga artists do draw them in a similar way. Comic book eyes are usually more simplistic; however, certain close-up scenes can show them with a comparable level of detail.
If you like these kinds of in-depth step-by-step drawing guides, also try the following:
- How to Draw Anime Eyes and Eye Expressions
- How to Draw Anime Characters Tutorial
- How to Draw Hands Holding Chopsticks Step by Step