Draw a Watermelon Slice in 6 Steps (Anime Style)
This tutorial shows how to draw a watermelon slice in the anime and manga style using an easy-to-follow step by step approach.
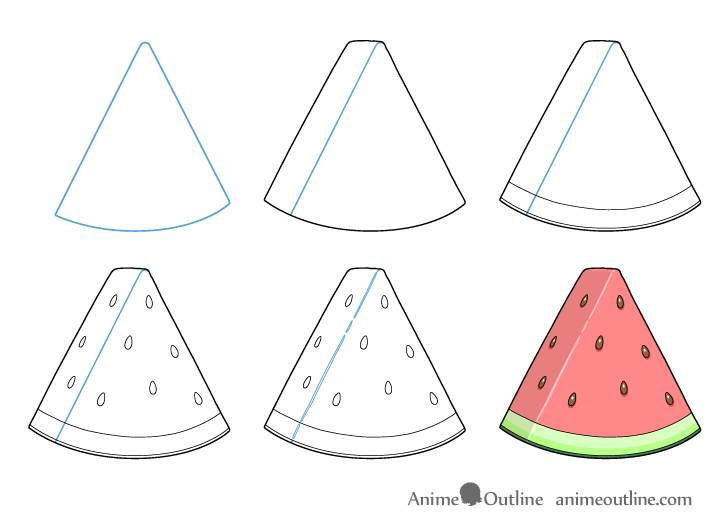
In anime and manga watermelons are fairly commonly shown in episodes or chapters that take place during summer. Characters tend to eat them when going to the beach or simply when hanging out at home. Although it’s not always the case, anime and manga watermelons tend to be shown as cut into small triangular slices. This tutorial shows how to draw such a slice using “flat colors” and black outlines to create an anime-like look.
While the artwork shown in this tutorial is done digitally, you can easily achieve a similar effect on paper by using a thin black marker and traditional coloring media. However, if you are going to be following along on paper, start in regular pencil first and then trace over your lines with the marker later on. This way you will have the option of correcting any potential mistakes.
Above is a video that shows how to draw the watermelon slice line by line. You can watch it for a more detailed breakdown of the drawing process as well as quick narrated summary of this tutorial. However, you should also read below for a more in-depth explanation of why the slice is drawn the way it is.
For more anime drawing videos see the AnimeOutline YouTube channel.
Step 1 – Outline the Front of the Watermelon Slice
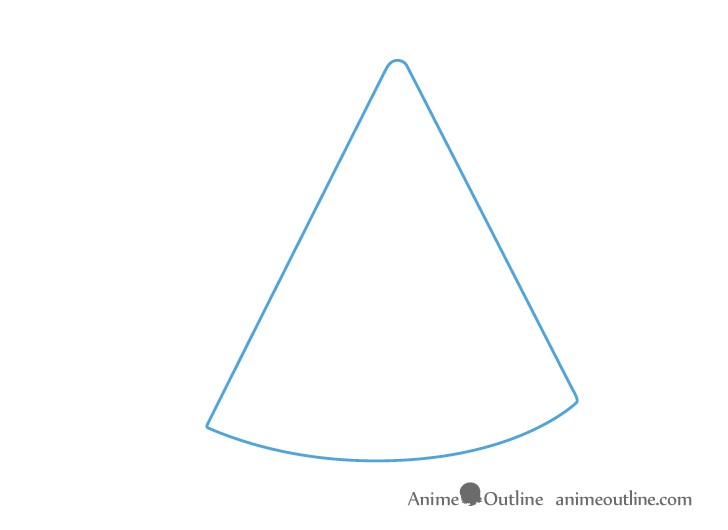
You want to start the drawing by defining the largest and most important parts of your subject. In this case it’s the forward or viewer facing side of the watermelon slice. As already mentioned, make the initial outline using fairly light lines. In this tutorial the lines that should be kept light are shown in blue.
Make the front of the slice shaped similar to a triangle with a rounded bottom and a slightly rounded upper tip. In this example it’s drawn on an angle, for this reason make the side facing more towards the viewer taller than the side facing more towards the background. This will create a sense of perspective.
Step 2 – Outline the Slice’s Side
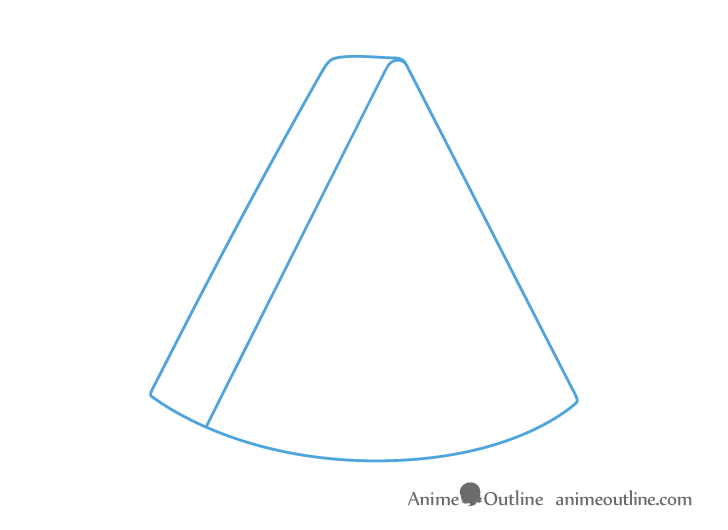
After defining the front of the slice, draw the side. Make it narrower as it goes towards the back to again, show perspective.

After adding the side, give the slice’s silhouette a darker outline. However, leave the line that defines the edge facing the most towards the viewer light as you will want to erase it later on.
Step 3 – Draw the Rind
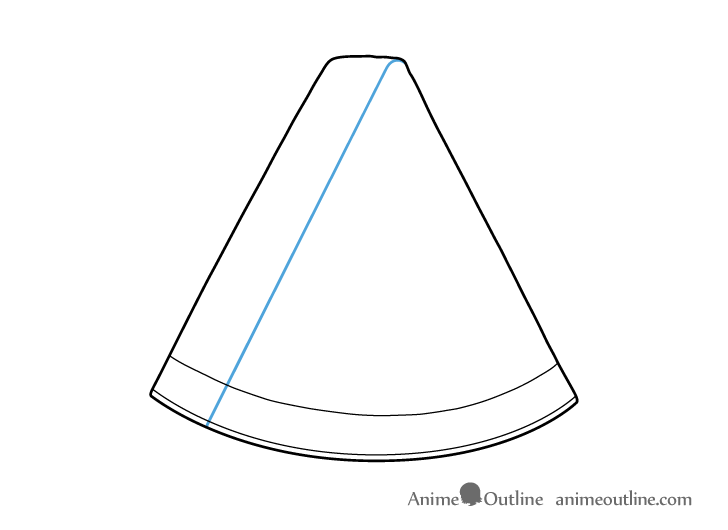
At the bottom of the slice outline the watermelon’s rind. Below that also define the skin. Draw both of these in a way where they follow the bottom curve of the slice’s overall shape.
Step 4 – Draw the Watermelon Seeds
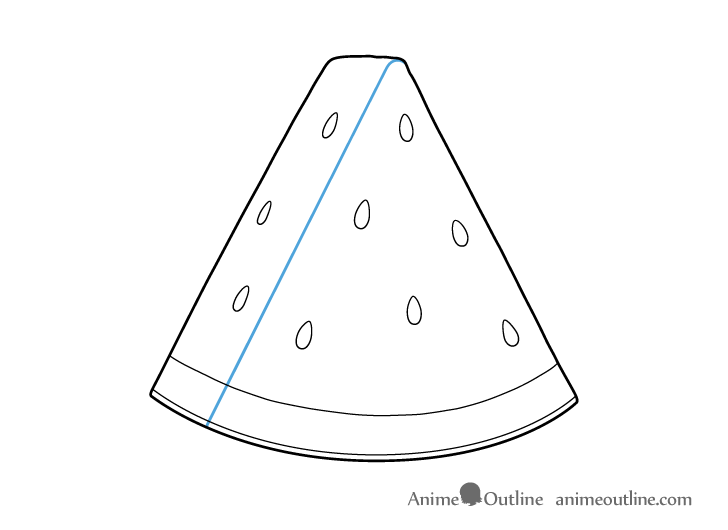
Draw the seeds with their tips pointing upwards and make them generally angled towards the tip of the slice. Make the outlines of the seeds on the side narrower (as they are being viewed from the side) and those along the front/face wider.
Step 5 – Outline the Highlights Along the Edge

This drawing is done as though the light is coming from the front and somewhere above the slice. In such a setting you can get highlights (light reflecting from the watermelon’s surface) running along it’s forward most facing edge. Define a series of these with somewhat wobbly and uneven outlines ( so that the drawing looks more natural). The reason you want to have several highlights instead of one log one is again to make the drawing appear more natural and less like a wire frame. For example, there may be little chips in the edge that will break up the reflection.
After adding the highlights, carefully erase the line that the edge was originally defined with.
Step 6 – Color & Shade the Watermelon Drawing

Watermelon slices are generally red or pink and green These are naturally complimentary colors and look great together. Color the water melon slice as follows:
- Flesh – red or pink
- Rind – light green top and yellow green bottom
- Skin – dark green
At first, leave the reflections white. However, after coloring each of the above sections also lightly go over them with the color of the area they run along. You don’t want the reflections looking overly bright as these parts of a watermelon generally are not that reflective.
A little detail to note is that unlike the rest of the drawing, you don’t need a black outline to separate the yellow green and light green parts of the rind. This will make the transition between the two colors appear softer.
Color the seeds brown but also leave a little highlights inside each of them (either lightly outline these beforehand or create them as you color). Position these reflections slightly to the upper end of each seed. Also, position those on the side seeds slightly towards the right and those on the front seeds slightly to the left. To show that the watermelon seeds are particularly smooth and reflective, you can leave these reflections completely white.

After applying the colors give the drawing some basic shading to make it appear more three dimensional.
As already mention, in this example the light is coming form the front. This means that the side of the slice (which is facing more away from it) will have a light shadow. You can show this by slightly darkening the corresponding area. However, don’t apply the shading all the way to the tip. Leave a little light strip right before it. As mentioned, the light source is above the watermelon so it’s tip will also be illuminated.
After adding the shadow along the side, also, add little shadows below the watermelon seeds. As these areas are generally indented less light will tend to reach inside of them.
Conclusion – Drawing a Watermelon in the Anime Style Can be Simple
This tutorial shows how to draw a watermelon slice in the anime and manga style. Such a look is achieved using black outline and flat colors. The tutorial employs a step by step approach where you start with the overall shape of the slice and then add it’s smaller parts. It then explains how to apply some color how to add some shading to show particular lighting conditions. The end result is a stylized but still believable and easily recognized drawing of a watermelon slice.
For more tutorials on drawing food commonly seen in anime and manga, try the following:
- How to Draw Anime Style Food & Lunch Box
- How to Draw a Candy Apple Step by Step
- How to Draw Sushi Step by Step
- How to Draw Dumplings (Anime & Manga Style)