
How to Draw Messy Anime Hair
This tutorial shows how to draw messy looking anime or manga style hair. It provides simple examples and easy to follow instructions.
Messy looking hair is quite common in anime and is often one of the most defining characteristics of some characters. This tutorial looks at the specifics of drawing such a hair using a female hairstyle as an example.
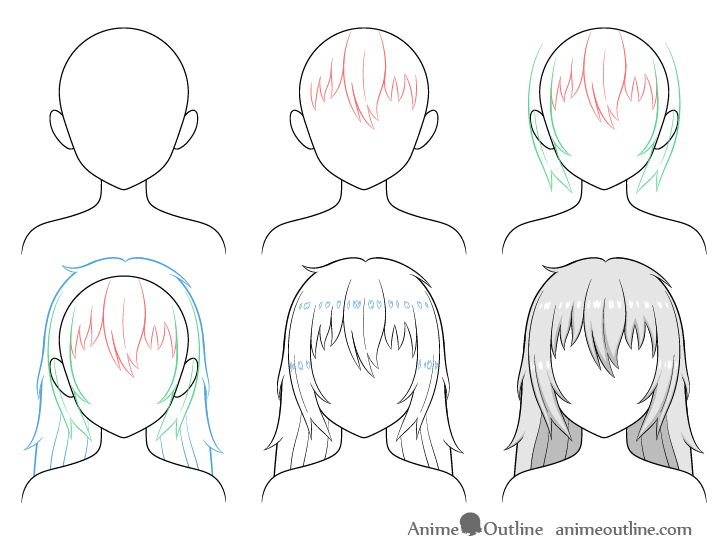
You can see the key stages of the tutorial in the preview image above but there are many more illustrations provided throughout it’s different steps.
Unless drawing digitally it’s recommended that you use a pencil and start with light and easy to erase lines. You can darken them before shading.
Above is a line by line drawing video of the messy looking hair. You can watch it and then read the more detailed drawing instructions below.
If you like these types of videos please be sure to leave a like and to subscribe to the AnimeOutline channel. Your likes and subscriptions are VERY helpful and much appreciated!
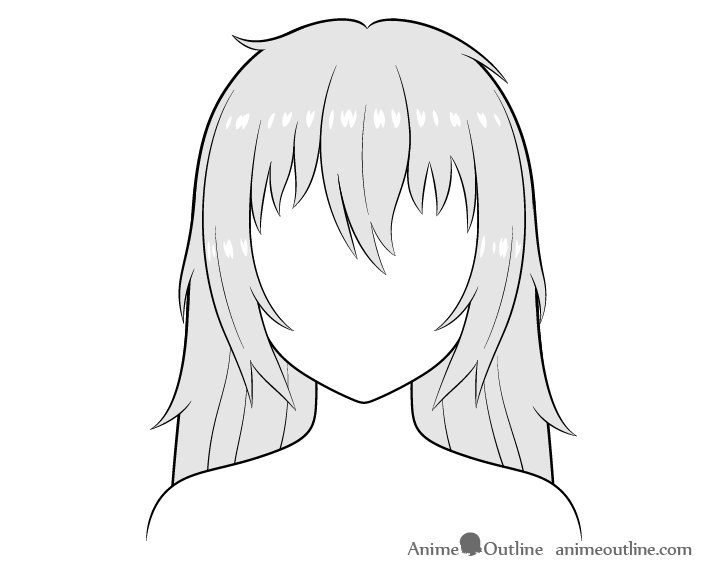
Step 1 – Make an Outline Drawing of the Head & Shoulders
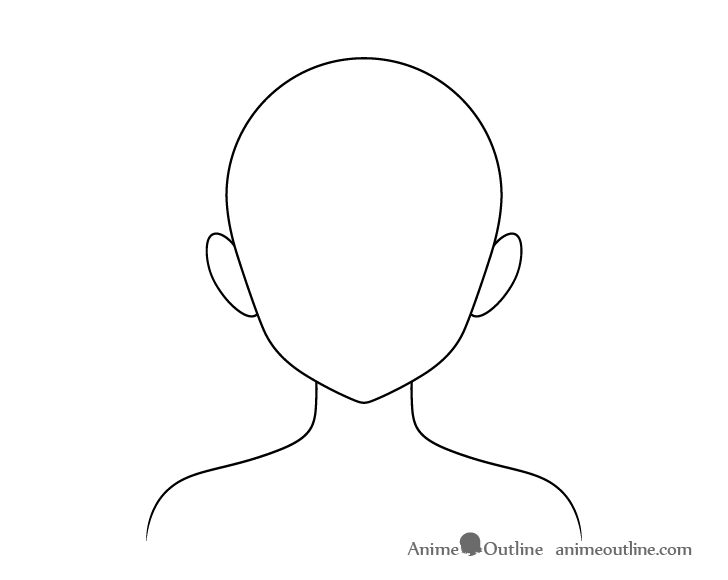
Before you draw the hair make an outline drawing of the head, neck and shoulders. You will want to draw the entire head even though large parts of it will eventually be covered by the hair. Doing so will make it easier to give the hair proper volume and to avoid mistakes.
For more tips on avoiding some common drawing mistakes see the following tutorial:
Common Mistakes When Drawing Anime & Manga
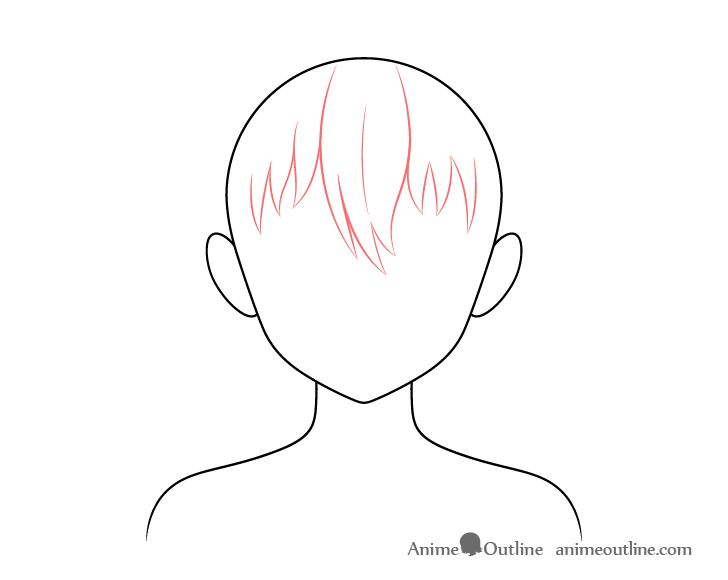
Step 2 – Draw the Hair Along the Forehead
As with most such tutorial here on AnimeOutline the hair will be split into three parts to make the drawing process easier to manage. In the examples these are shown in red, green and blue but you can draw everything in regular pencil.
For more on this drawing approach read:
How to Draw Anime and Manga Hair – Female
Start the drawing with the “front section” of the hair (along the forehead). Give it a longer bit in the middle and shorter parts on the sides.
Draw the hair in fairly large clumps that curve in different directions to help create a messy look.
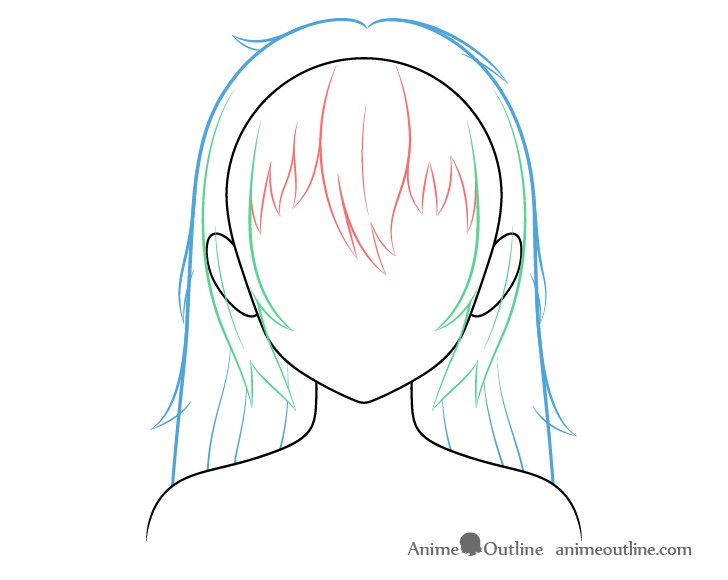
Step 3 – Draw the Hair Along the Sides of the Head
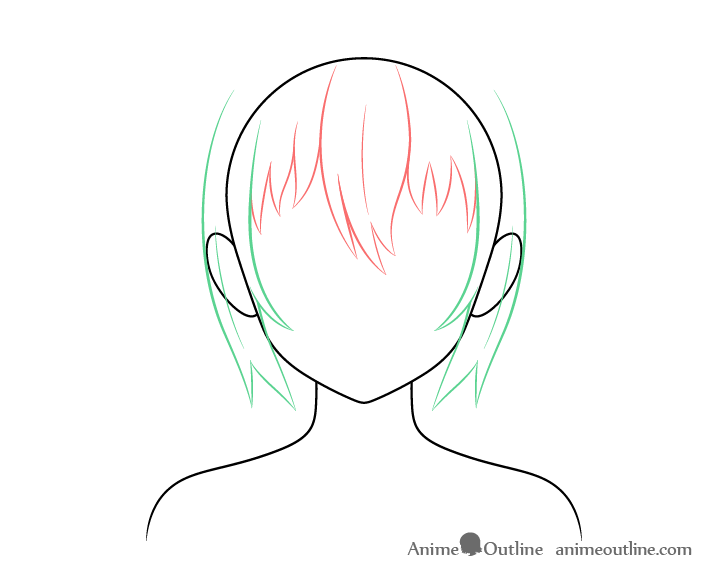
Draw the side sections of the hair somewhat hugging the shape of the head. Give each one a little clump around the ears and a split on it’s end.
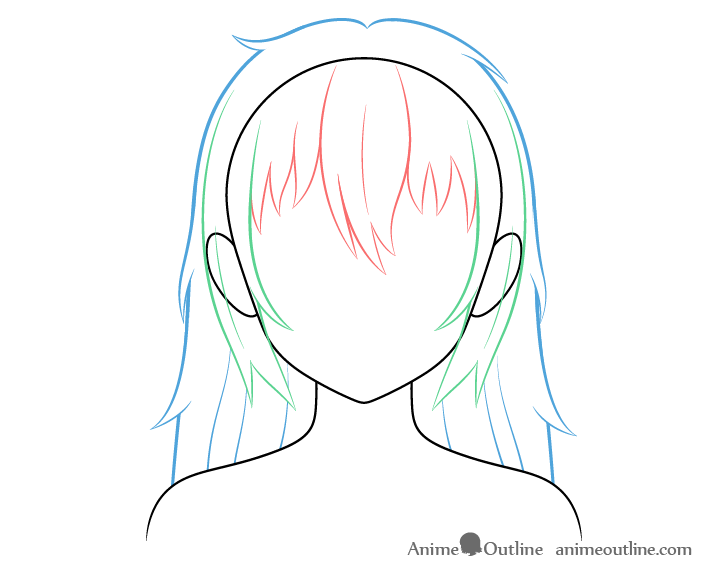
Step 4 – Draw the Hair on Top & at the Back of the Head
For the top/background section of the hair draw it somewhat following the shape of the head as it goes down and then getting wider around the level of the ears.
Next draw a few folds as a series of wavy lines running between the shoulders and the lower part of the head. Afterwards add a series of small clumps running along the outer shape of the hair. These are particularly important in creating the messy look.
You can then erase parts of the top/background section’s outline in the spots where you’ve added the clumps.
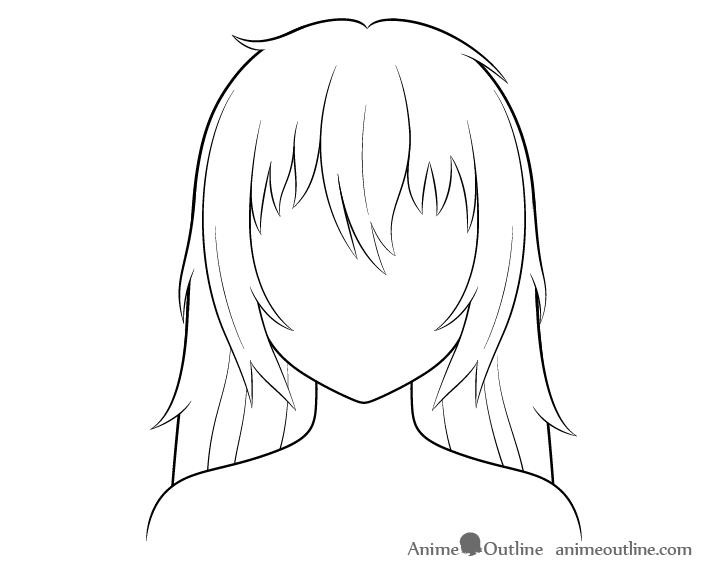
After finishing the above you can also erase the parts of the head that are covered by the hair so that you have a clean drawing similar to the example.
Step 5 – Outline the Hair Highlights
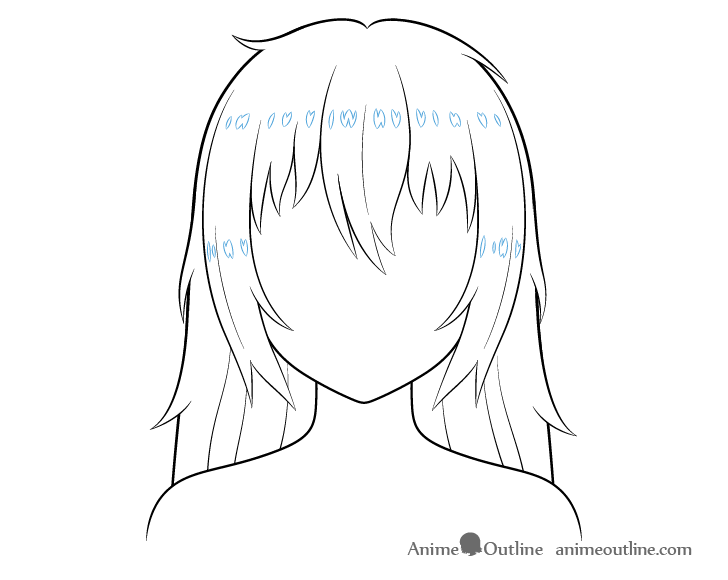
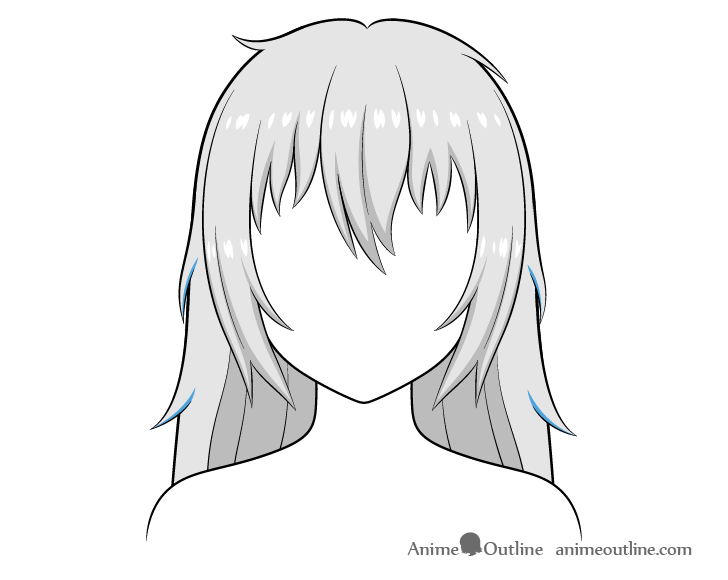
Before shading the drawing you can outline a series of little highlights running across the forehead area and side section of the hair. These are to show light reflecting from it’s smooth surface and to give the hair a more shiny appearance.
Alternatively you can simply create the highlights as you shade or add them in over top of the shading if drawing digitally (in a new layer).
You can also add them in over top of the pencil shading using a white correction pen.
For other styles of anime and manga hair highlights see:
Different Ways to Draw Anime Hair Highlights
Step 6 – Add Shading to Finish the Messy Hair Drawing
For the first step of the shading process simply fill in the entire area of the hair with grey (or use color if you prefer).
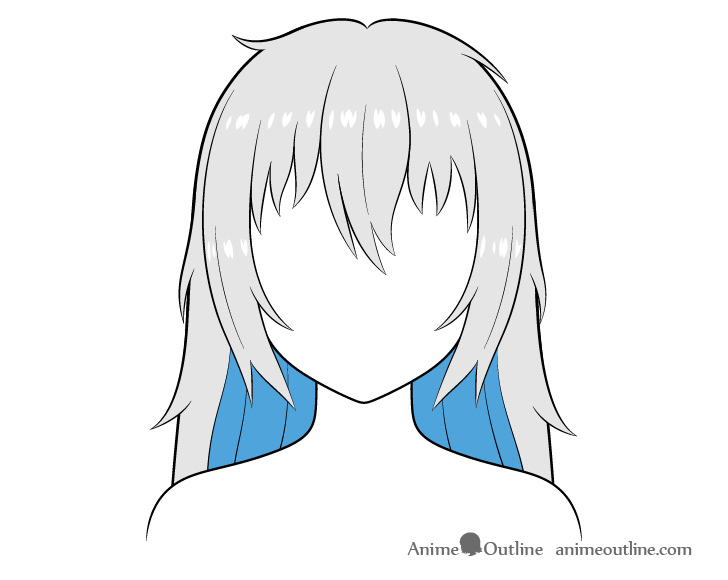
In this example the shadows will be placed where they are likely to appear in common lighting conditions such as daytime outdoors or a well lit room. Make the shadows darker than the regular grey/color of the hair but not too much so.
The largest shaded area will be the inner/background section of the hair around the neck (shown in blue in the example above to make it easier to see). You can darken this first.
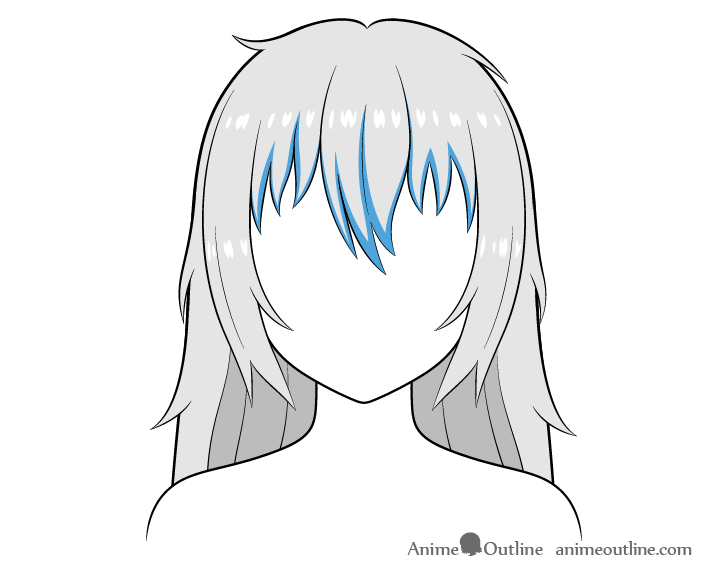
Next add some shadows to the forehead area running along the bottoms and sides of it’s clumps.
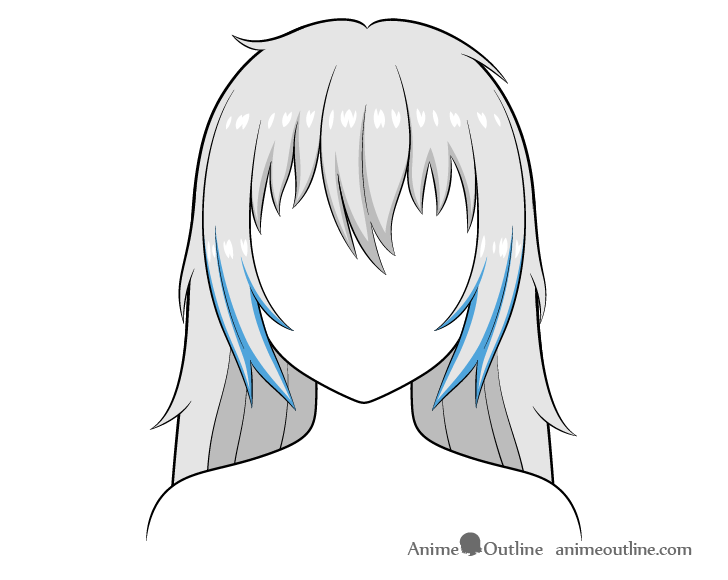
Add some shadows to the side sections of the hair in a way similar to those for the forehead.
Finally add some tiny shadows on the lower parts of the side clumps sicking out from the top/background section.
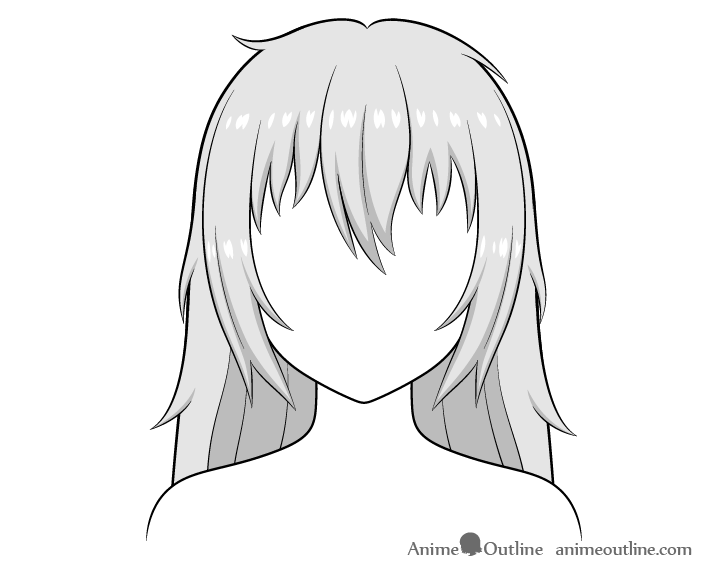
Once all of the shadows are in place you should have a finished drawing of a messy anime/manga style hair.
Conclusion
As mentioned at the start of the tutorial, messy looking hair is quite common in anime and manga. Sometimes it can be drawn this way to show that the hair has been “roughed up” and other times as just part of a character’s normal hairstyle.
Drawing messy looking hair is not much different from other classic anime hairstyles. Generally the more hair clumps you add sticking out in random direction the more messy it will appear.
If you like these types detailed and easy to follow tutorials then also be sure to check the following:
- How to Draw Anime “Hime Cut” Hairstyle
- How to Draw Anime Pigtails Hair
- How to Draw Anime Hair Over One Eye
- How to Draw Curly Anime Hair
- How to Draw Anime Hair Buns Step by Step
- How to Draw Anime Characters Tutorial
- How to Draw an Anime Little Girl (Entire Body)


