
How to Draw Dumplings (Anime & Manga Style)
This tutorial shows how to draw steamed Japanese/Asian dumplings in the anime or manga style. It consists of eight steps and provides many detailed examples.
The steamed dumplings shown in this tutorial are a fairly common food in several Asian cultures. They are usually served a bamboo steamer like the one in the example.
While the focus of this tutorial is on the anime/manga style the line drawing portion will not differ much from traditional art. However, the coloring and shading parts will be done using “Cel Shading” that you are probably familiar with if you’ve tried some other guides here on AnimeOutline.
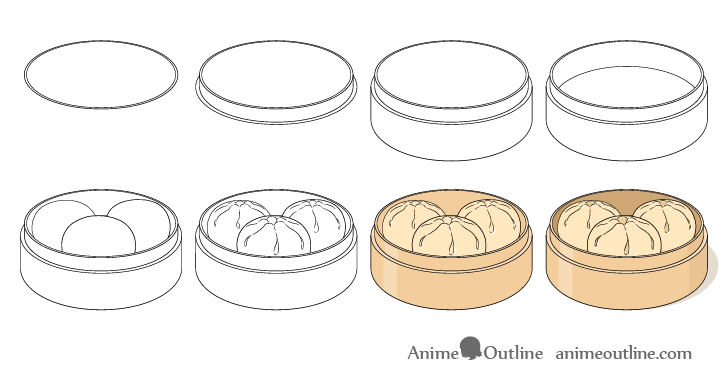
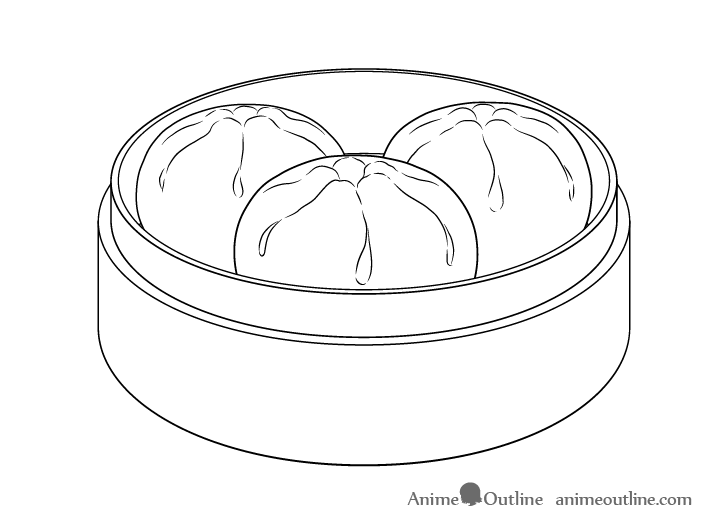
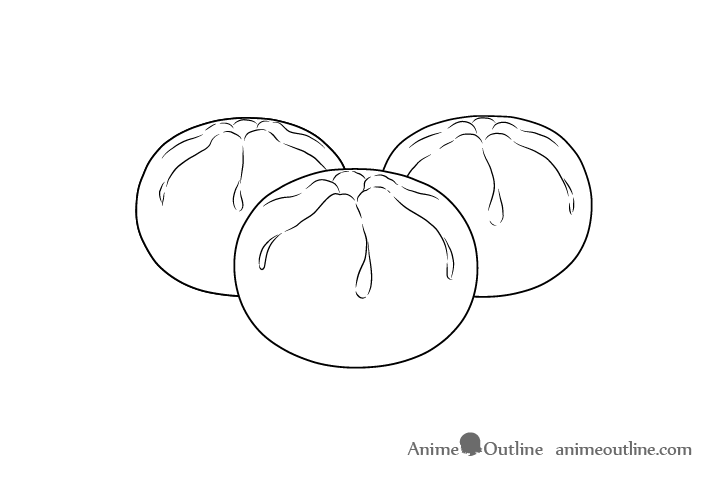
The tutorial can be done in two ways. One is drawing the dumplings in the steamer (shown above). The second is drawing the dumplings on their own (shown below).
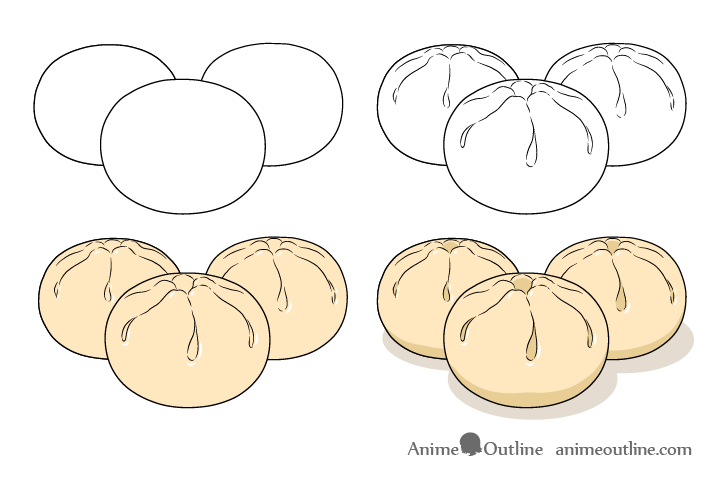
The second option is much easier. If that’s the one you wish to go for simple skip step 1-4 and go straight to step 5 of the tutorial.
You can see the main drawing stages in the two preview images but there are additional examples provided in some of the steps.
Whichever version you choose it’s be sure to start the tutorial in pencil (unless drawing digitally) and make light lines that are easy to erase. You can darken them later on.
Step 1 – Draw the Top of the Dumpling Steamer
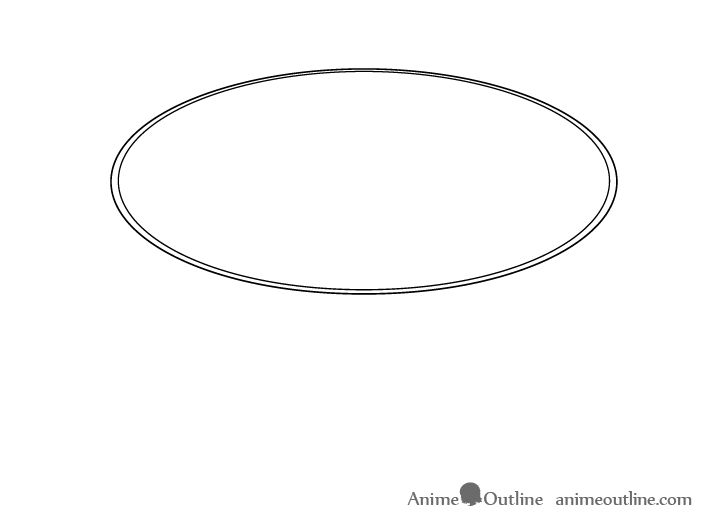
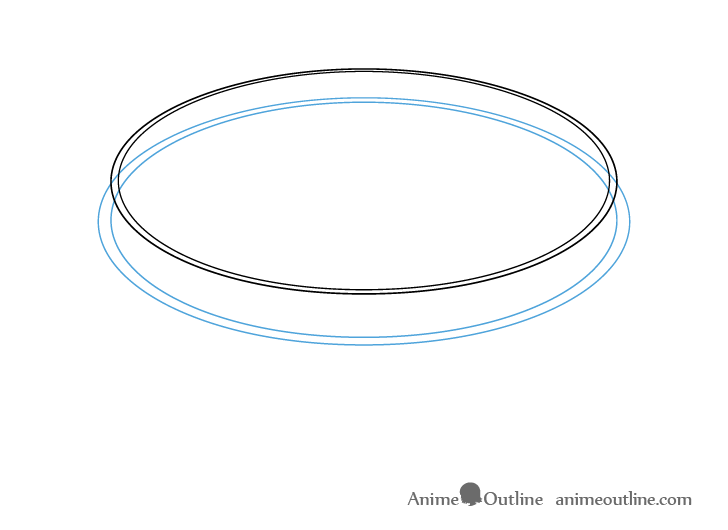
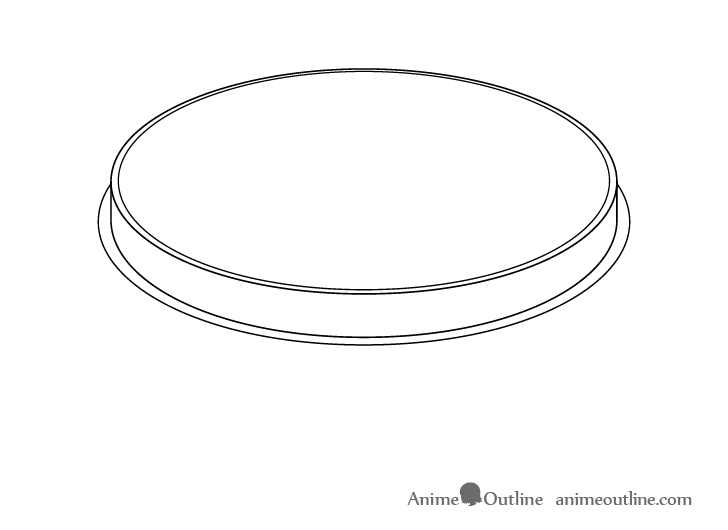
Begin by drawing the top of the dumpling steamer. Generally these are round in shape but when viewed on an angle (as in this drawing) it’s top will appear as an oval.
Draw a larger oval first and then draw a smaller one inside it to show the thickness of the steamer’s walls.
As the steamer is drawn in perspective you should take a few things into account when creating the “ovals”. These are explained below. Please note that you do NOT have to create the drawing with all of the perspective lines. The explanation is simply done to give you a better understanding of why things are drawn the way they are.
For more on perspective drawing also see the following:
Perspective Drawing Tutorial for Beginners and How it Relates to Anime
Perspective is objects getting smaller as they go off into the distance. “Eye Level” refers to the level of the viewers eyes in relation to the object that is being drawn.
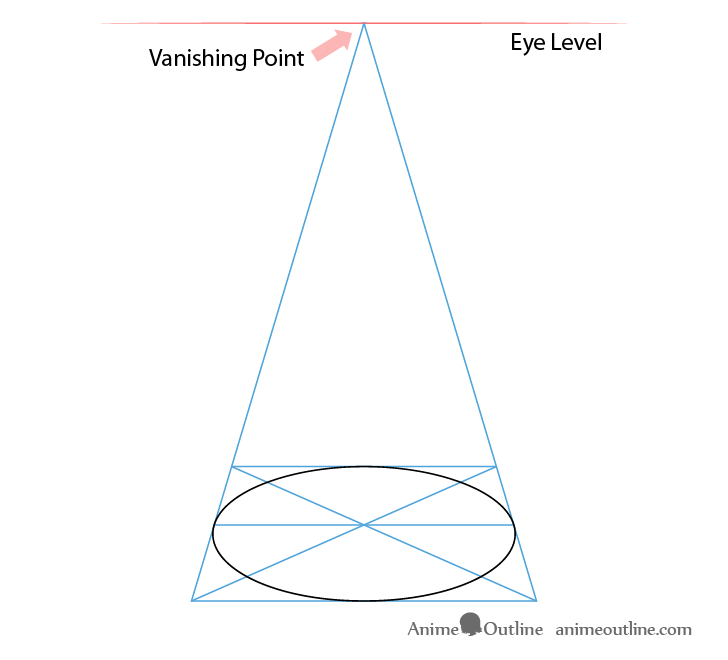
A properly structured in perspective circle drawing for the top of the steamer is shown above. To create one you would first need to make a one point perspective drawing of a square and then draw a pair of lines going from one corner to another to create an “X”.
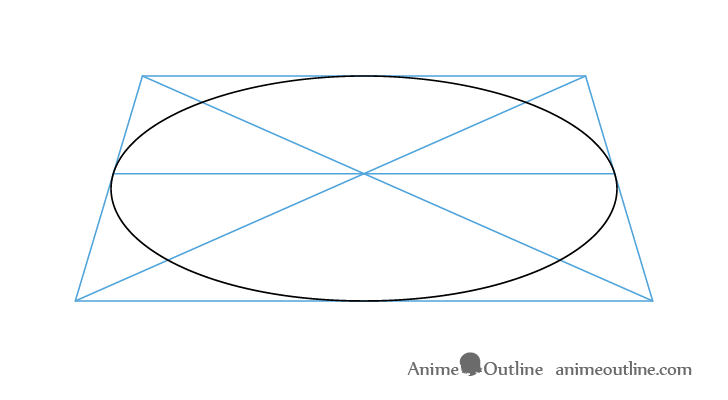
The point where lines intersect gives you the “in perspective” middle of the circle. By drawing a horizontal line through this you can split the circle into the top and bottom.
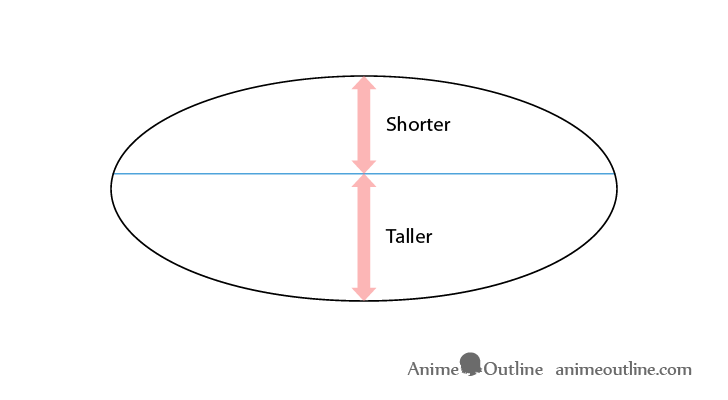
In the above example you can see that the top half of the “oval” ends up being narrower than the bottom. As already mentioned you don’t need to actually draw out all of the perspective lines. Simply try and keep the above above in mind when outlining the shapes of the “ovals”. Try and make their bottoms taller/rounder and their tops narrower/flatter.
Step 2 – Draw the Middle of the Steamer
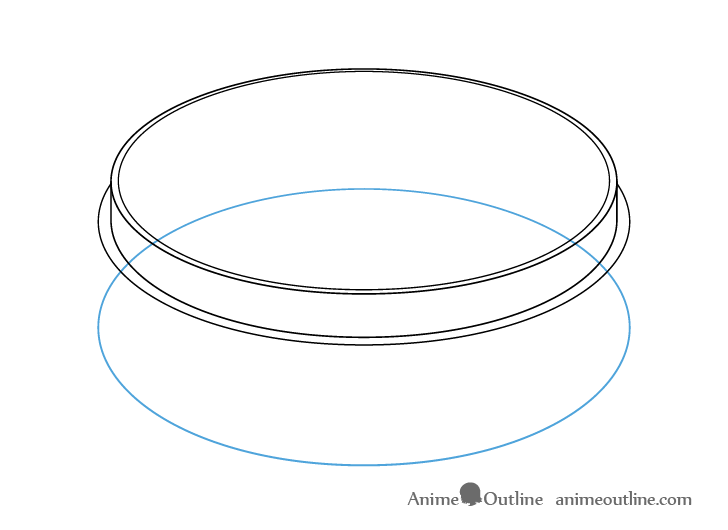
For this step you will want to draw the middle part of the steamer that the lid sits on.
A little bit below the initial two ovals draw another pair. Make the first one the same width as the outer oval from the step one but make it a little rounder (taller/vertically wider). The reason for this is that the further the a circle that’s viewed on an angle is below a viewers eyes the rounder it appears.
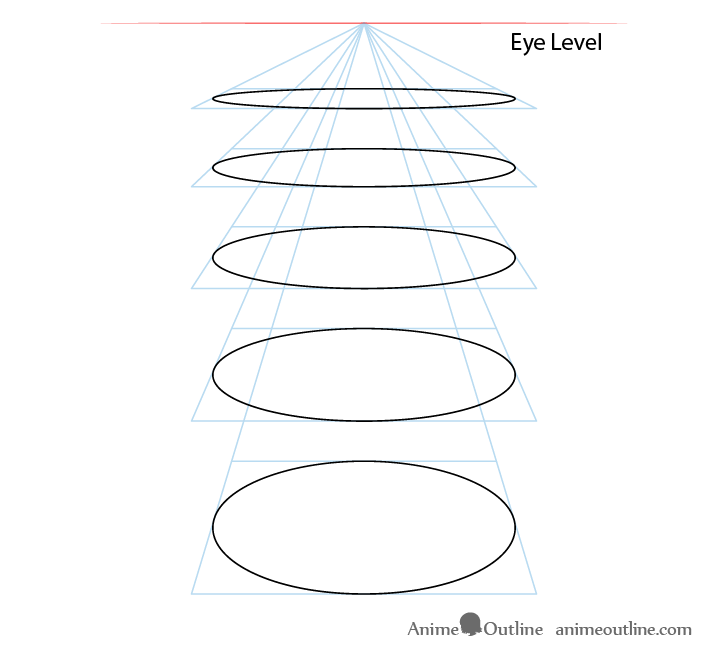
You can see how things change based on eye level in the above illustration. Try this for yourself by looking at any round object sitting on the floor or the table and then bringing it up closer to the level of your eyes (without tilting it too much). The closer it gets the narrower it will appear. Once at the level of your eyes the round surface will basically look flat.
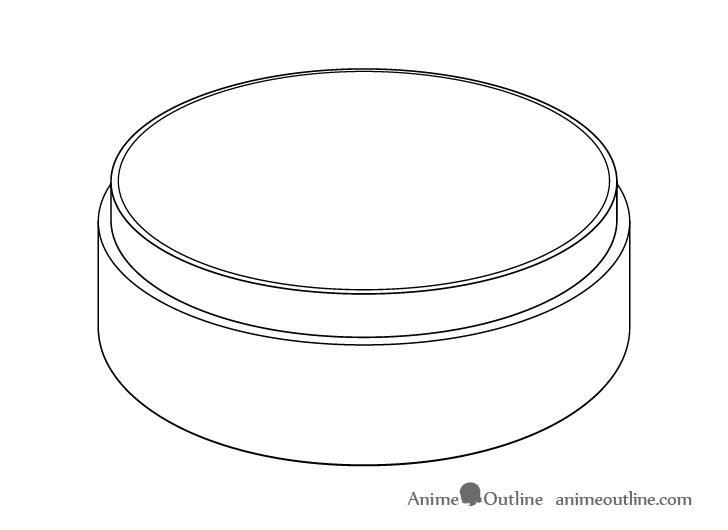
You will also want to first draw the ovals as though the steamer is see through. Next connect the outer sides of the top inner oval to the outer sides of the inner oval at the bottom. Afterwards erase the lines that should not be visible so that you have something similar to the above.
The reason for the “transparent drawing” is because it makes it easier to see if you have a proper oval when the entire thing outlined.
Step 3 – Draw the Bottom of the Steamer
Similar to the previous step draw an oval for the bottom of the steamer. This one should be the same width as the outer oval from the previous step but once again it should be rounder (taller/vertically wider).
Again, first draw it as though the steamer is transparent. Next connect the outer edge of the the two largest ovals with a pair of straight lines and erase the parts that should not be visible.
Step 4 – Draw the Inside of the Steamer
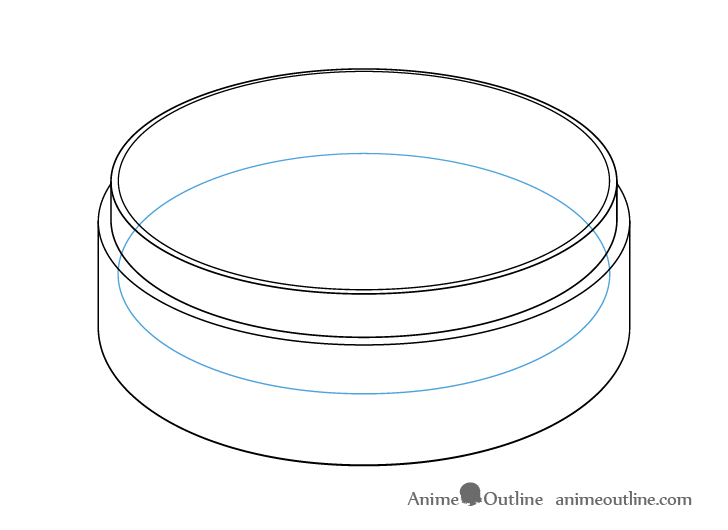
For the last part of the steamer add it’s inner section that the dumplings will sit on. This is a little bit up from the bottom and should be the same width as the inner oval at the very top. It should also once again be rounder as it’s lower down.
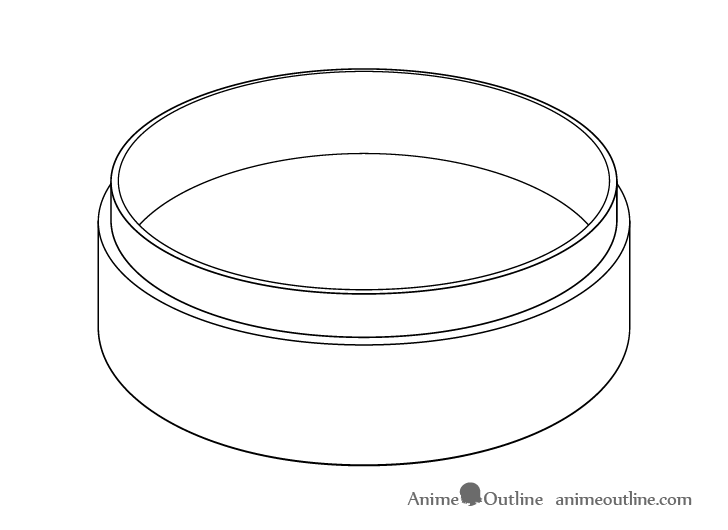
Yet again, draw the oval as though the dumpling steamer is transparent and then erase the part that is hidden.
With the above done you should have a finished line drawing of the steamer.
Step 5 – Outline the Dumplings
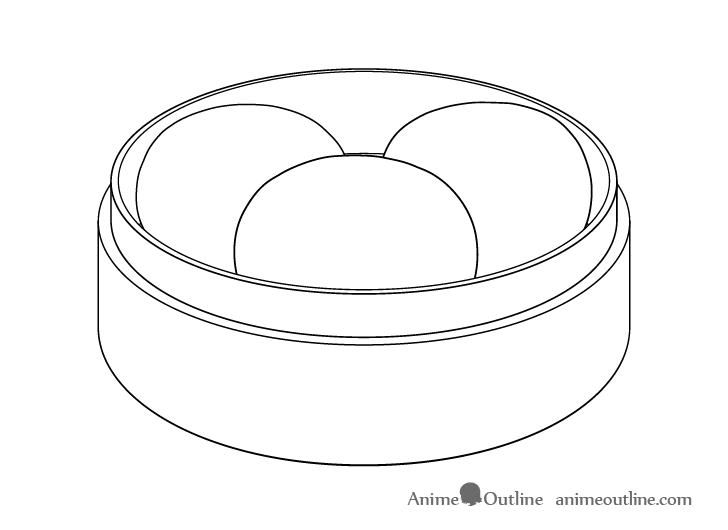
With the steamer outlined you can draw the dumplings inside it as in the example. Generally at this angle they will tend to appear as ovals with somewhat flattened tops and sides.
When adding them try and estimate the placement so that they don’t appear to be too far down or too far up.
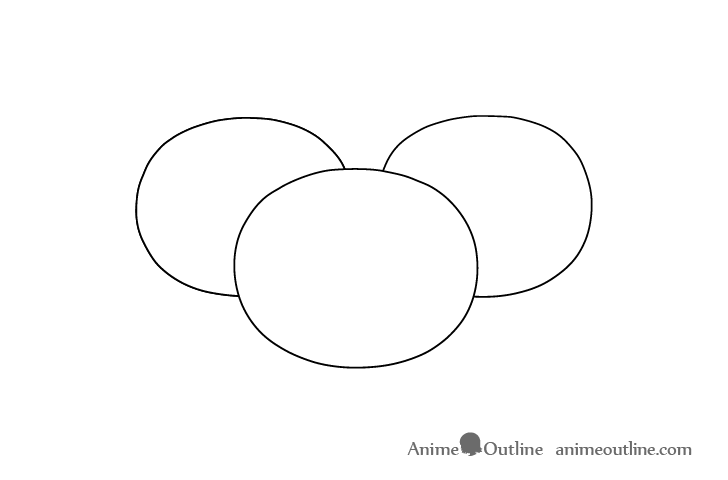
If you want to just draw the dumplings you can just outline their shapes as shown above.
Step 6 – Draw the Smaller Details
After you have teach dumpling outlined add the smaller details. These are the folds created in the dough when it’s closed up around the filling.
You can see what the dumplings look like without the steamer in the example above.
When done adding these folds check your drawing to make sure everything is in the right place. You can then trace over your lines to darken them (if needed).
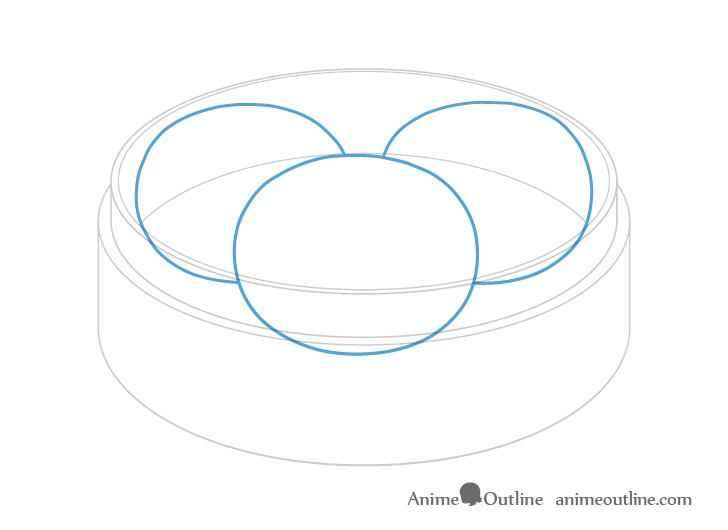
Step 7 – Add Color
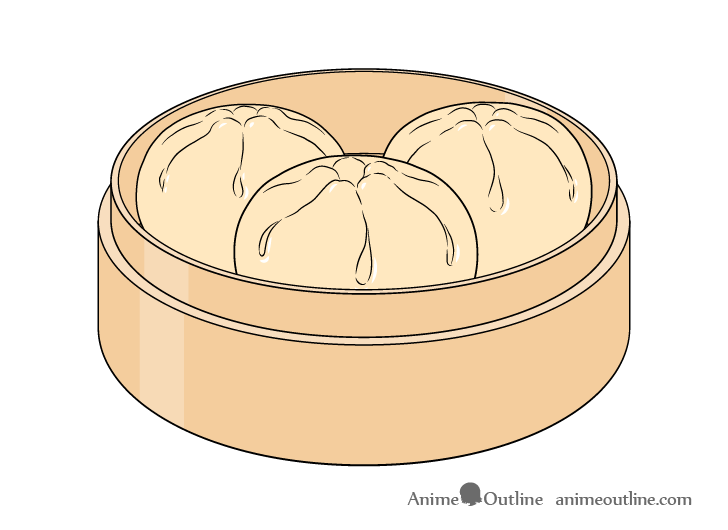
To color the drawing you can make the dumplings a light yellow/brown and make the steamer a slightly darker yellow/brown with a bit of orange.
You will also want to leave a few highlights and lighter areas on the dumplings and steamer. Keep these white on the dumplings and make them a lighter variant of it’s color for the steamer.

As the lighter areas and highlights may be a bit difficult to see their locations are shown in blue in the example above. As mentioned at the start of the tutorial the coloring/shading in the examples is done using “Cel Shading”. A technique that has no gradients between the light, medium and dark areas. This is common in anime, manga, comic books and cartoons.
In this case the light will be coming from above. It will also be slightly in front and to the left of dumplings/steamer. This means that the lighter areas will generally be on the top surfaces of the steamer. In this example there will also be highlight son it’s outer left and it’s inner right areas.
The dumplings will have highlights on the upper left of the bumps at the top and lower right of the folds.
Please keep in mind that as this is a somewhat stylized drawing you do not need to be overly precise with the light and shadows. It simply has to be close enough to be believable.

If you are only drawing the dumplings the coloring process is still exactly the same.
Step 8 – Add Shading & Finish the Dumplings Drawing
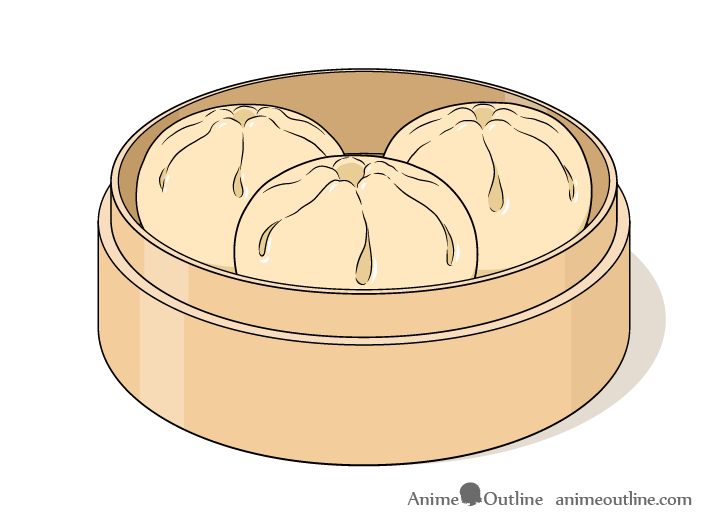
For the last step add the shadows.
In the lighting setup described above the darker areas will be on the inside of the steamer (even darker on it’s inner left) as well as on it’s outer right side. It will also cast a really short shadow to the right and a little bit behind itself.
The dumplings will have shadows mainly along their bottoms and the areas with deep inner folds.
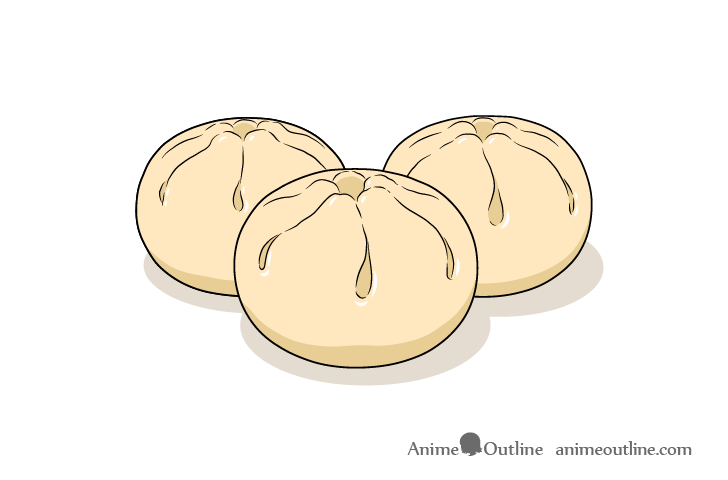
If drawing the dumplings without the steamer you can give each one it’s own shadow as shown in the example above.
Once done adding the shadows you should be finished with the drawing.
Conclusion
This tutorial shows two variations of drawing Japanese/Asian style dumplings. While the “steamer version” is significantly more complex it also offers very important drawing advice that can be useful in improving your skills as an artist. However, even if you’ve gone with just the dumplings that can still make for some good practice.
Whatever version of the tutorial you preferred hopefully you’ve had fun following along.
For more guides on drawing anime/manga style food and related items see the following:
- How to Draw Hands Holding Chopsticks Step by Step
- How to Draw a Rice Bowl Step by Step
- How to Draw Anime Style Food & Lunch Box
- How to Draw Sushi Step by Step
- How to Draw a Candy Apple Step by Step


