
How to Draw a Rice Bowl Step by Step
This tutorial shows how to draw a rice bowl filled with rice in an anime or manga style. It includes a total of 12 steps with detailed drawing examples for each of them.
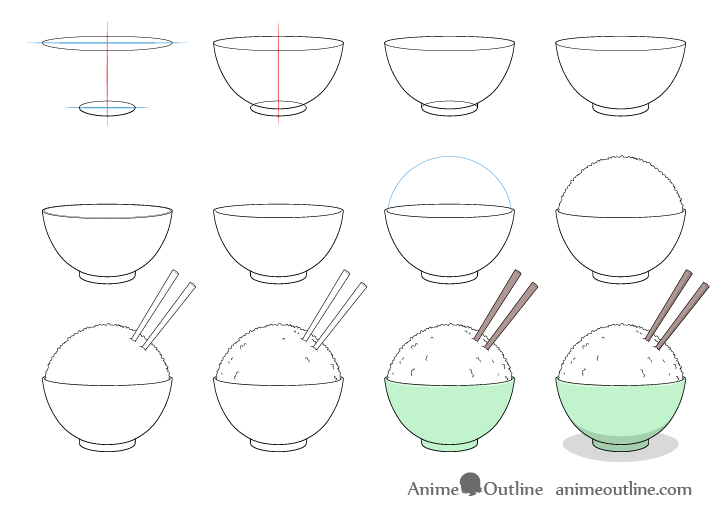
Rice bowls are very common in many types of anime and manga. They may seem fairly simple but there are a few things to be aware of if you want to create a properly structured drawing of one. This tutorial explains what these are and shows a drawing approach that you can use even outside of the anime and manga style.
Start the tutorial in pencil and make light lines as you will need to do some erasing moving between a few of the steps. You can darken them at the end of step ten.
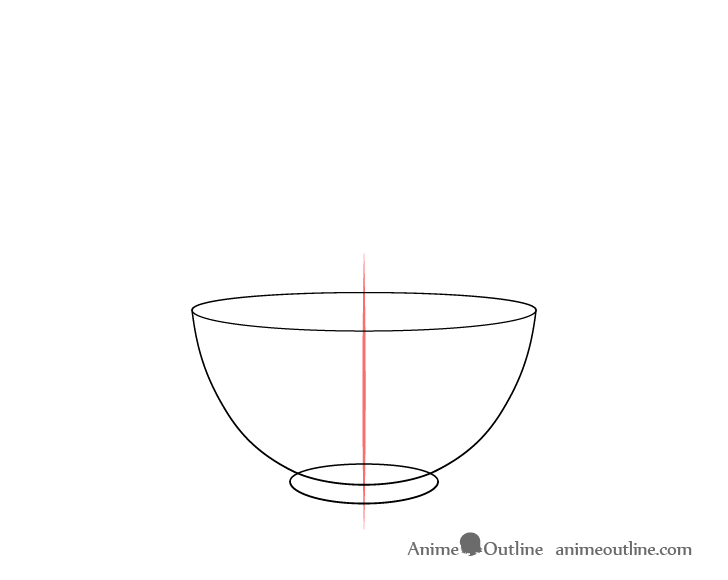
Step 1 – Draw the Top and Base of the Bowl
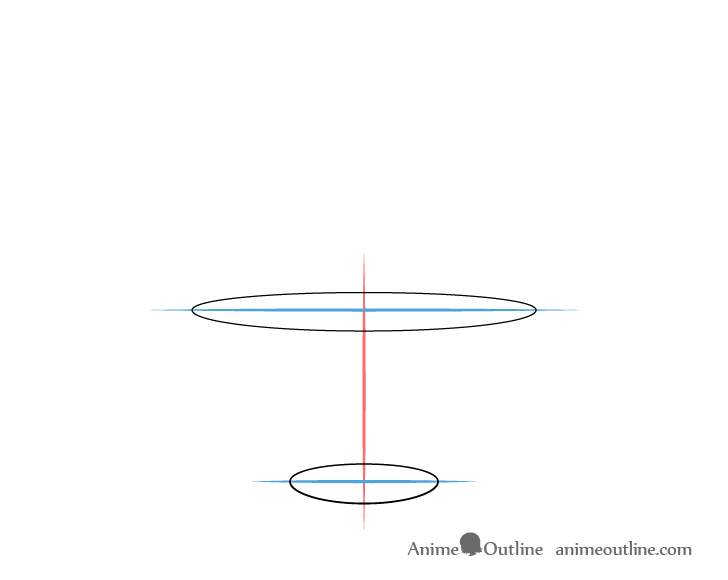
Please note that this step of the tutorial may seem a bit complicated but it is very important to understand if you want to be able to make a proper drawing.
As you begin be sure to position things in a way that leaves enough room at the top of your drawing area for the rice and chopsticks (if you want to add them).
Star the drawing by first making a vertical line. This is to help you see if both sides of the bowl are even in width.
Next draw a pair of horizontal lines, one for the top of the bowl and one for the bottom.
Around each horizontal line (as shown in the example) draw the outline of the top and base of the bowl. In the final drawing the far side of the base (top part of the bottom oval) will not be visible but for this step draw it as though the bowl is see through.
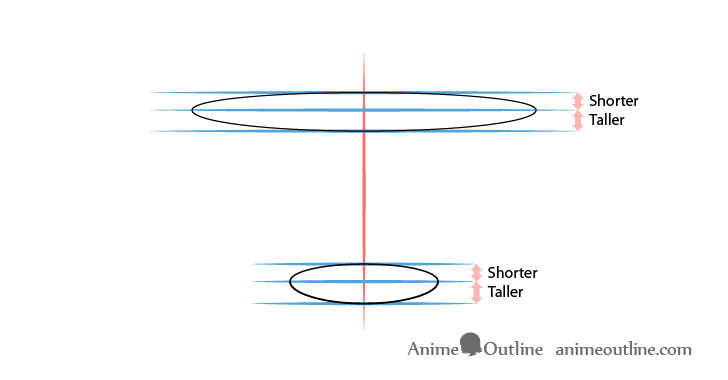
Draw the upper side of each of the ovals slightly narrower than their bottom sides. This is to show perspective (things appearing smaller as they go off into the distance).
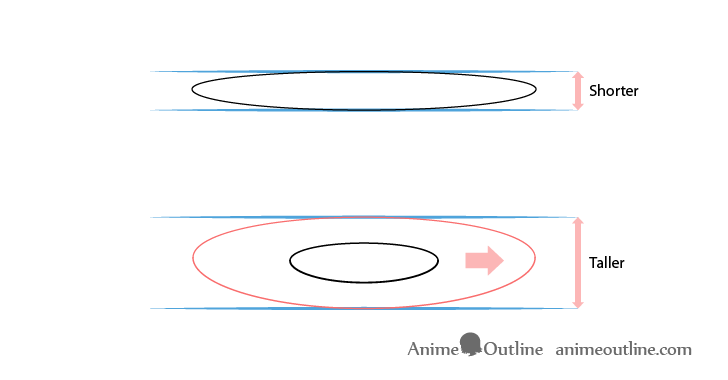
Make the bottom oval taller in relation to it’s width than the top oval. As you can see in the example above if both ovals were the same width the bottom one would be much taller.
The reason for drawing this way is due to eye level. For an example of how this works you can simply hold up a real bowl in front of you and look at it’s upper rim. If you bring it right to the level of your eyes the top will appear to be pretty much a straight line. The more you lower it down the rounder it will appear.
As the bottom of the bowl in the example is lower down than the top it should be drawn rounder.
For more on perspective and eye level see:
Perspective Drawing Tutorial for Beginners and How it Relates to Anime
You can erase the horizontal guide lines after you are done with this step.
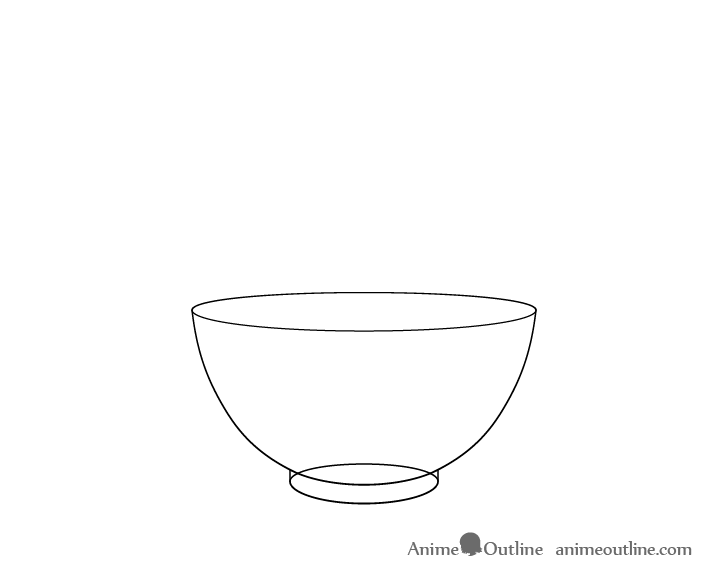
Step 2 – Draw the Shape of the Bowl
Going down form the sides of the upper oval draw the shape of the bowl. In this case it should be somewhat close to a half circle/oval.
Make sure that near the bottom the shape of the bowl pretty much follows the shape of the bottom oval with some distance between the two.
When finished make sure that both halves of the bowl are even. You can erase the vertical line once done.
Step 3 – Finish Drawing the Base of the Bowl
For this simple step just draw a pair of lines going down from the half circle/oval to the bottom oval to create the base of the bowl.
Step 4 – Clean up the Drawing
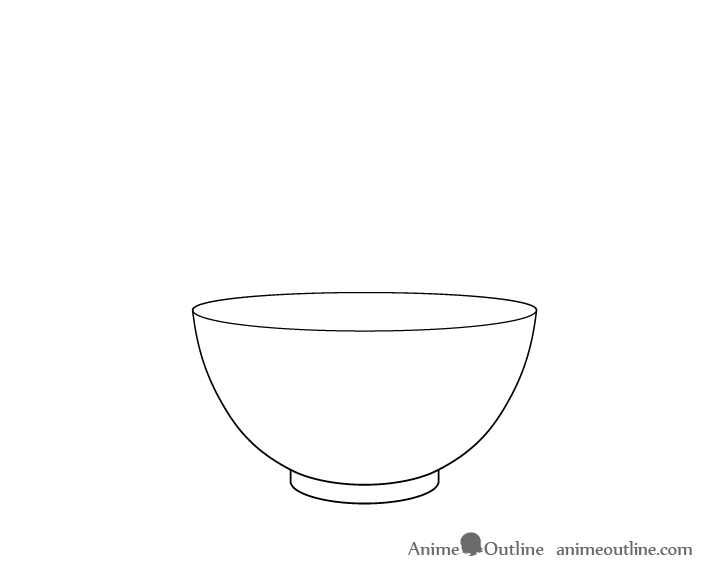
Clean up the drawing erasing the “see through” parts of the base so that you have something similar to the example above. This should be a very basic drawing of the rice bowl.
Step 5 – Add the Rim

To show that the bowl has some thickness first give it a rim at the top by drawing another oval inside the larger one that defines it’s top.
Again due to perspective this rim should be thicker towards the front of the bowl (bottom side of oval) and narrower towards the back (upper side of oval).
Step 6 – Finish the Bowl Drawing

Generally bows don’t have sharp edges as in the previous example. To give it a more smooth locking rim erase the bottom part of the outer oval as well as the upper half of the inner oval so that you have a drawing like the one in the above example. This will create a hint of a smooth rounded rim.
With that you should pretty much have a finished line drawing of the rice bowl.
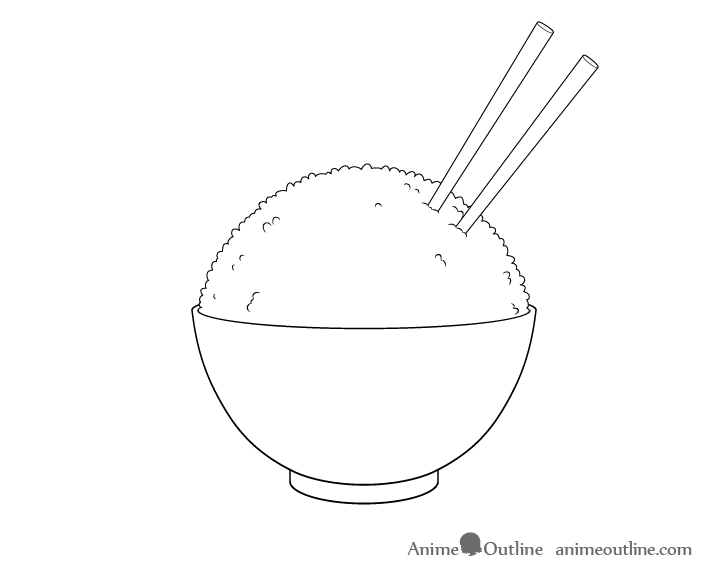
Step 7 – Outline the Shape of the Rice
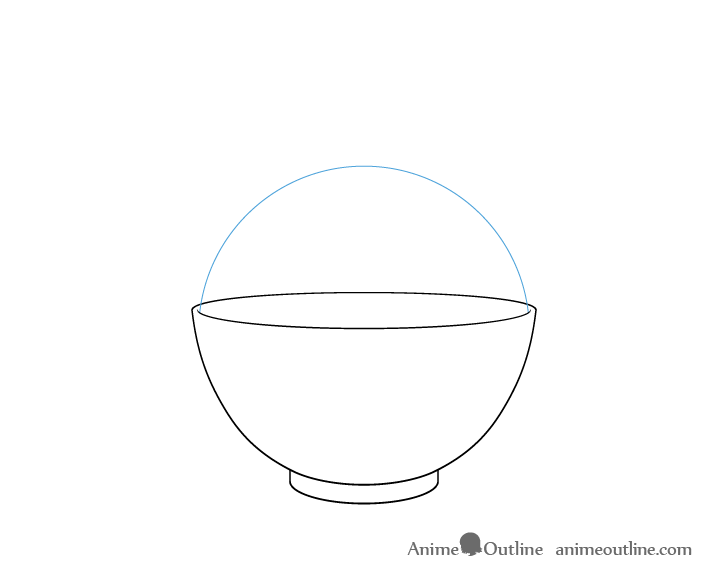
Now begin drawing the rice by first outlining it’s general shape. In this case it will be a rounded heap.
It does not need to be perfectly symmetrical but for a nicer looking drawing try to make sure the rice is not overly skewed to one side.
Again draw this outline right over top of the bowl as though the rice is transparent and try and make it as light as you can so that it’s just barely visible.
Step 8 – Draw the Rice Grains

Going along outline add what should basically be a silhouette of the rice grains.
You can make the grains darker than the line from the previous step so that it pretty much just fades into them.
Step 9 – Add the Chopsticks
Generally in anime and manga the rice would be served with the chopsticks lying next to it. In this case however to make the drawing look a little more interesting they will be sticking out of the rice.
Begin with a simple outline of the chopsticks. Next add some rice grains around their base to give the impression that they are actually stuck into the rice.
Finally instead of sticking directly sideways the chopsticks will be facing a little bit towards the viewer. You can show this by some oval like shapes on their upper ends.
For more on drawing chopsticks see:
How to Draw Hands Holding Chopsticks Step by Step
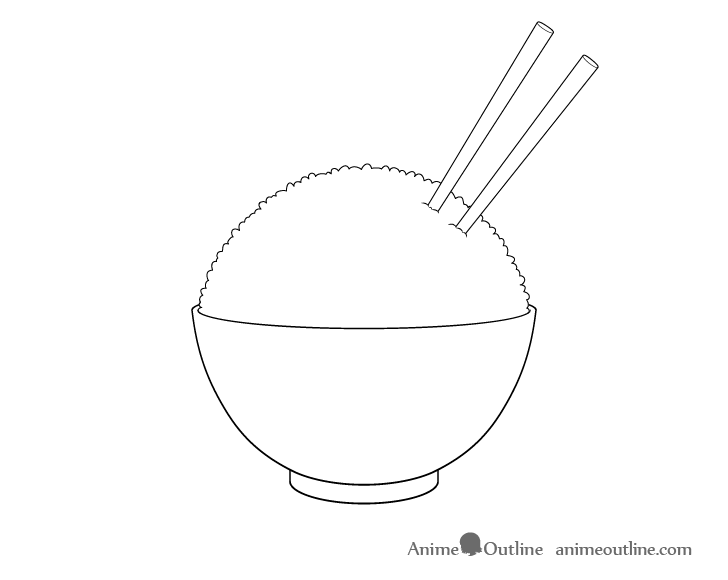
Step 10 – Add More Rice Details
Finally to finish the line drawing of the rice bowl you can add some hints of small rice grain clusters and individual grains along the rice.
Afterwards if you feel that your drawing looks right you can go ahead and darken your lines by tracing over them.
Step 11 – Color the Bowl
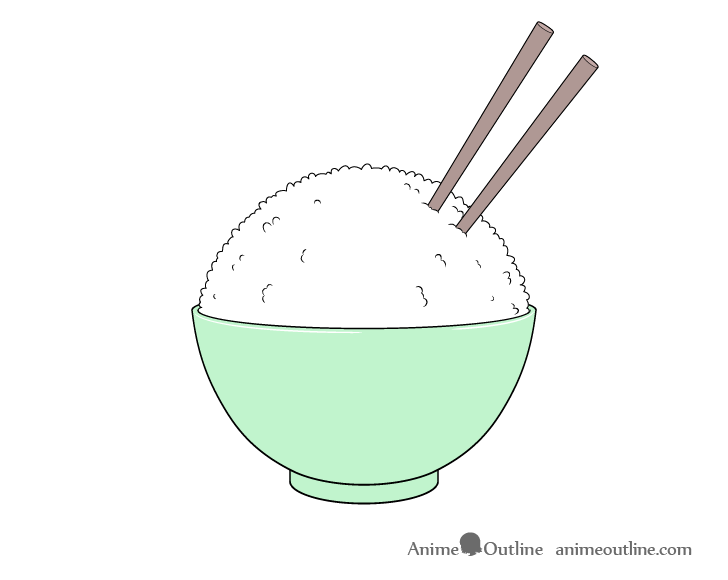
If you wish to color the drawing leave a thin white line (may be a bit hard to see in the example) that’s randomly broken up in a spot or two along the rim of the bowl.
This will create a highlight (light reflecting from it’s surface) that will make it look more like the bowl has a smooth reflective surface.
In this case the bowl will be green but you can obviously make it any color you like.
When coloring the chopsticks make their upper ends (the parts where they’re chopped off) slightly lighter than the rest. In this case the light will be coming directly from above the bowl so those parts will be lighter as they are facing more towards it.
Step 12 – Finish the Rice Bowl Drawing
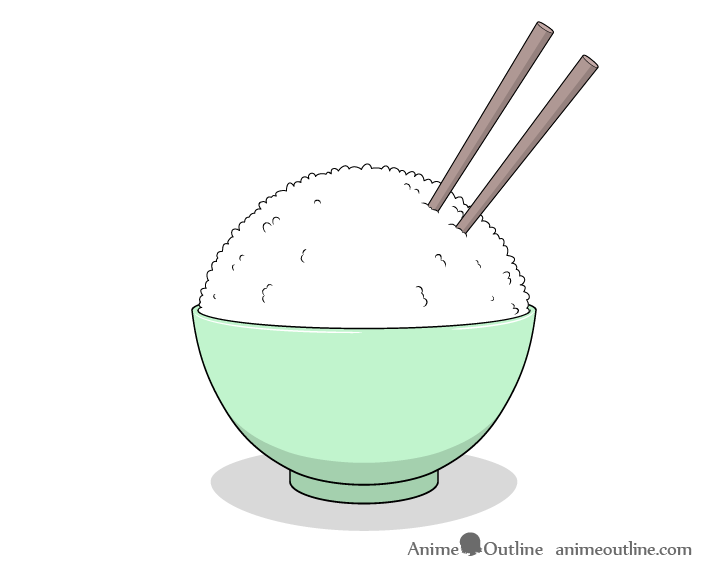
In a more realistic drawing there would be smooth transitions between the shadow and light areas but this example utilizes cel shading (no gradients) which is fairly common in anime and manga.
Though it should also be noted that sometimes in anime and manga close ups of food can be shaded in a more realistic way to make it look more delicious. However this is usually a single shot or panel of a manga. Drawing/shading multiple frames/panels in such a way is often simply too time consuming. For this reason you often see the food drawn/shaded similar to the above example, especially once characters have it in their hands.
As mentioned the light will be coming from above the bowl which means it will cast a shadow directly below itself. The shape of this shadow will reflect the shape of the bowl. It will pretty much be round but as it’s viewed on an angle it will appear oval.
You can also shade the bottom portion of the bow as well as the downwards facing sides of each of the chopsticks.
As long as you add it in the right place even some basic shading as this can make a drawing more interesting and less flat.
Conclusion
While fairly simple this tutorial provides some very important drawing instructions. Properly structuring your drawing early on will help insure that it looks good when finished. If you don’t get that part right then no matter how much effort you put into the details your drawing will look off.
It also shows how you can use some very basic color/shading to make your drawing stand out more without too much effort.
For more food related tutorials see:
- How to Draw Anime Style Food & Lunch Box
- How to Draw Sushi Step by Step
- How to Draw a Slice of Cake Step by Step
- How to Draw a Candy Apple Step by Step
- How to Draw Takoyaki Step by Step
- How to Draw Dumplings (Anime & Manga Style)


")


