
How to Draw a Candy Apple Step by Step
This tutorial shows how to draw a candy apple in eight steps with line drawing, coloring and shading examples as well quick drawing tips.
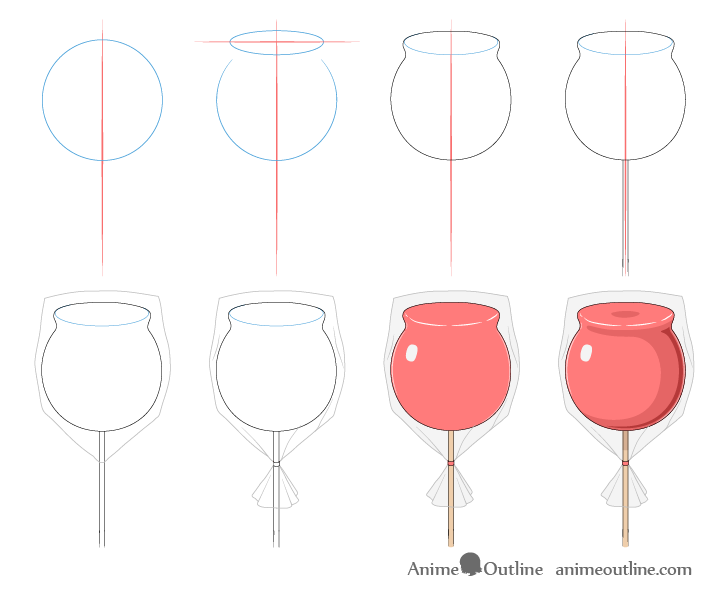
While candy apples are not exclusive to anime and manga they are a very common item in ones that feature a festival. This particular example is drawn in a cel shaded style (no gradients) that is also very characteristic of anime.
If drawing on paper it’s recommended that you start the tutorial in pencil and make light strokes as you will need to erase the construction lines used in some of the steps.
Step 1 – Make a Simple Construction Drawing of the Candy Apple
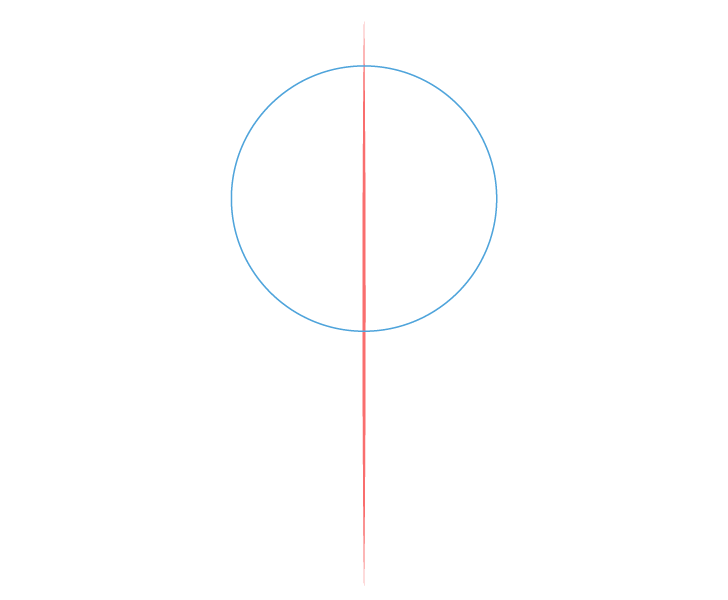
Begin by drawing a horizontal line that will help you insure both halves of the apple are close in width. You can extend the line fairly far down the drawing area so that it also covers the visible length of the stick.
Next draw the outer shape of the apple (as a circle). Position it near the upper part of the vertical line so that you have enough room for the stick.
Step 2 – Outline the Top
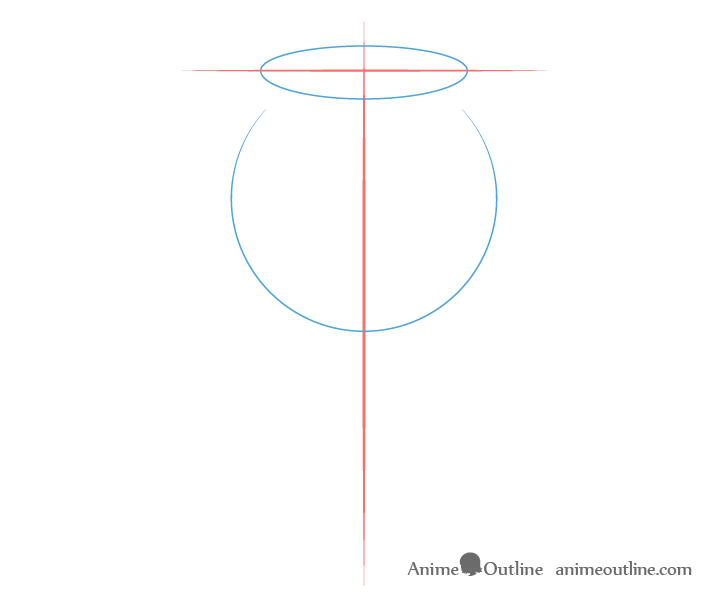
When the apple is dipped into it’s coating and set to dry the caramel (or whatever is used) will usually create a flat round area at it’s bottom.
When the apple is flipped upside down this flat part will then be at the top as in this example.
You can add another part to the construction drawing to help you properly show this area.
First draw a horizontal line so set the middle of this surface and then draw an oval around it (the circled viewed on an angle). To show perspective draw the bottom part of the oval slightly taller than the top. While in this particular tutorial this is a very hard to notice detail it’s still something to be aware of.
For more on perspective drawing see:
Perspective Drawing Tutorial for Beginners and How it Relates to Anime
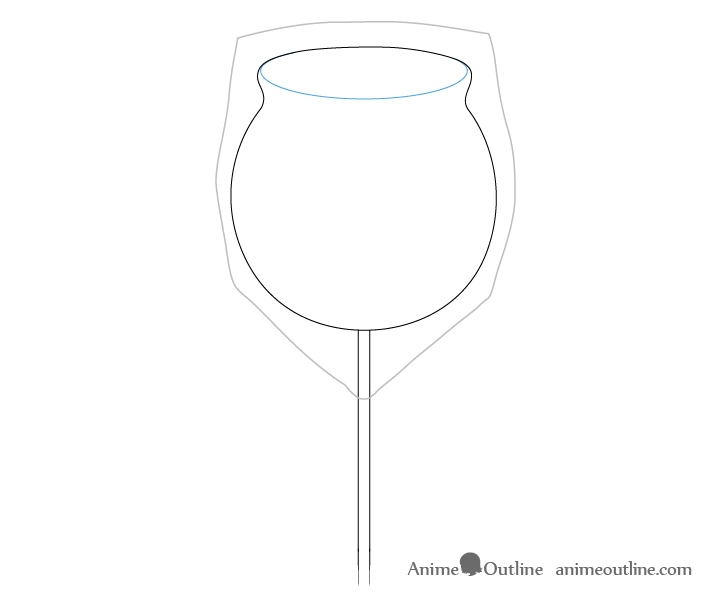
Step 3 – Draw the Apple

Now draw the actual outline of the apple based on the construction drawing created in the two previous steps. You can erase any extra lines afterwards but for now leave the horizontal center line as well as the oval (shown in blue).
Step 4 – Draw the Stick
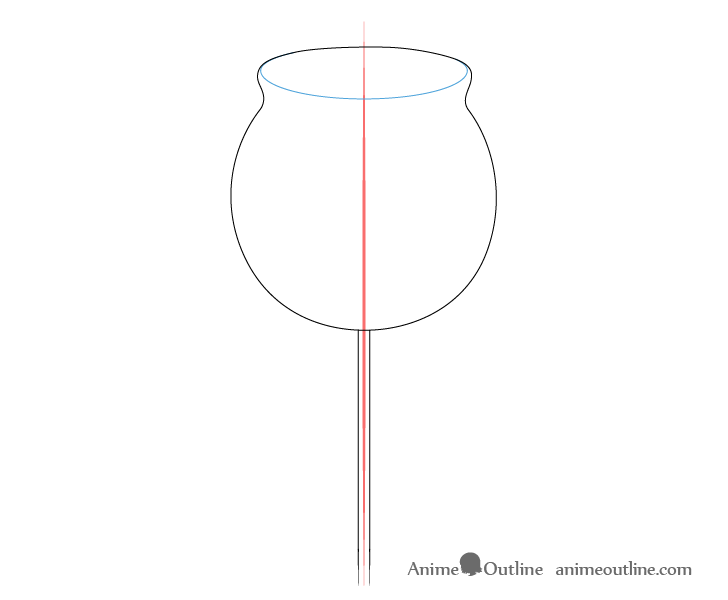
Going down from the apple add the stick that candy apples usually sit on. You can once again use the vertical line drawn in the previous step as a guide.
In this case the stick will only be partially drawn but you can see an example with it’s full length at the end of the tutorial.
Step 5 – Draw the Upper Part of the Wrapper
Candy apples usually tend to have a clear plastic wrap around them. The shape of these wraps can vary but you can draw something similar to the example above.
Be sure to make the wrap slightly uneven to show that it has some bends and folds. Also make it narrow near the bottom as that’s where it will be tied.
Step 6 – Draw the Lower Part of the Wrapper & Folds
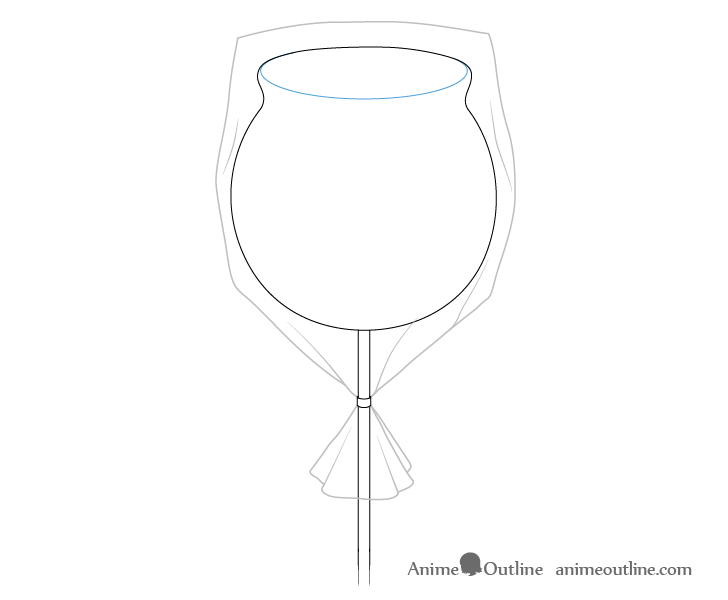
Below the wrapper add the little bit where it’s tired to the stick and then add the little bit that stick out at the bottom. Draw this with several folds as shown in the example.
Afterwards also draw a few folds into the upper part of the wrapper.
Once done you can trace over your lines with a darker pencil stroke or a thin black marker. However, keep the outline of the wrapper lighter (as shown in the example). This will make it appear lighter and more like an actual transparent piece of plastic.
Step 7 – Add Color
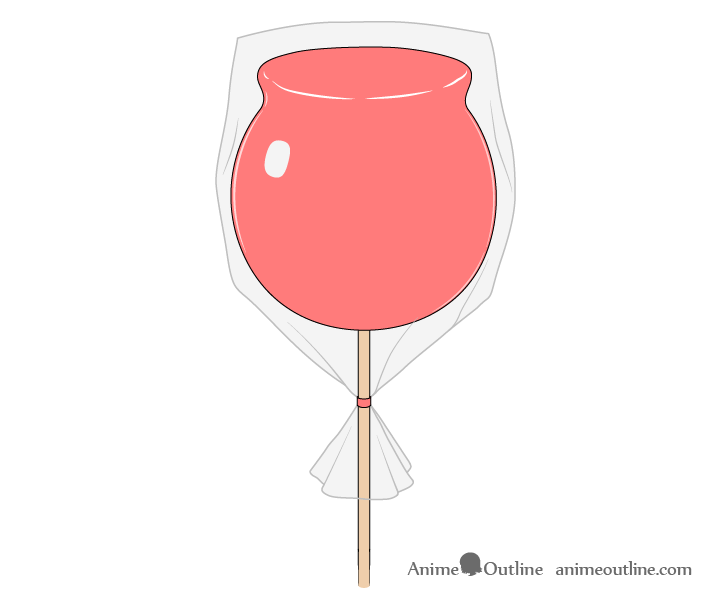
You can color the apple and the little tie on the wrapper red, the stick a light brown and the wrapper a very light grey.
When coloring the apple you will want to leave some highlight areas running along both of it’s sides as well as the edge of it’s to surface (running along the outline of the oval from previous steps). Also leave an area for a larger highlight towards the upper part of one of the sides.
Again if drawing on paper you can first outline the highlights with red pencil to make sure you don’t accidentally color over them. If drawing digitally you can add the highlights over top of the color.
You can leave most of the highlights pure white but lightly shade the ones on the side opposite the main highlight red (highlights on the right side of the drawing). The explanation for this is that most of the highlights will be created by the main source of light while the others will be created by the light reflecting form other objects and therefore wont be as bright.
Adding a lot of highlights will help give the apple a smooth and reflective look.
Step 8 – Add Shading & Finish the Candy Apple Drawing
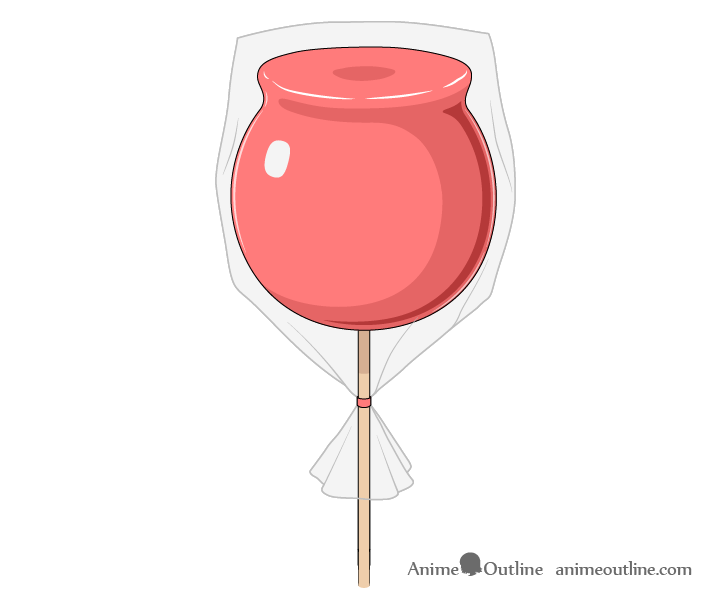
To finish the drawing add some very basic shading to the candy apple. In this case the light will be coming from it’s upper left so the shadows will tend to form along the bottom right.
You can also add a small dark area in the middle of the flat area at the top. As apples curve inwards at their bottoms this will show through the transparent coating and create a bit of a dark patch in it.
Next add a shadow a little bit below the flat upper part of the apple as that will create a bit of a ledge that will cast a shadow below it. This should transition into a large shadow on it’s side that curves around the bottom. Afterwards add a thin patch of an even darker shading into the large side shadow, however, leave some room between that and the side of the apple. Also again be sure not to go over the highlights when shading.
Finish by also darkening the upper part of the stick that will have a shadow cast on it by the apple.
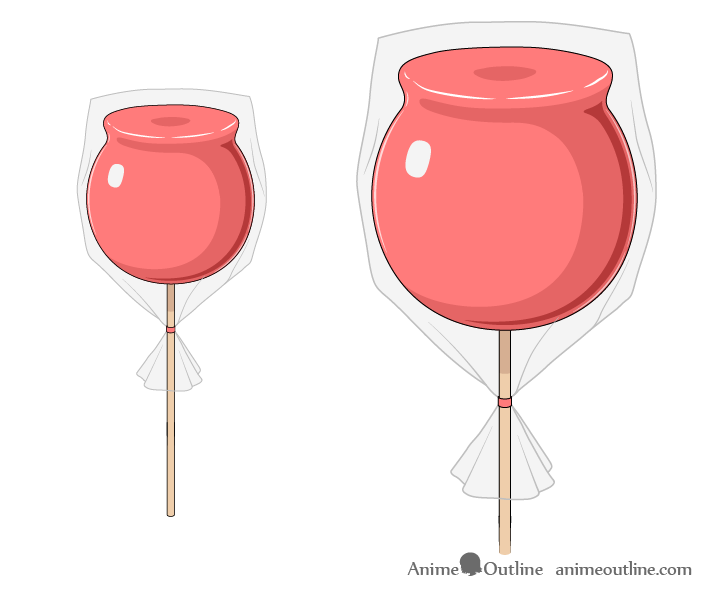
Above you can also see an example of the apple with the full length of the stick just in case you want that for reference.
Conclusion
Candy apples are a very common item in anime and manga featuring a festival and festivals in turn are very common to anime, especially so in the “Slice of Life” genre.
This tutorial shows a fairly simple way to draw one while at the same time following good drawing practices and maintaining a style that is appropriate for anime and manga.
For more tutorials on drawing food in this style also see:
- How to Draw Takoyaki Step by Step
- How to Draw Anime Style Food & Lunch Box
- How to Draw a Rice Bowl Step by Step
- How to Draw a Slice of Cake Step by Step
- How to Draw Sushi Step by Step
- How to Draw Dumplings (Anime & Manga Style)
")


