
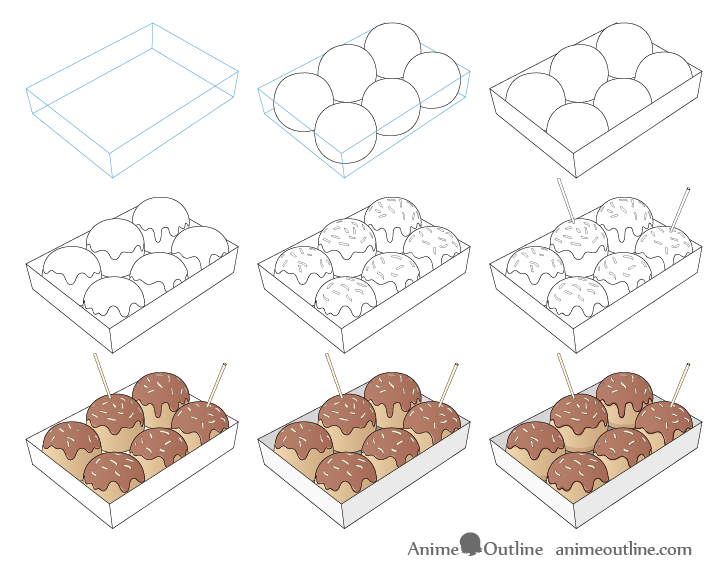
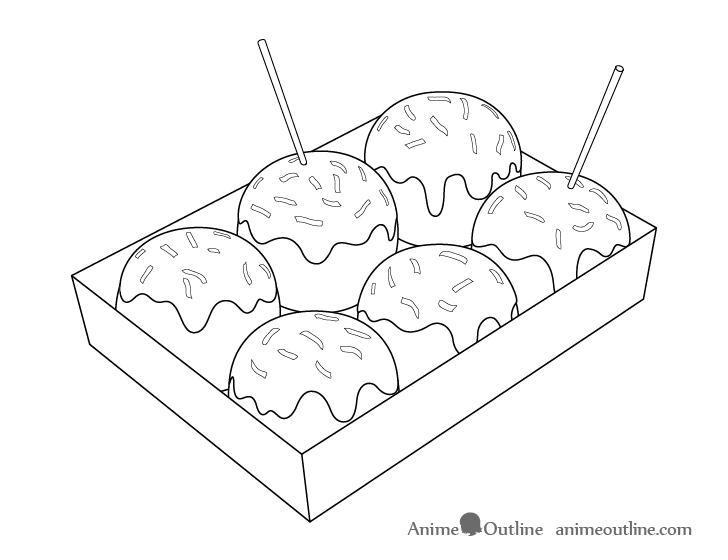
How to Draw Takoyaki Step by Step
This tutorial shows how to draw Takoyaki in nine steps. The examples focus on drawing in a way that can be appropriate for anime and manga but can also apply to other styles.
Takoyaki is a food that is fairly common in anime. It can be found in many scenes ranging from events and festivals to characters simply grabbing a quick bite to eat. Generally they are fried balls filled with octopus, covered with a mixed sauce and topped with bonito flakes but they can also have other fillings and toppings.
While drawing Takoyaki may seem easy at first it’s actually not as simple as it may at first look. However don’t let that discourage you as this tutorial provides a very detailed visual breakdown along with an explanation of the drawing process to help.
Unless drawing digitally you should start the tutorial in pencil and make light lines as you will need to erase parts of the drawing in some of the steps.
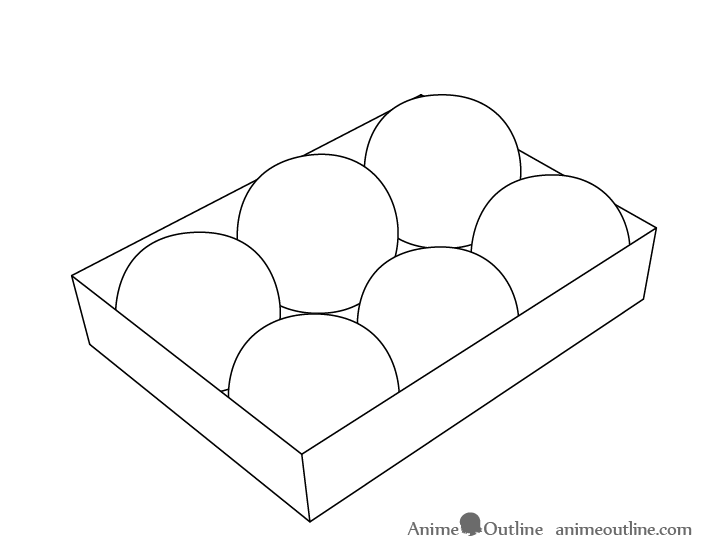
Step 1 – Draw the Takoyaki Container
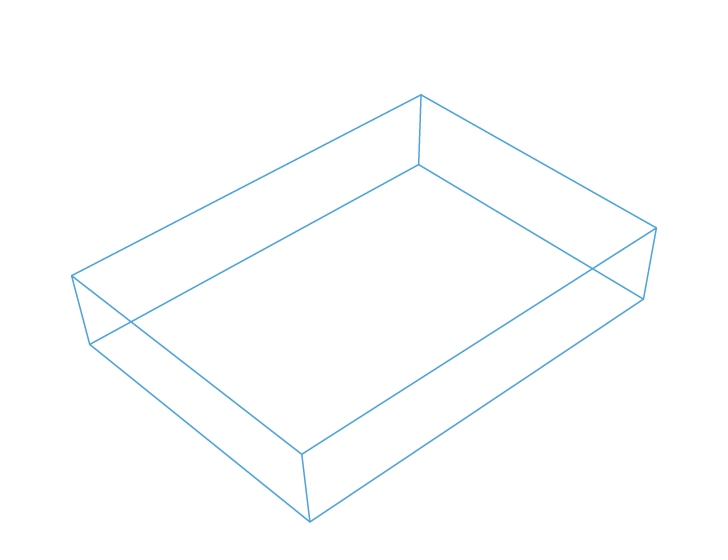
Begin by drawing the container the Takoyaki will go into. In this case it will be a small cardboard one shaped in a way where it’s sides go outwards towards the top (sort of like an upside down pyramid).
The drawing will be made in 3/4 view and in two point perspective. As perspective is objects getting smaller as they go off into the distance this means that the container will be drawn narrower as it goes towards the sides that are farther from the viewer.
For a detailed explanation of perspective drawing you can see:
Perspective Drawing Tutorial for Beginners and How it Relates to Anime
At this stage also draw the container as though its’ transparent so that all of it’s sides are visible.
Step 2 – Outline the Takoyaki Balls
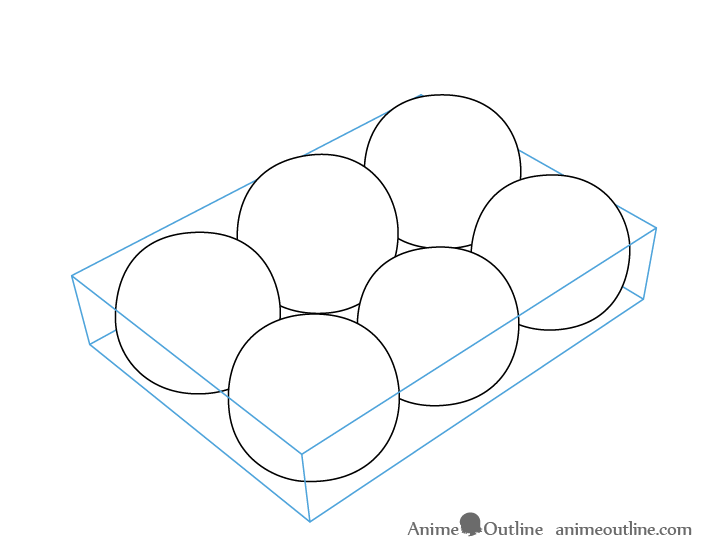
There will be six Takoyaki balls in total. Draw them to be slightly uneven in shape (not perfect circles) so that they look more natural.
Also try to size and position them so that they fit nicely into the container. If you don’t get things right the first time simply erase that part of the drawing and try again.
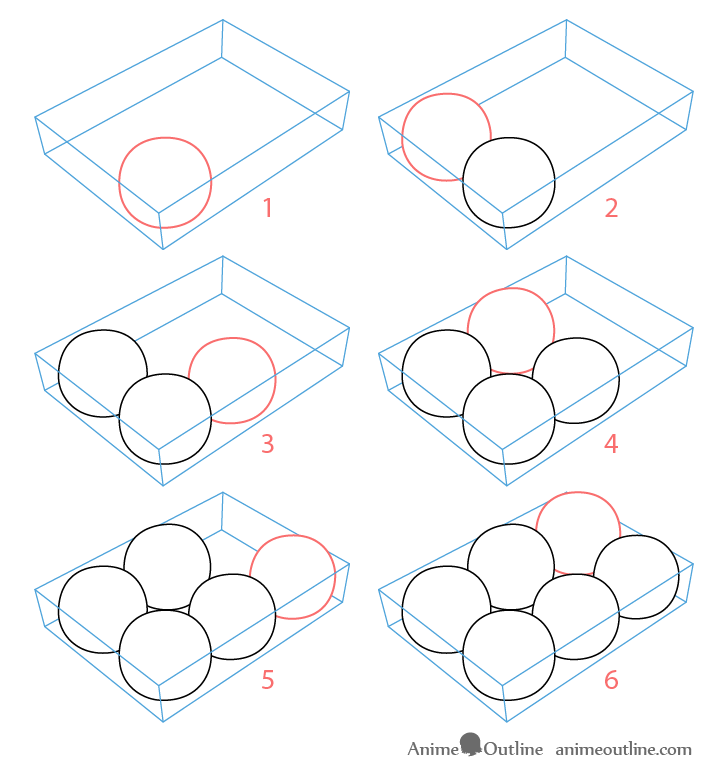
You can see a step by step breakdown of the placement in the example above.
Step 3 – Clean up the Drawing
After you finish drawing the Takoyaki balls erase the parts of them that are hidden/covered by the sides of the container. You should have clean line drawing similar to the above example once done.
Step 4 – Draw the Sauce
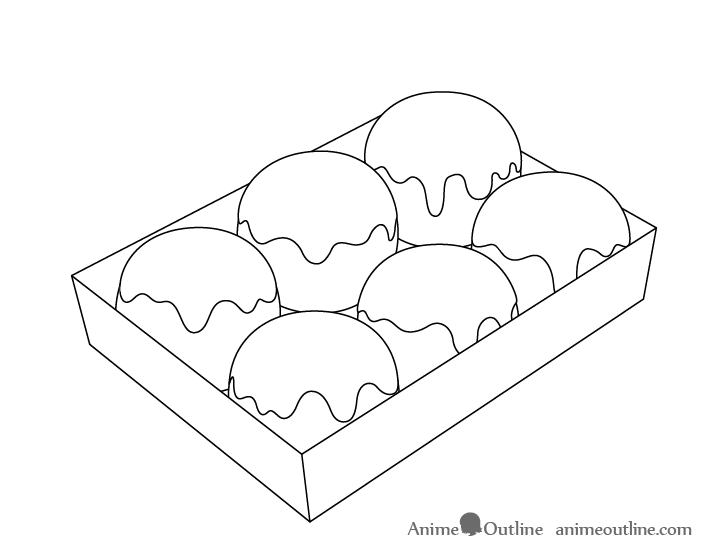
Covering the tops of the Takoyaki balls and running down the sides add the sauce (as shown in the example).
Keep in mind that the sauce has some volume to it. So in addition to outlining the parts that are running down the sides you will want to give it some “padding” on top (shown in the above illustration). Afterwards erase the part of each ball’s outline that is covered by the sauce.
Step 5 – Draw the Flakes
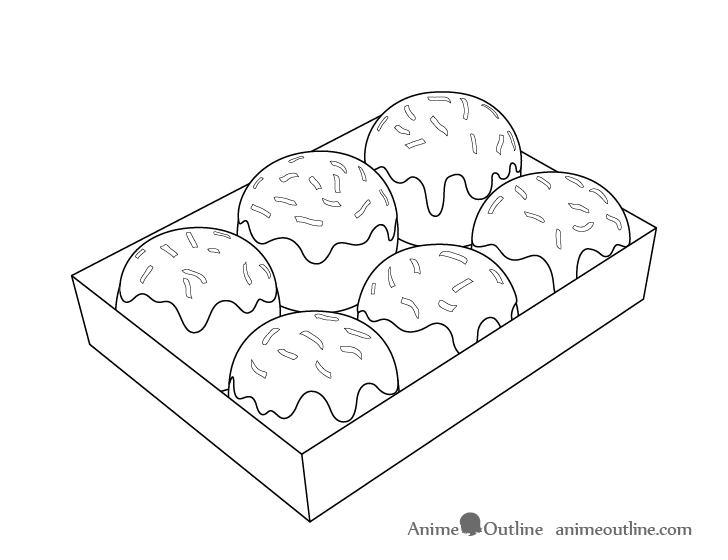
Sprinkled on top of the Takoyaki add the flakes. When drawing these it may be helpful to think of them as little paper rectangles that have been bent and twisted out of shape.
Try and spread them out somewhat randomly across Takoyaki but with a similar amount on each one so that the drawing looks nice and balanced.
Step 6 – Add the Sticks & Finish the Line Drawing
Finally add some small sticks stuck into a couple of the balls to eat them with (similar to toothpicks).
Afterwards check that the drawing looks good and trace over your lines to darken them.
Step 7 – Color Takoyaki
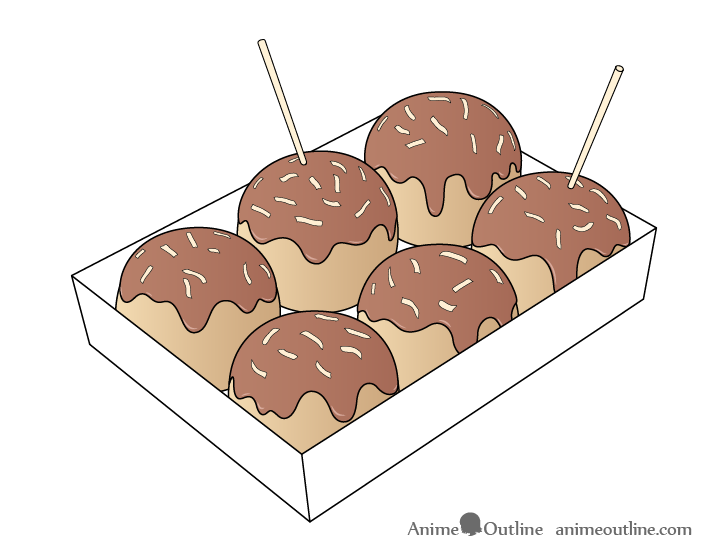
To color the Takoyaki make the sauce a dark brown with the balls a mix of orange, yellow and brown.
Color them in such a way as to create a gradient where the sauce/balls are lighter on the left and darker on the right. You can also color the little sticks a light yellow/brown to show that they are wooden.
When coloring the sauce leave some tiny highlights close to it’s bottom edges.
You can see the areas you will want to place the highlights in the close up example above shown in red.
At first you can leave the highlights white and color around them, then very lightly go over them with brown so that they are not too bright.
If coloring digitally add the highlights at the very end after adding the shadows.
Step 8 – Add Shading to the Container
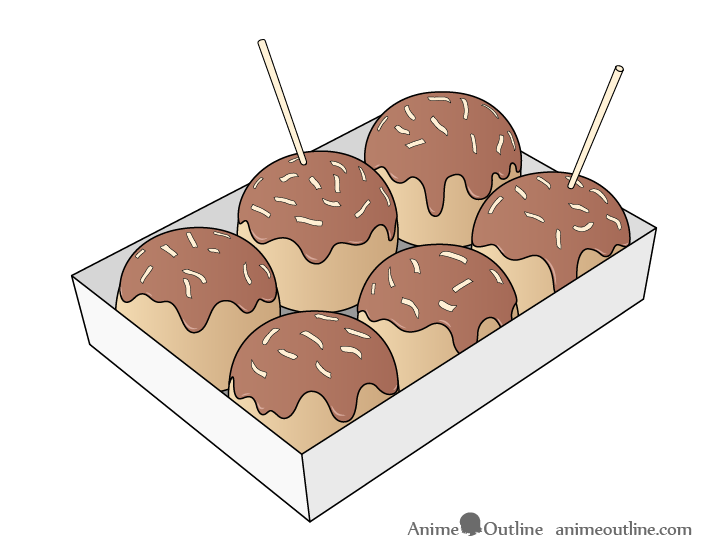
The container will be white so you can shade it with greys.
In this case the shading will be done as though the light is coming from around the upper front area of the drawing (also slightly to the left).
This means that the front of the container on the left will be the lightest and the right side will be darker. The inner sides of the container will be even darker as they will also have the Takoyaki blocking some of the light. The bottom will be the darkest as again the Takoyaki will generally block the light from reaching there.
Please keep in mind that as this is a somewhat stylized/simplified drawing you don’t need to be perfectly precise with the way you place the shadows. You just need to give a rough overall idea of them so that the drawing looks more three dimensional.
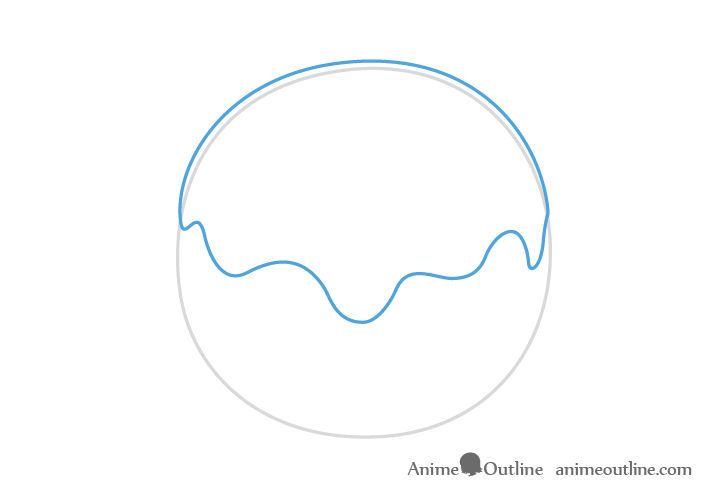
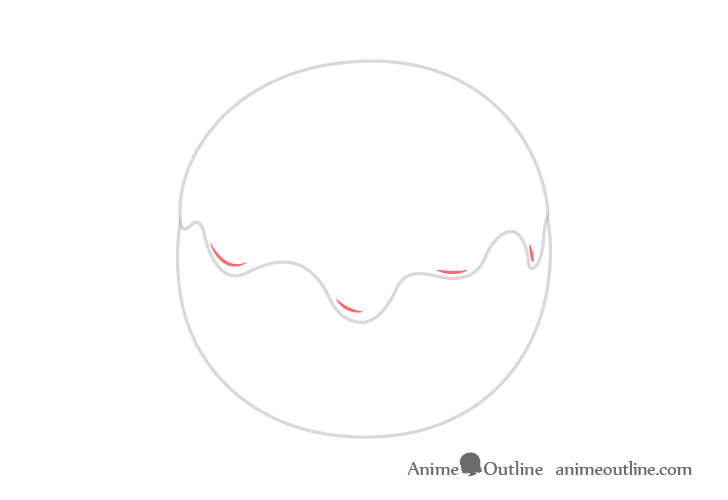
Step 9 – Add Shading to the Takoyaki

Finally you can also add some shadows to the Takoyaki (in addition to the gradient done earlier). Create thin strips of shading running along the bottom of the sauce as well as some shading along the bottom of the Takoyaki balls. You can also even add some very tiny shadows to some of the flakes depending on how large you draw them.
You can see a larger drawing of one of the Takoyaki balls above to make it easier for you to see the shadows.
Conclusion
Takoyaki is a fairly common food in both anime and manga which at first may seem like it’s relatively simple to draw. However, a details drawing like the one in this example can actually be quite time consuming. Don’t let this discourage you though. If you look at actual anime you may notice that a lot of the nice and close up drawings of food are often just shown once from a single angle. After the characters start eating it the art tends to become much simpler in comparison. The reason for this is that drawing tasty looking food even in the simplified anime style can still be quite difficult and time consuming even for professionals. So don’t worry if it takes you a while to finish this tutorial.
For more tutorials on drawing food commonly seen in anime and manga also try:
- How to Draw Anime Style Food & Lunch Box
- How to Draw Sushi Step by Step
- How to Draw a Candy Apple Step by Step
- How to Draw a Slice of Cake Step by Step
- How to Draw a Rice Bowl Step by Step
- How to Draw Dumplings (Anime & Manga Style)

")


