How to Draw a Slice of Cake Step by Step
This twelve step tutorial shows an easy way to draw a slice of strawberry shortcake in a simplified anime/manga style.

Same as several other tutorials here on AnimeOutline drawing a cake slice is not directly related to anime. The Japanese short cake is however fairly common in scenes where the characters go to a cafe or have some sweets. Drawing a slice of it is not particularly complicated but the examples and drawing tips in this tutorial can make it even easier.
Start the drawing in pencil and make light liens that you can easily erase. You can darken them later on right before adding color.
Step 1 – Draw the Outline of the Cake Slice
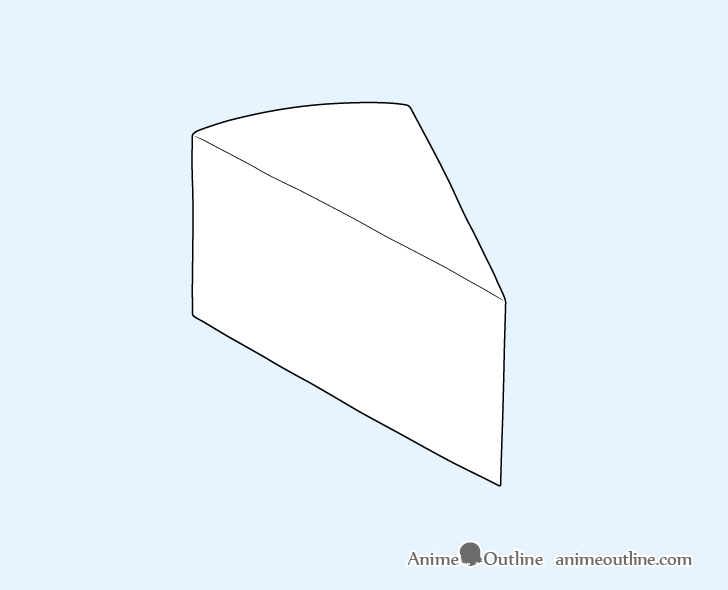
In this case the slice will be drawn in 3/4 view somewhat below the level of the viewers eyes (meaning you will be able to see the top of the slice). This is a good setup as it presents the cake in a position you are likely to see it (such as sitting on a table in front of you).
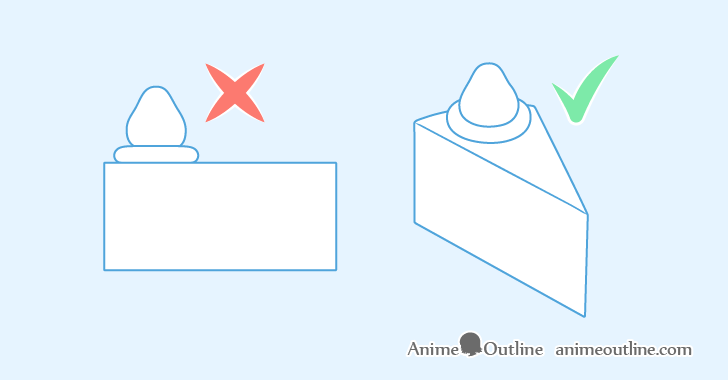
If for example you were to draw the cake directly from one side without showing the top of the slice this could look somewhat unnatural. For such a view to occur the person having it would need to hold the cake at the level of their eyes looking directly at one of it’s sides.
For more more about “eye level” see:
Perspective Drawing Tutorial for Beginners and How it Relates to Anime
For the actual drawing process begin by outlining the main shape of the slice (without any of the decorations) as shown in the example above. You can deliberately make your lines slightly wobbly to make them look more natural as usually the cake slice wont be perfect in shape.
Step 2 – Add Some Frosting
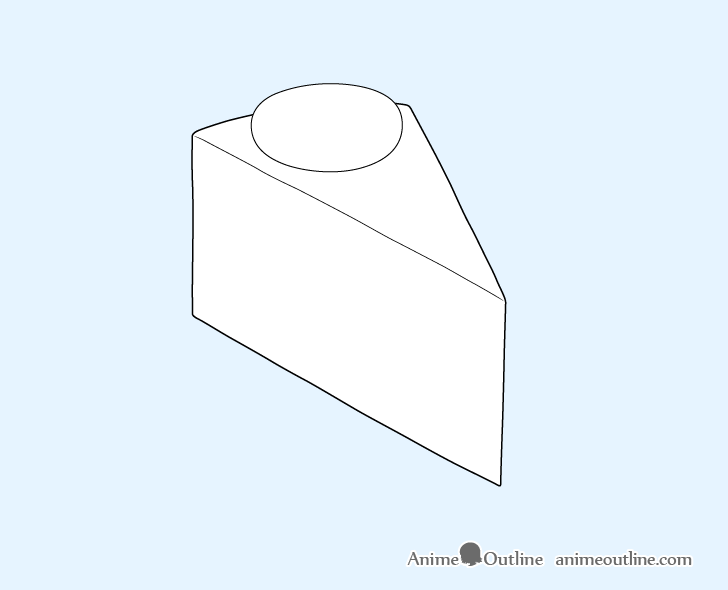
On top of the slice add a “blob” of frosting that the strawberry will sit on. Viewed at this angle it’s shape should appear somewhat like an oval. Draw it accordingly and position it towards the back of the slice.
When done erase the part of slice outline that’s overlapped by the frosting.
Step 3 – Draw the Outline of the Strawberry
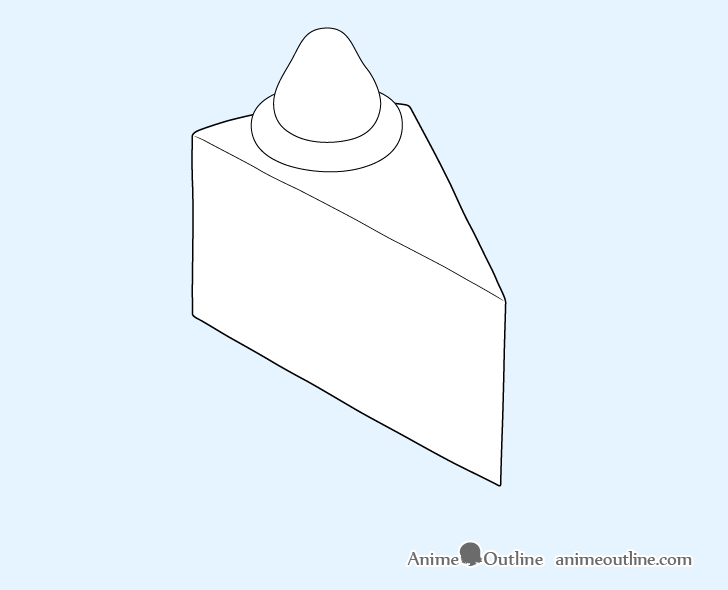
On top of the cream add the strawberry as shown in the example (with it’s bottom pointing upwards).
Draw it right over the top of the cream “blob” and erase the part of the cream outline where the two shapes overlap.
Step 4 – Draw an Outline of the Plate
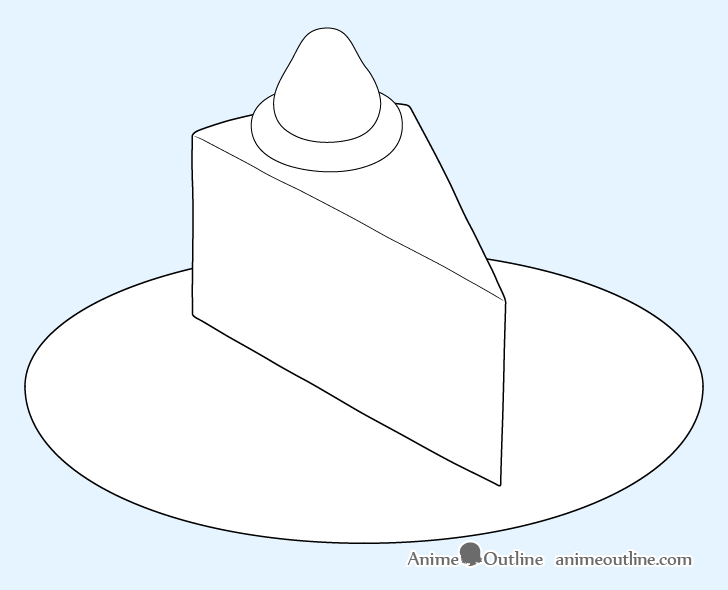
Finally add the outline of the plate the cake will be sitting on. At the angle the plate is drawn on it will appear as an oval.
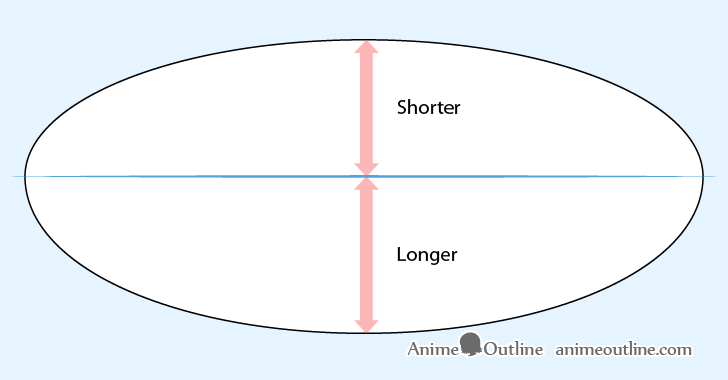
The top of this oval should be slightly flattened compared to the bottom. This means that if you divide the plate in half horizontally the top part should be narrower than the bottom.
The reason for drawing this way is to show perspective which makes objects seem smaller as they go off into the distance. As the upper part of the plate is farther away from the viewer it will appear smaller.
You can again see the perspective tutorial linked earlier for more on this.
Step 5 – Draw the Details of the Plate
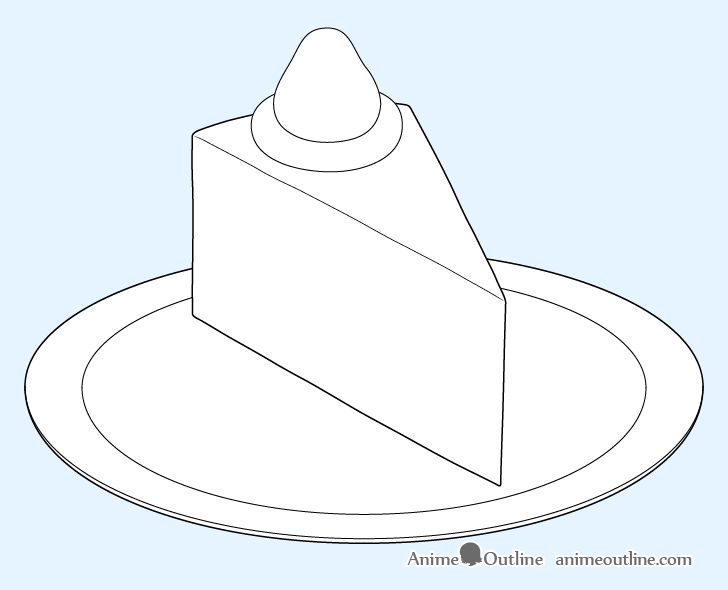
Add the inner rim of the plate and give it a bit of an edge so that the plate looks like it actually has some thickness to it instead of just being paper thin.
Step 6 – Draw the Layers
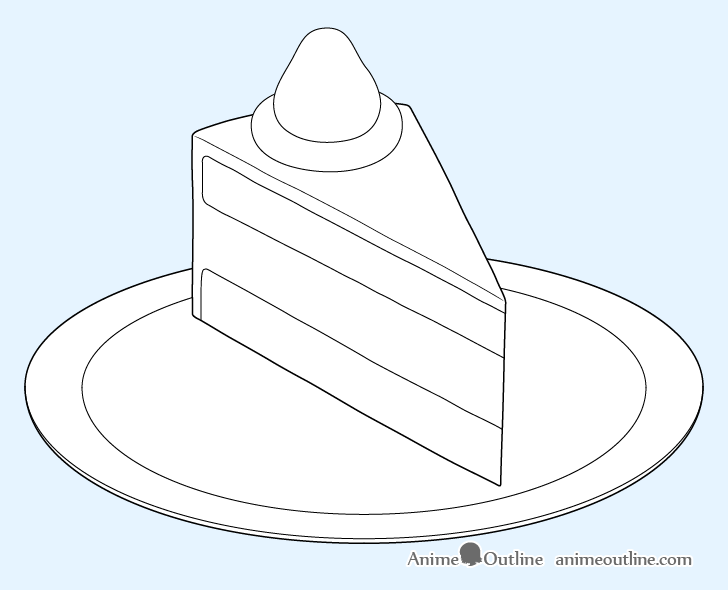
On the side of the slice outline the layers. In this case it will really just be the two portions of the cake. The area surrounding them will be the frosting.
Step 7 – Draw the Strawberry Slices
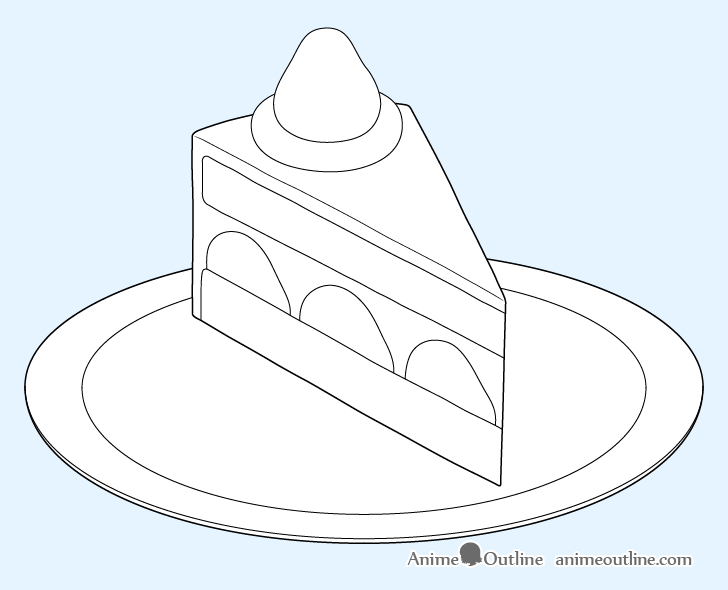
In the middle portion of the frosting draw some strawberry slices. Each one should have the shape of a strawberry that’s been sliced in half.
Step 8 – Draw the Insides of the Strawberry Slices

Inside each strawberry slice draw a smaller shape similar to the outline but with jagged edges. Also project a few wobbly lines of different length going out from each of these center parts.
Step 9 – Draw the Layer Details
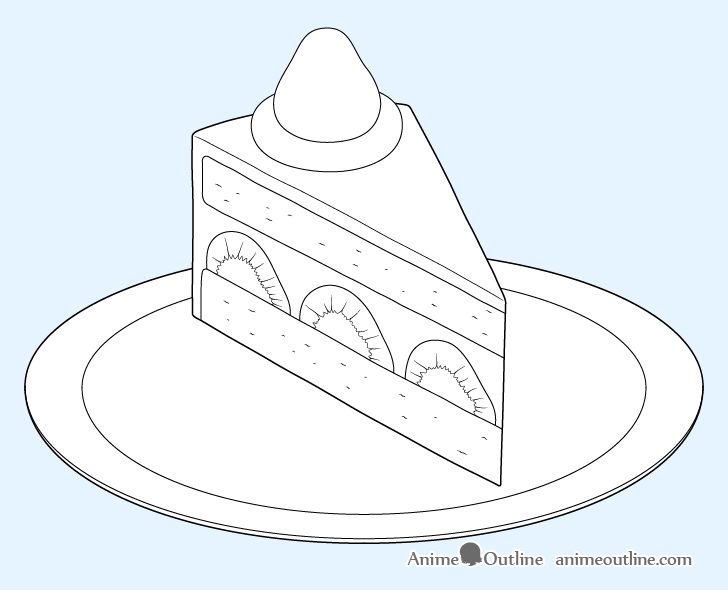
Draw some hints of pores along the two portions of the cake. Try and make these somewhat random in shape, size and placement.
Step 10 – Finish the Line Drawing
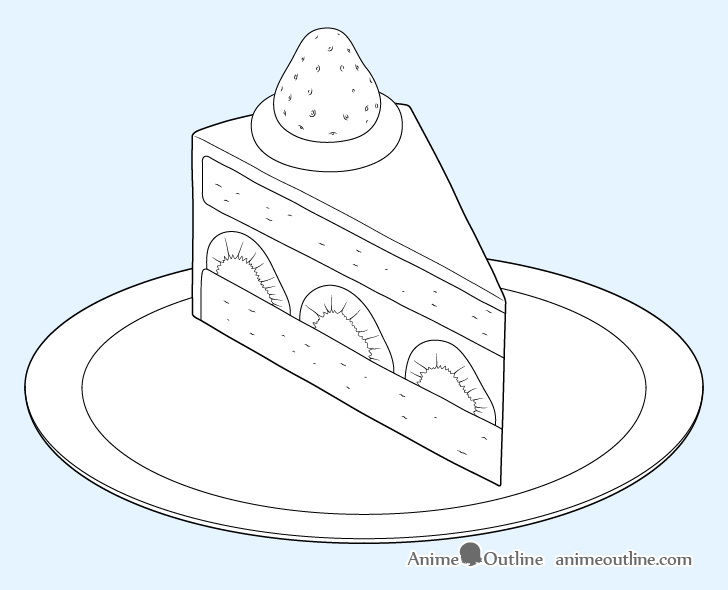
Finish the line drawing by adding seeds along the strawberry. You can also draw some curves around the seeds to help show that they are sort of indented in the berry.
One done with this make sure that your drawing looks right and trace over it with darker outlines.
Step 11 – Add Color
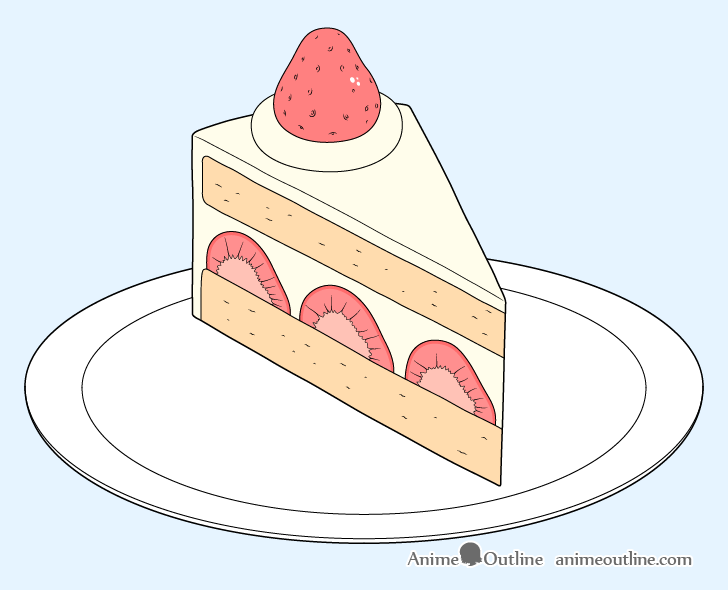
To color the cake you can make the dough areas yellow (with a bit of orange/brown mixed into it). Make the strawberry on top red and the strawberry slices pink with a red outline near their edges. You can make the middles of the slices a lighter pink. When shading the top strawberry also leave a small cluster of white dots to create a highlight. Strawberries tend to have a shiny surface that reflects light and the highlight will help to give a hint of that. The reason you want a few smaller dots instead of just one big one is to also show that the berry has a bit of an uneven surface which breaks up the light.
You can color the frosting a very light yellow and keep the plate white.
Step 12 – Add Shading & Finish the Strawberry Shortcake Slice Drawing
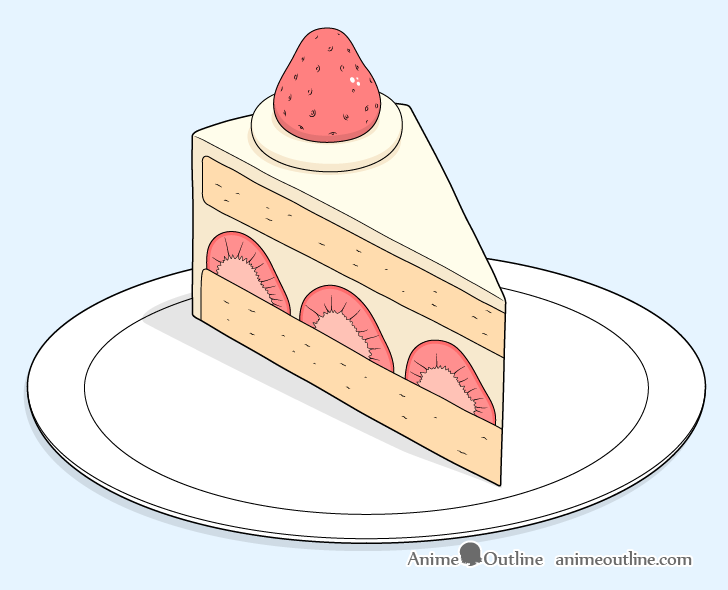
To finish the drawing add some very basic shading.
In this case the light will be coming from above the slice slightly behind it and to the right of the drawing.
This means the slice will cast a short shadow on the plate (to the left of the drawing area and slightly towards the viewer). You can shade this areas a light grey. It also means that the side of the slice facing towards the viewer will be “in shadow”. To show this shade frosting along it a slightly darker yellow as compared to the frosting along the top.
You can also add some shading below the cream surrounding the top strawberry as well as along the bottom of the strawberry itself and the area right below it.
Finally also add a bit of a shadow below to the plate (slightly more to the left side of the drawing).
Once done with the shading you should have a finished drawing of a strawberry shortcake slice.
Conclusion
As mentioned at the start of the tutorial a cake slice is not directly related to anime. However cakes, and strawberry shortcakes in particular are fairly common in anime and manga scenes involving cafes, bakeries, and sweets in general. You can of course also use pretty much the same steps and style to draw other types of cake.
For drawing other kinds of food often seen in anime have a look at:
- How to Draw Anime Style Food & Lunch Box
- How to Draw Sushi Step by Step
- How to Draw a Rice Bowl Step by Step
- How to Draw a Candy Apple Step by Step
- How to Draw Takoyaki Step by Step
- How to Draw Dumplings (Anime & Manga Style)
")